Categories
Release of ASP.NET Core
This article describes how you can publish an ASP.NET Core application.
To run ASP.NET Core, you first need a Core package from us; this is not possible with our standard packages such as the complete package.
An upgrade can be requested in the ticket system. First, a few things need to be checked and configured in the Control Panel.
Step 1.
Log in to the control panel.Step 2.
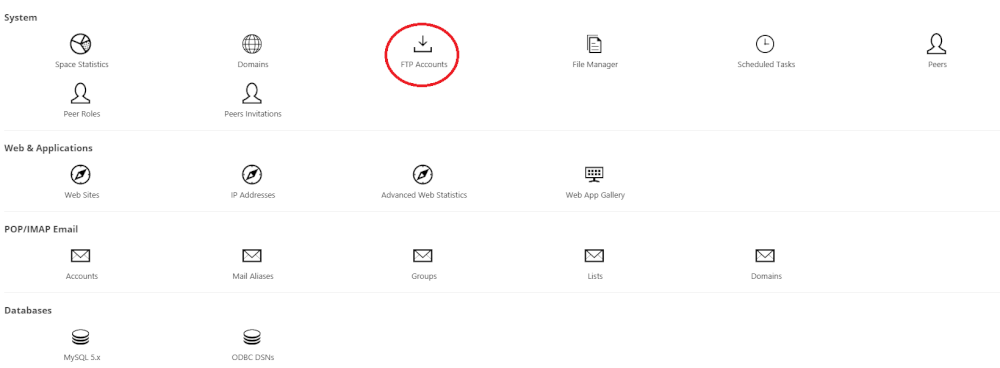
Go to FTP accountsStep3. select Create FTP account.
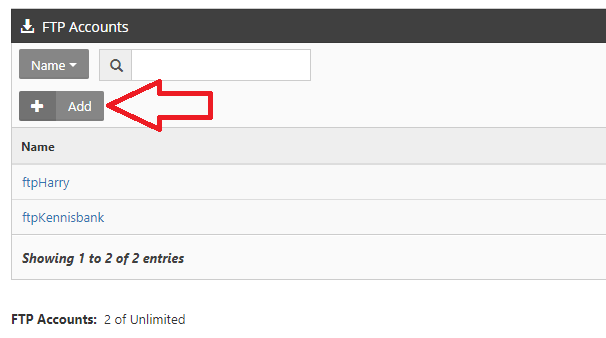
The steps for creating the FTP account can also be carried out in the customer panel. Step 4.
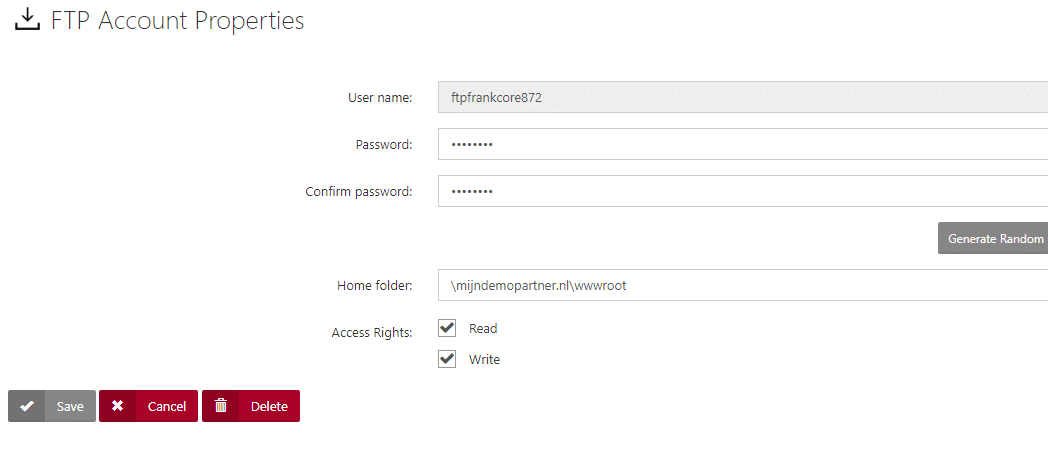
FTP account When creating the FTP account, you can further customize the settings so that the FTP account goes directly to the wwwroot of the domain name. See the example in the screenshot.
Step 5.
ASP version and dedicated pool Now select the Extensions tab in the Control Panel under Websites and check that the ASP.NET version is set to No managed code.
This is also automatically ASP.NET Core. Then save the changes again.
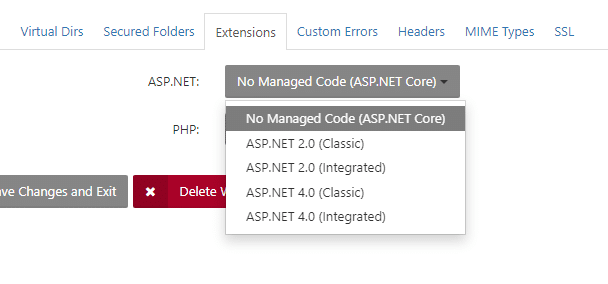
In addition to setting the correct .NET version, it is also necessary to activate the dedicated application pool, you can do this under Websites in the Control Panel. And set a checkmark in the following checkbox, also the write permissions should be switched on in the first phase.

These were the steps to be carried out in the Control Panel. The following steps are still local for you in Visual Studio.Step 6.
Starta project inVisualStudio and select a .NET Core application. 
Step 8. 
Select Web ApplicationStep9.
Go to the wizard to publishthe application .Step 10.
SelectCustom on the screen and click Next.Step 11.
Enter the FTP data. Publishing mode -> FTP Passive mode should be set to Target URL enter the domain name. If you still receive an error message because of the connection to "ftp.", you can prefix this with the following:
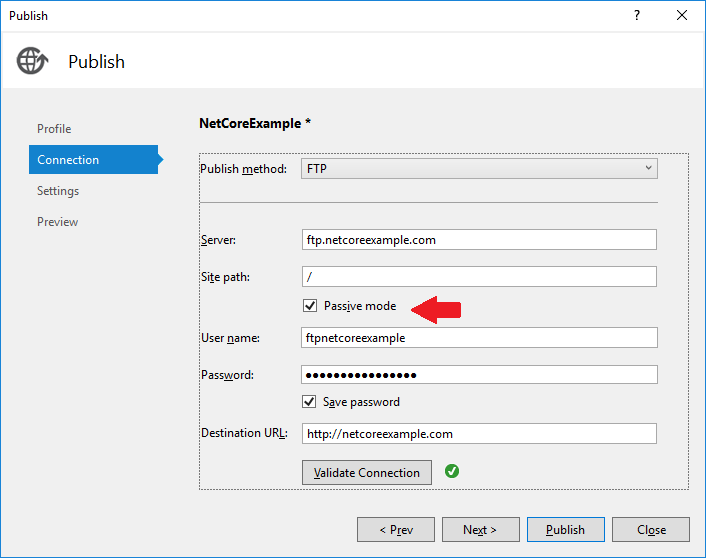
Then press Publish again.step 12 Complete the settings.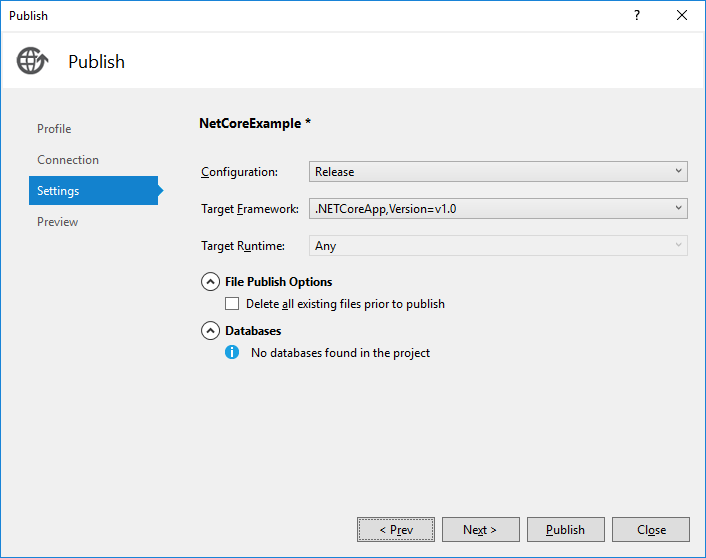
See below for the last update, August 2022.
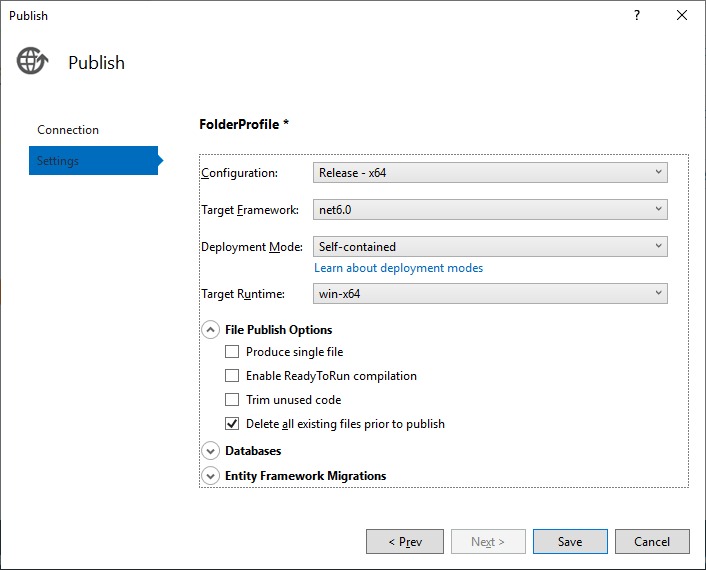
Then press Publish again.Step 13.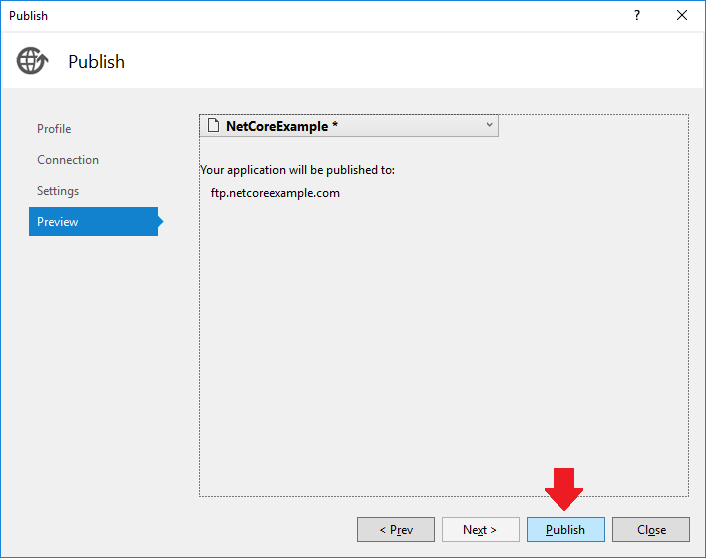
Publish the ASP.NET Core application.Step 14.
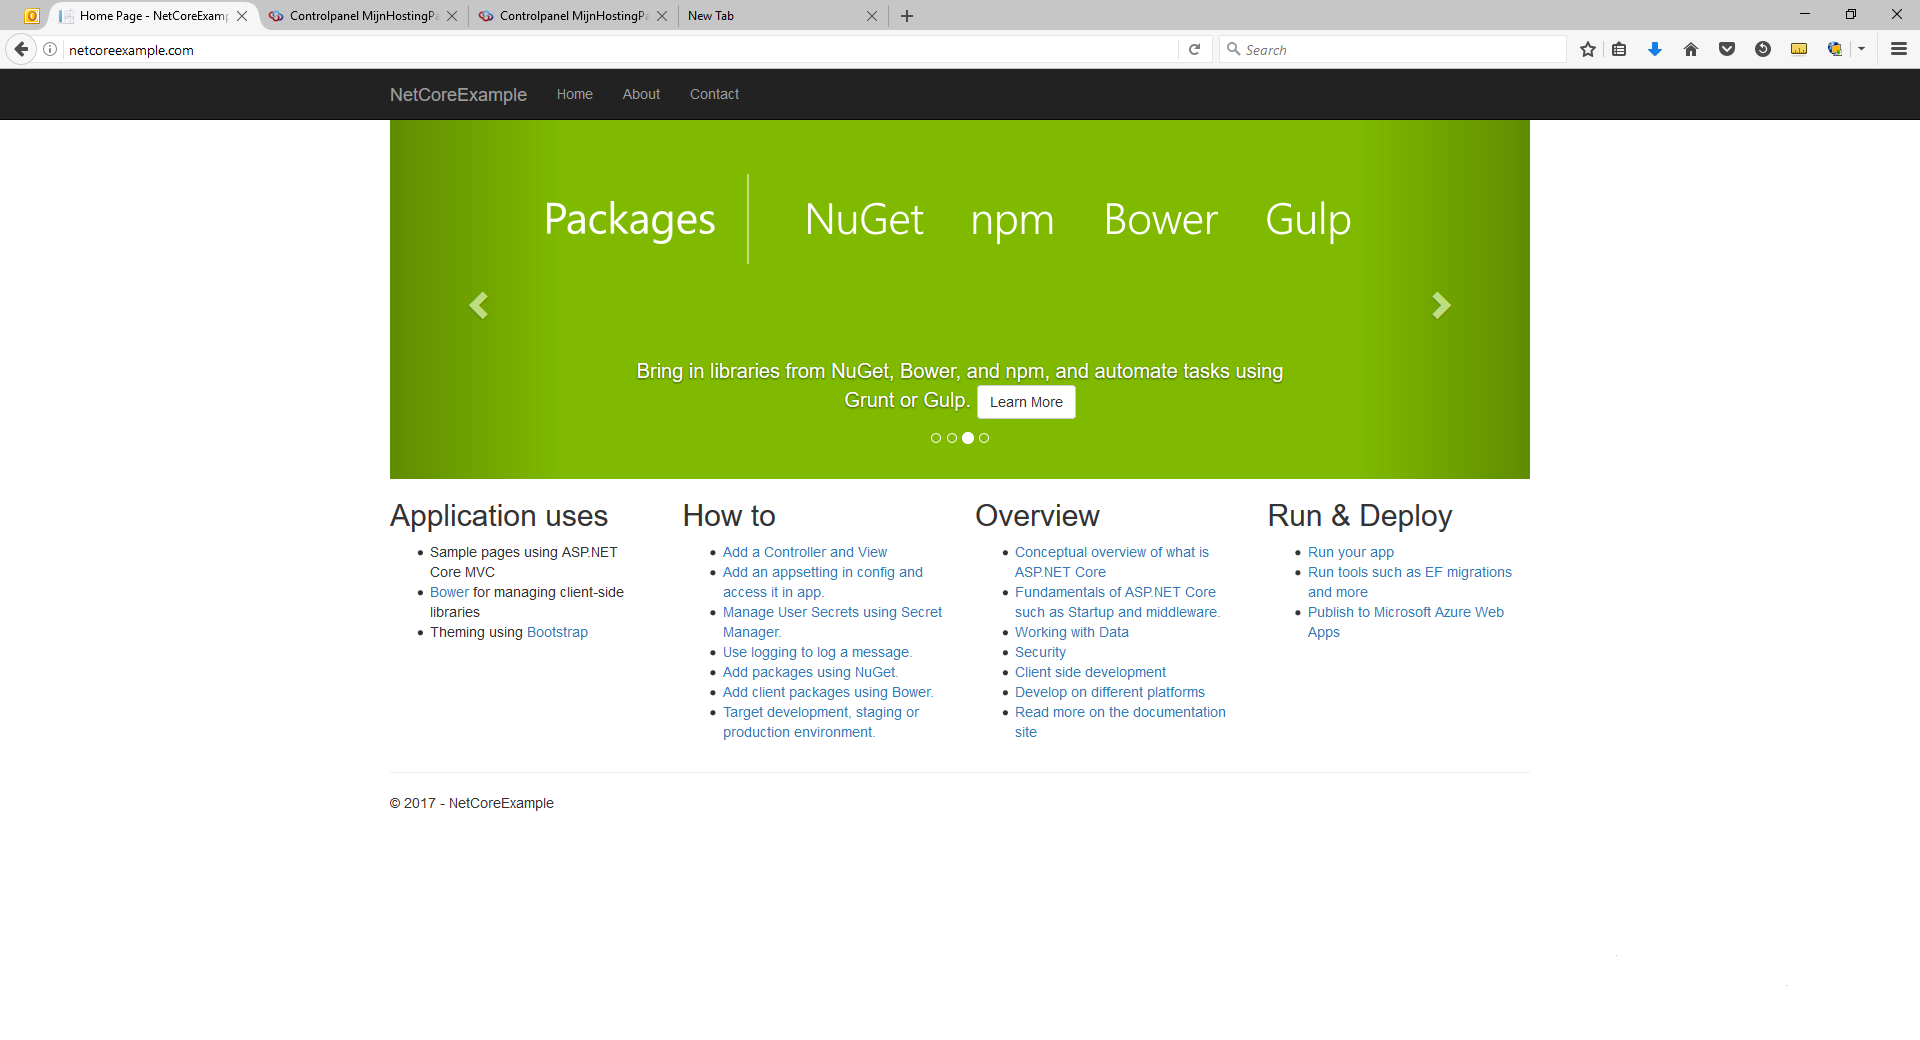
Go to the website.After uploading, you can call up the URL in your browser. The application will then be available.
Troubleshooting steps
A common error message when publishing .NET Core applications is a 403 message after publishing, the path is then set incorrectly and the application cannot be found.

To get an overview of where your application has been published, you can use both the file manager and an FTP account to check this. In most cases, your application should be set to the steps and paths above, so the final website files will be in the folder:
Domainname.co.ukwwwroot
In the event of a 403 error, you will often find that your files have been placed directly in the top-level branch and are therefore located directly in the main folder
\ (Home in the file manager)
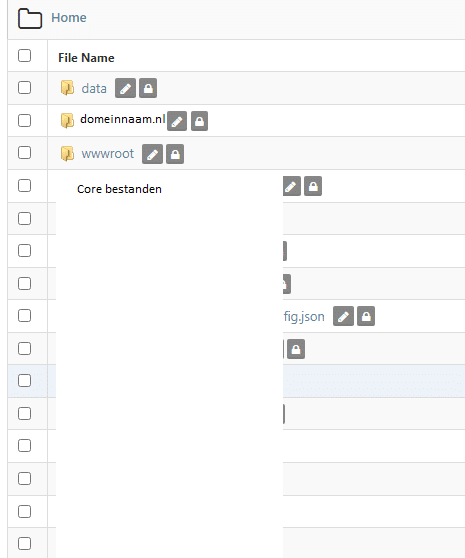
If this is the case, you should change the path of the upload to the first option and check the path of the website under the application under Websites in the Control Panel.
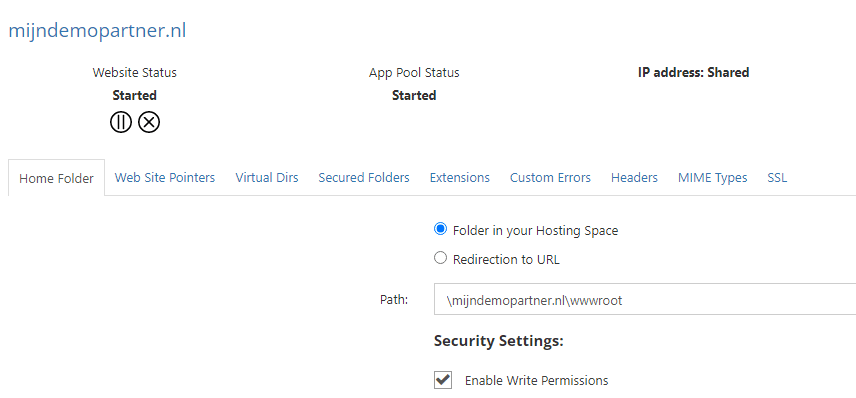
Clean up your hosting space and then republish to the correct folder for your application, also check your application settings and documentation.
After that, your domain name should end up directly in the application.