Categories
Email setup - iOS 8 iPad / iPhone
Description Apple iOS 8
Setting up a mail account from my hosting partner on your Apple device running iOS 8 is done as follows:
1) You go to your settings and select Mail, Contacts, Agenda
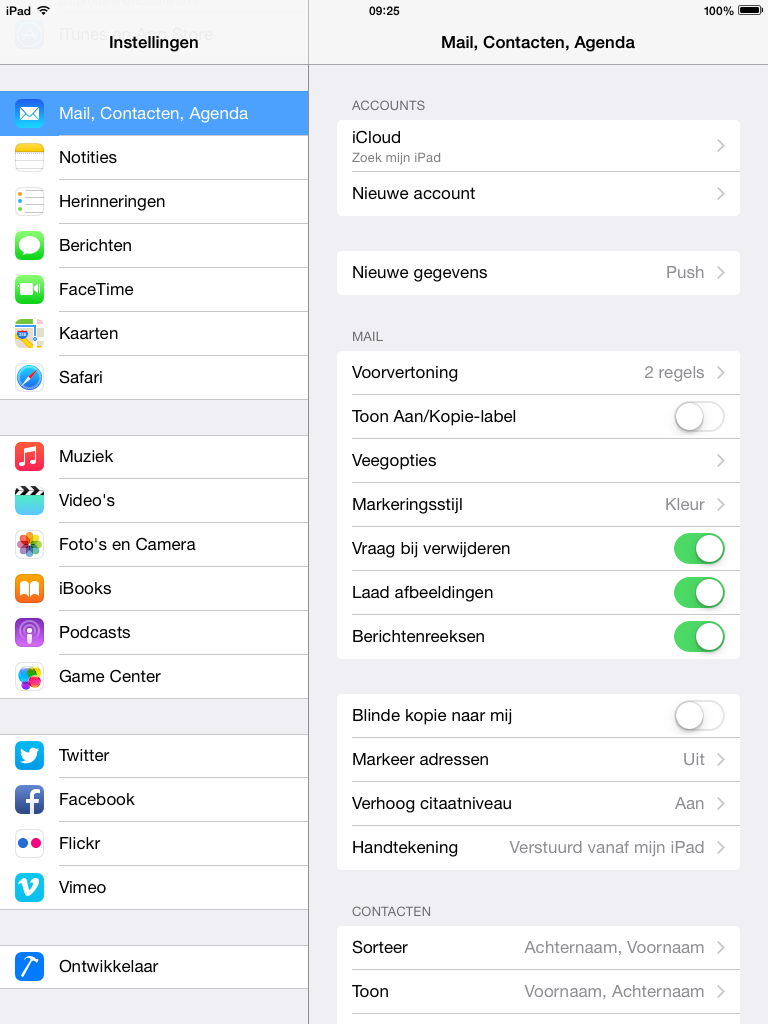
2 ) Then you select new account.
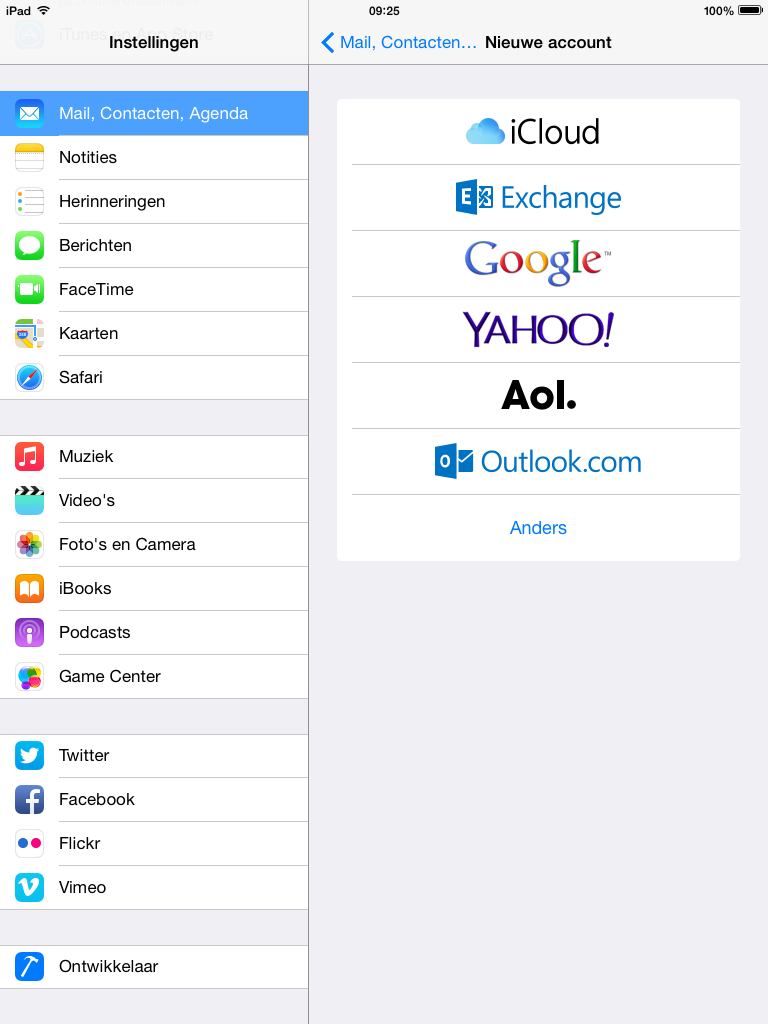
3) On the next screen you choose different
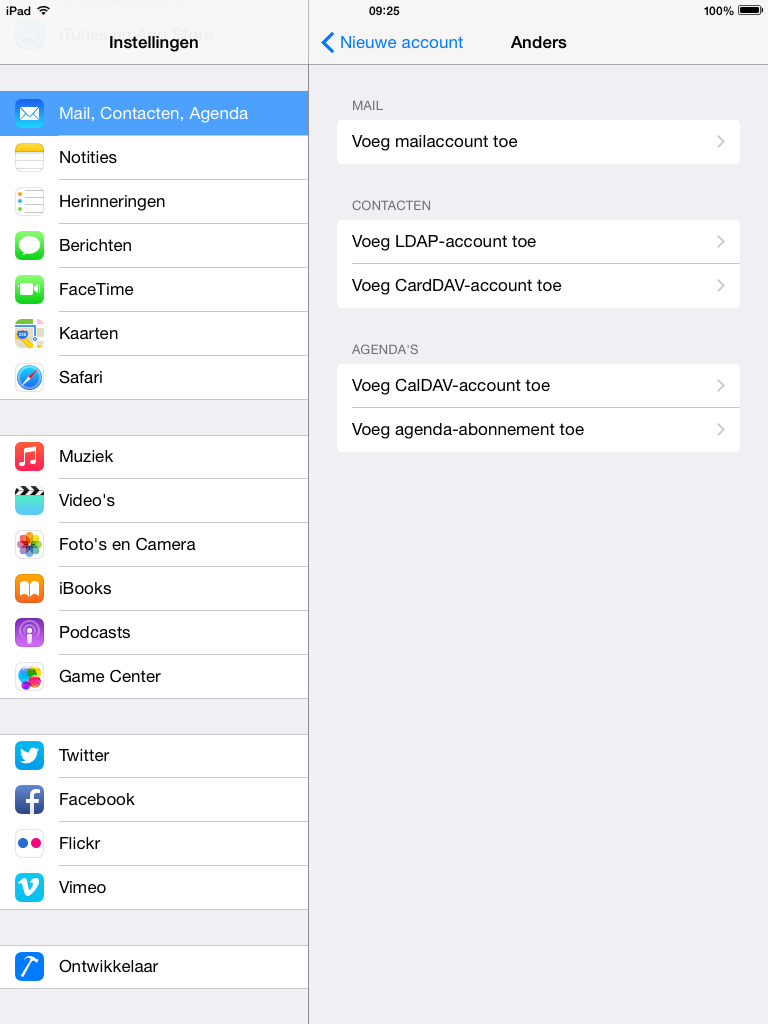
4 ) Then you click on: Add mailaccount
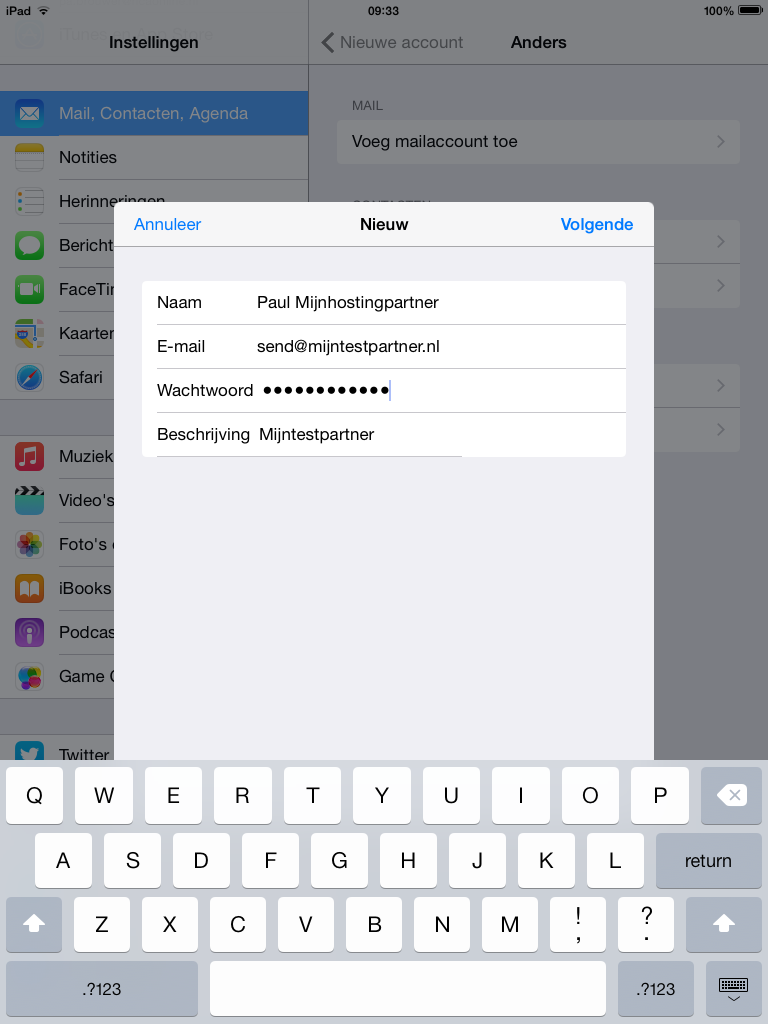
5 ) Then you need to enter your data:
- These data are from your mail account that you created in the control panel.
- For the description and your name you can fill in what you choose. For the email address and password, it is required to enter the correct information here though.
6) At the next screen you need to adjust some more settings. Again it is necessary to enter the email address. (At description you can fill in what you want. This is only the display name on your device).
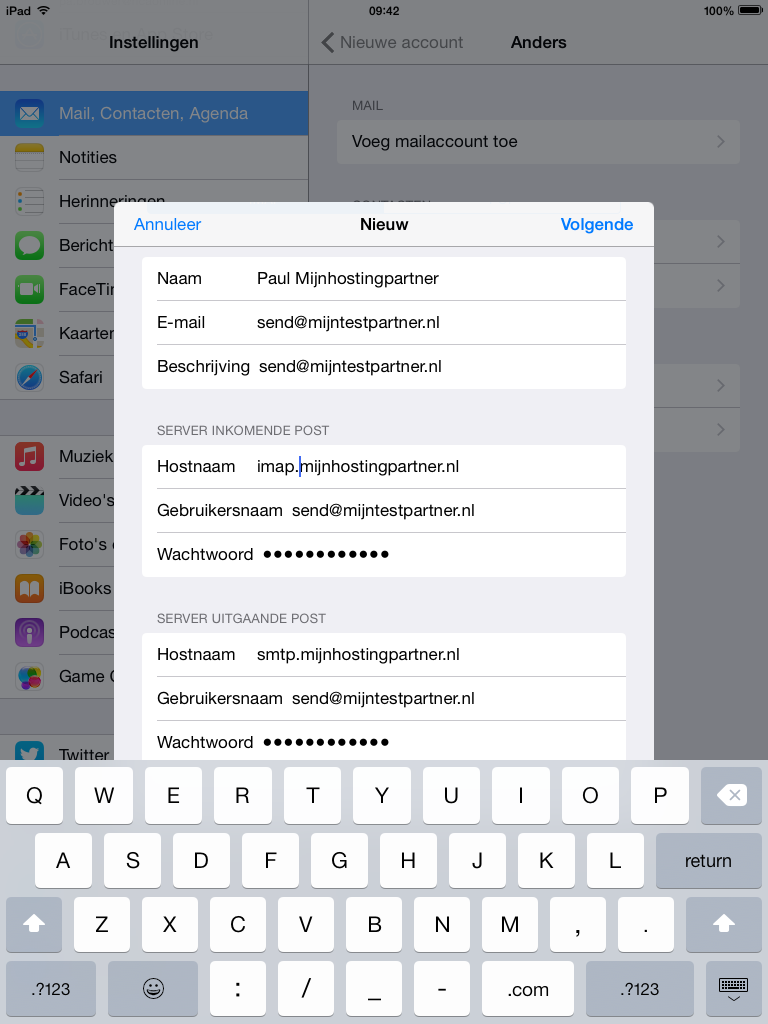
7) Then at server incoming mail:
- Hostname should be imap.mijnhostingpartner.nl.
- Again, here is your email address and password.
8 ) At server outgoing mail:
- Hostname must be smtp.mijnhostingpartner.nl.
- Email again in combination with password.
9) Then at advanced settings you can check if the settings are like in the screenshot.
So no SSL activated and the server port is set to 143.
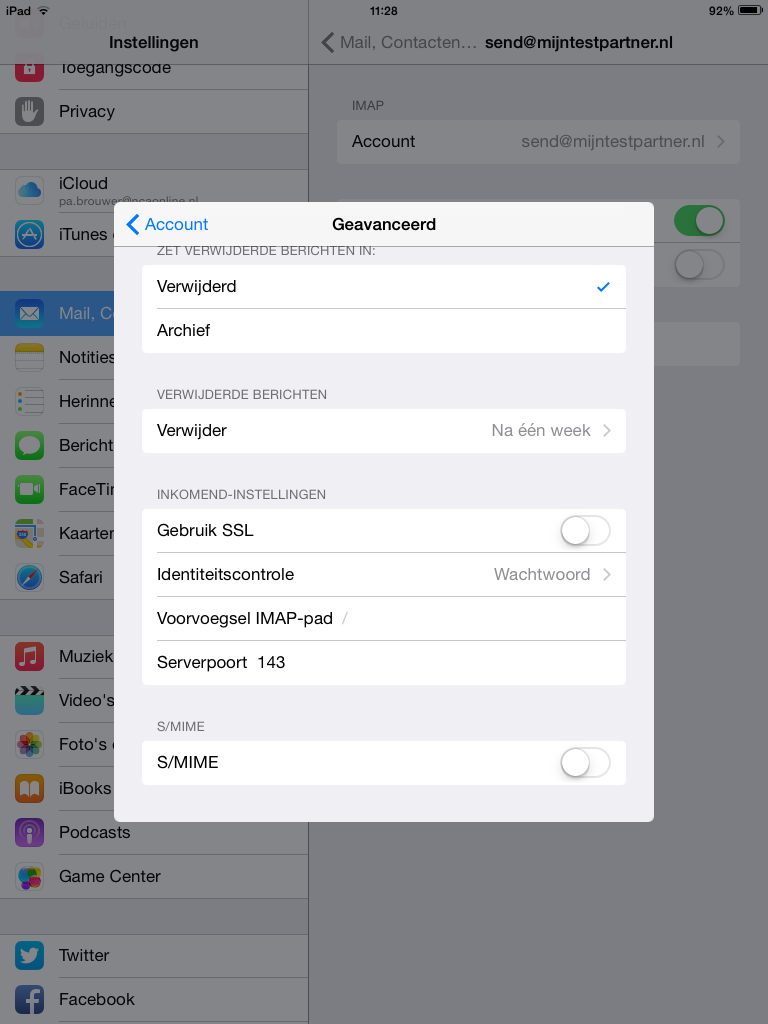
10) You may, when you press next, be asked whether you want to choose SSL or no SSL. You need to indicate no SSL.
Once you have done the above you can add this email address to your joinbox and you can receive and send mail through your IOS 8 device.
Troubleshooting:
For smtp server, the following settings should be at advanced: No SSL (as with Imap) and port must be set to 25.
If your internet provider blocks port 25 you can set it to 26 or 587.
This can be set afterwards by clicking on the smtp server address.
If you get stuck at any step, please let us know.
keywords: SSL IOS apple mail email mac macintosh configuring email SMTP IMAP imap smtp