Categories
I want to set up my mail in IOS 7 on my iPhone or iPad, how do I do that?
I want to set up my email account on my iPhone / iPad which runs on IOS 7. How to proceed can be found in the step-by-step article below.
1 ) On the main screen of your iPhone / iPad go to 'settings'.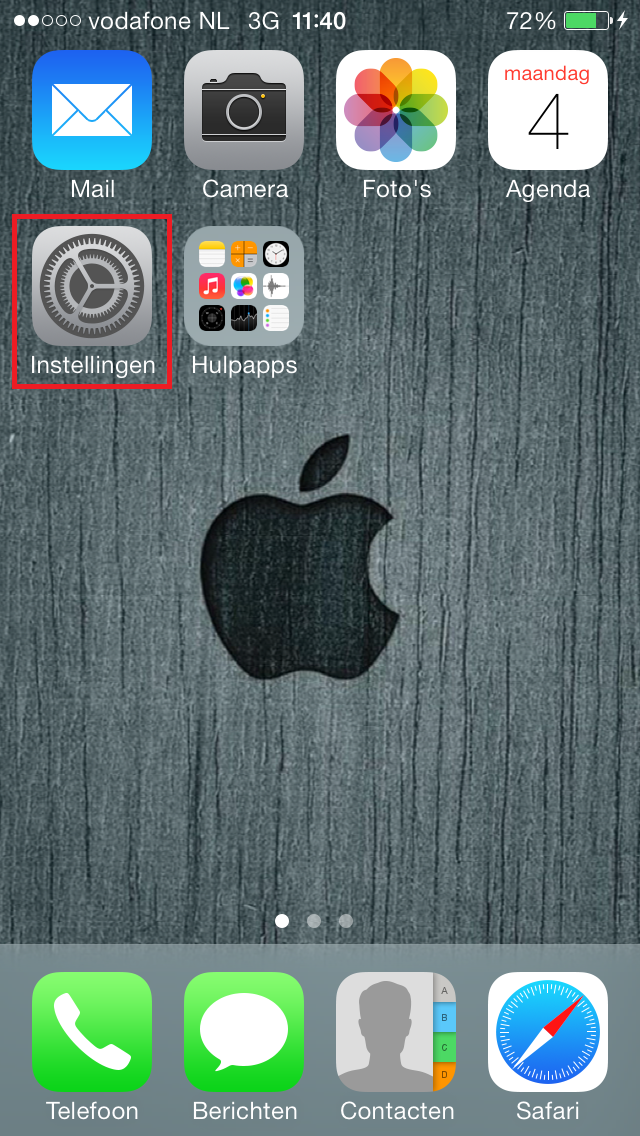
2 ) After this, tap "Mail, contacts, calendars.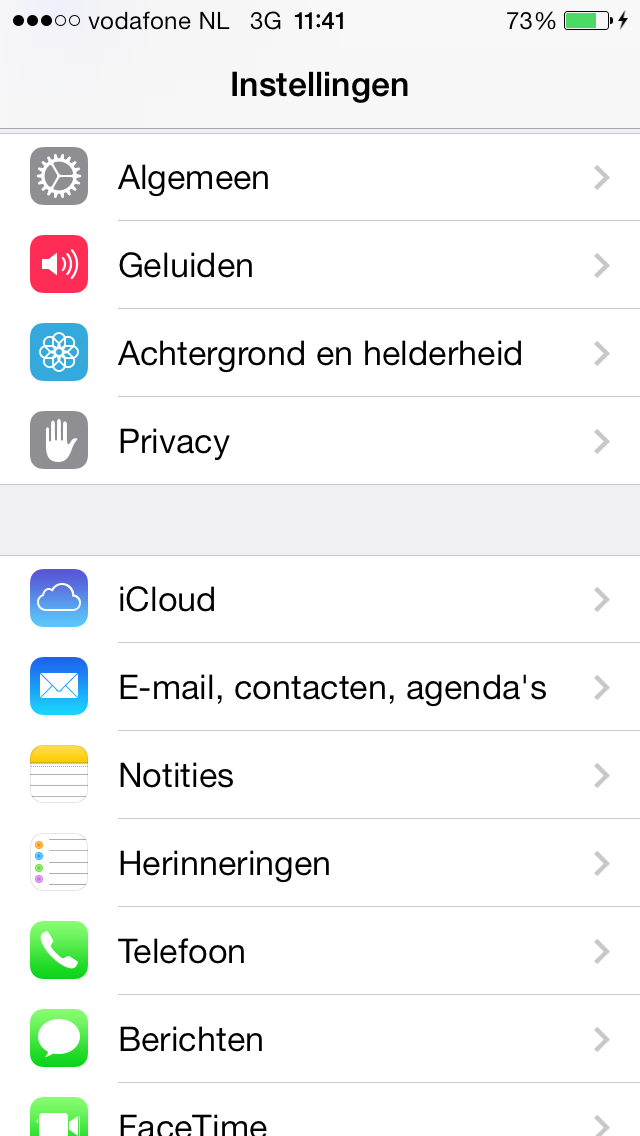
3 ) In the next screen tap on "New account".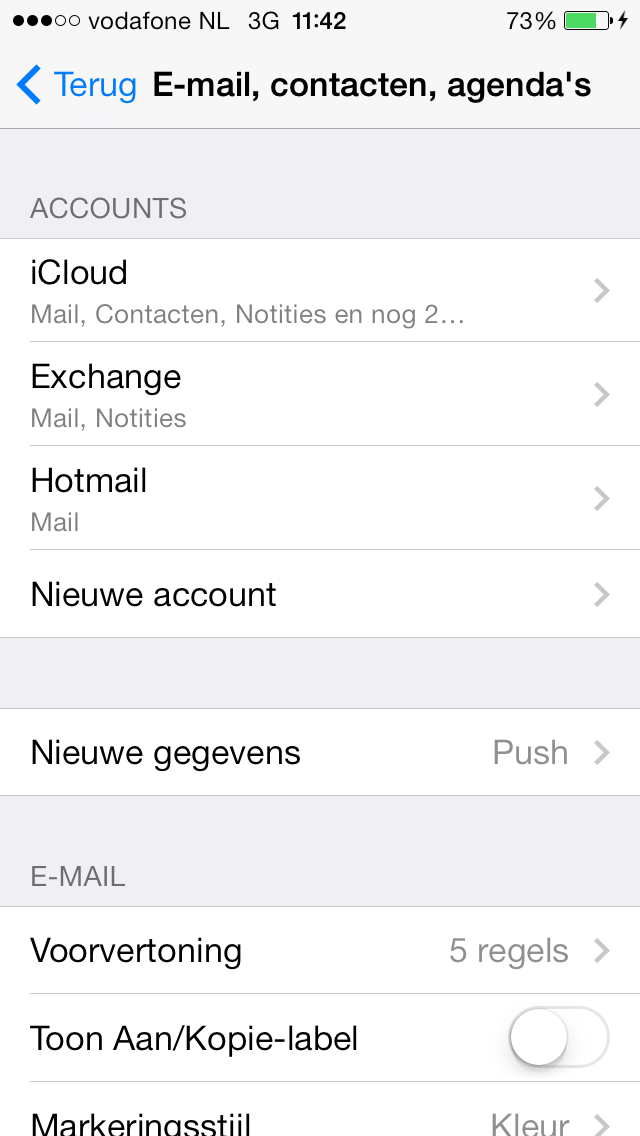
4 ) In this screen choose "Other".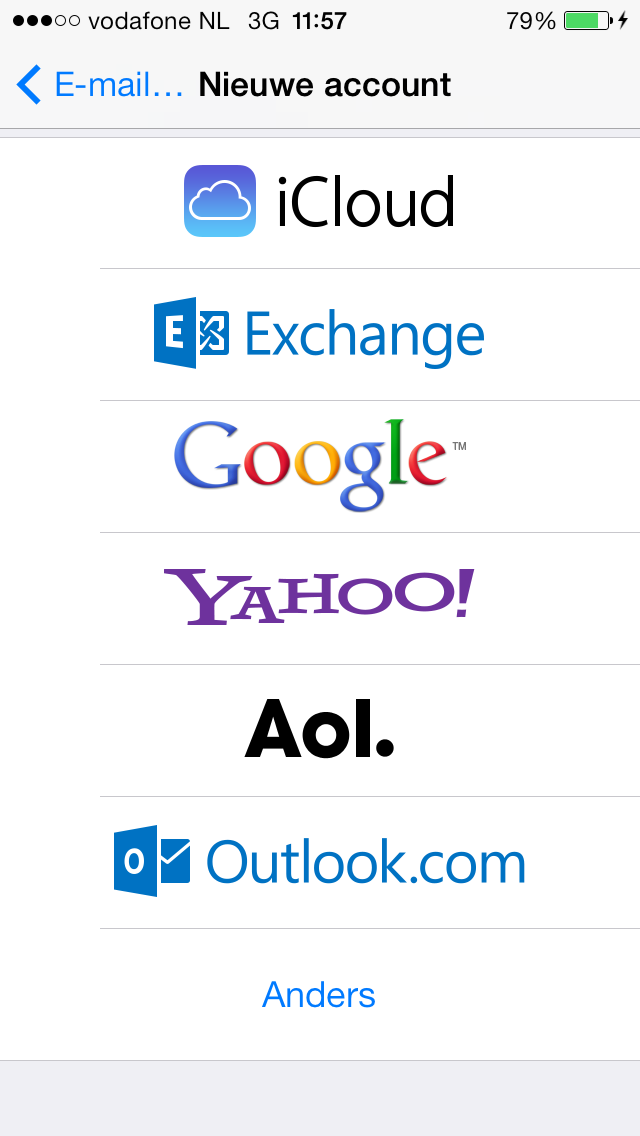
5) In the next screen tap on the heading Mail and click on 'Add mail account'.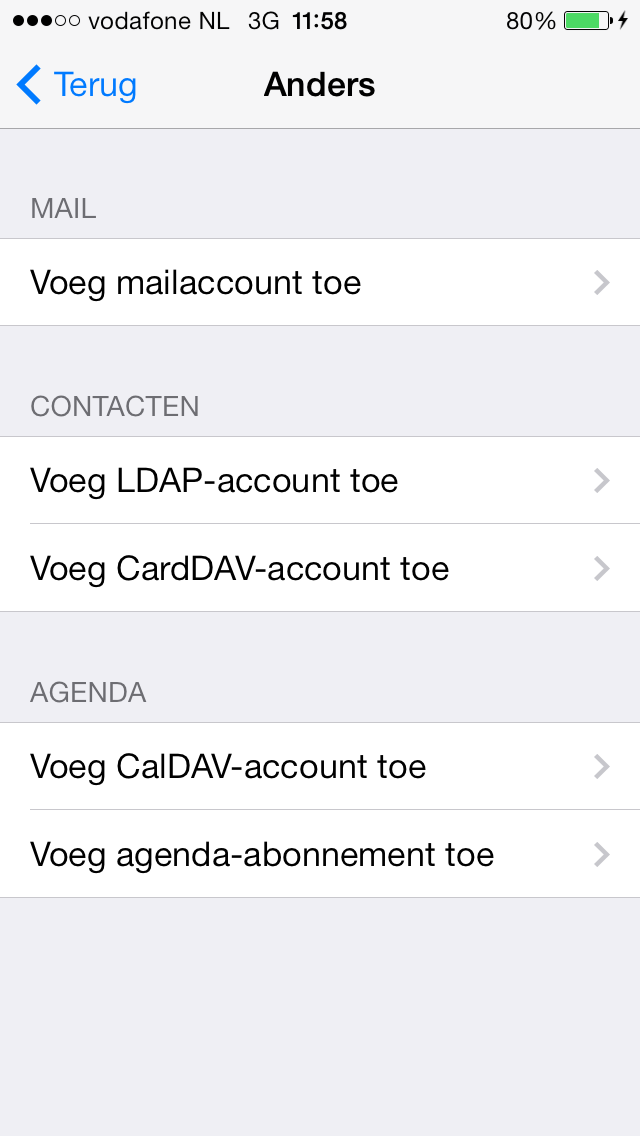
6) In this screen you need to fill in the email account details
:1. name of the new account2
.the mail address3. the password belonging to your mail address.
The mail address3
. the password that belongs to your mail address.
4. Description of the account.
When you have filled in all the information, tap 'next' at the top right of the screen. 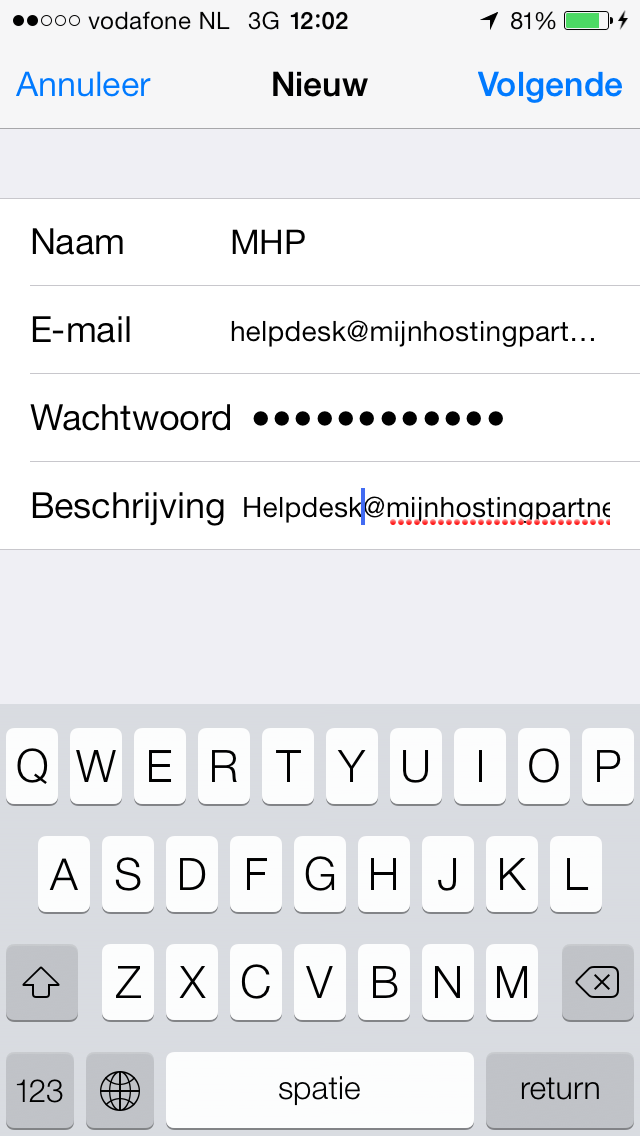
7) In the next screen you can choose how you want to receive and send mail. This can be done via 'IMAP' or via 'POP'. We advise you to choose 'IMAP'. With this setting your folders will be synchronized and you will have exactly the same information on your iPhone / iPad as on the webmail. For any sync tools we refer you to the webmail. There, under 'settings' is the heading 'My Hosting Partner Sync' where you can download software to sync all your devices.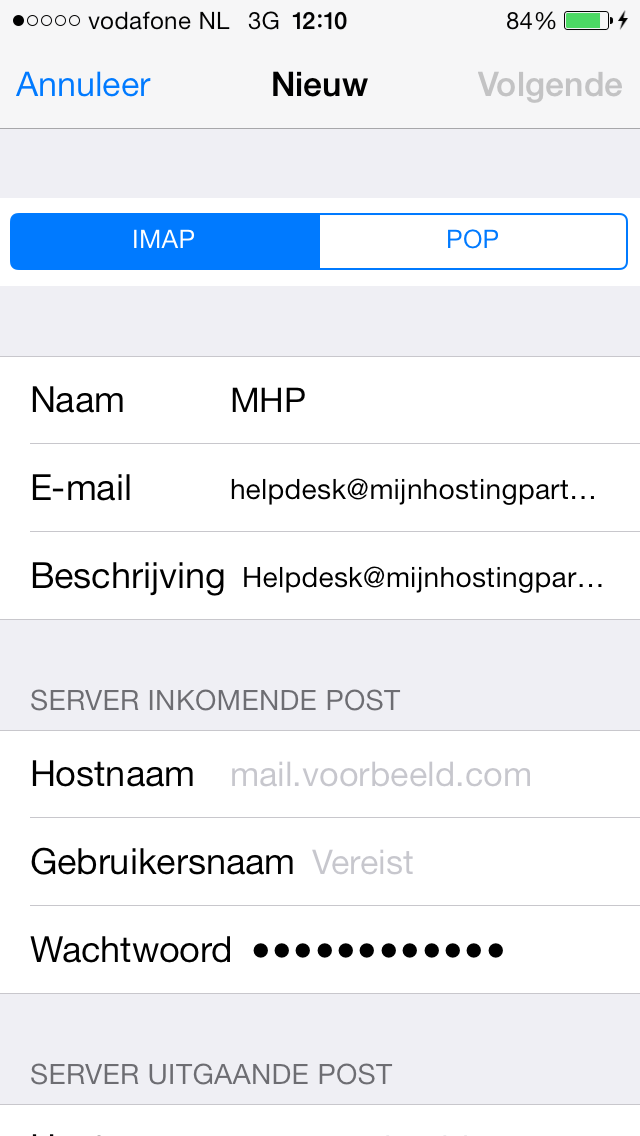
8) If you scroll down in the above screen you will see the screen below. You need to fill in the following information there:
Server incoming mail1
. Hostname: imap.myhostingpartner.nl2
. Username: the mail address for example:
naam@uwdomeinnaam.nl3. Password: The password that belongs to the mail address. You have set this in the control panel.
Server outgoing mail4
. Hostname: smtp.mijnhostingpartner.nl5
. Username: the mail address for example:
naam@uwdomeinnaam.nl6. Password: The password that accompanies the mail address. You have set this in the control panel.
If you have entered all the information you tap 'next' in the top right of the screen.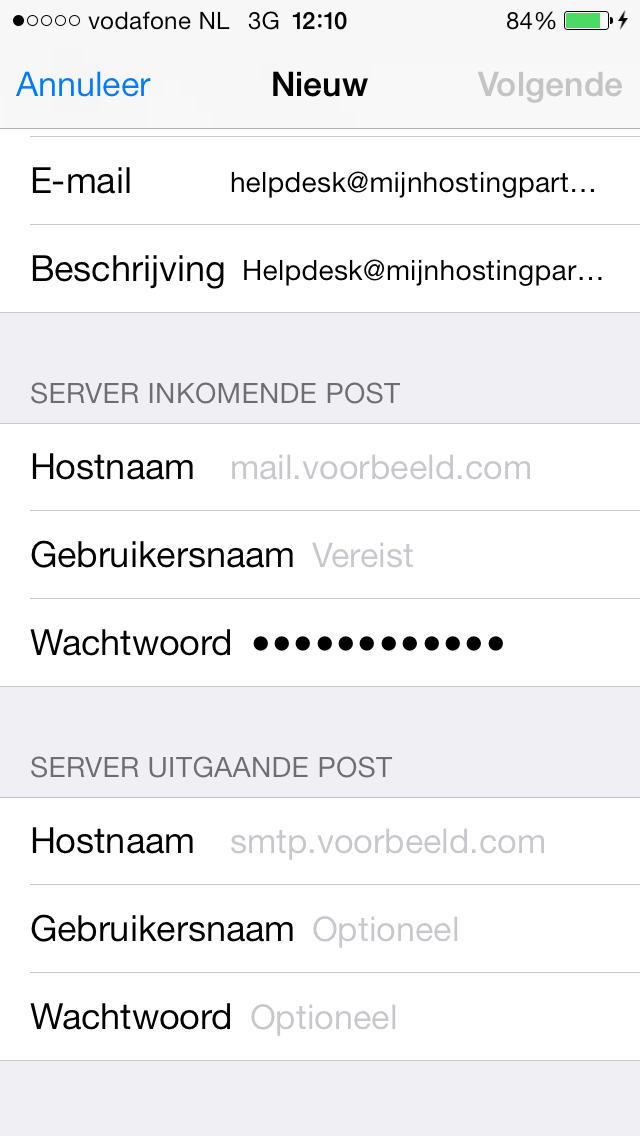
9) Finally the iPhone / iPad will check your settings. This check can take a very long time and at some point you will see the screen below. Where you will be asked if you want to configure the account without SSL. You need to tap 'Yes' here.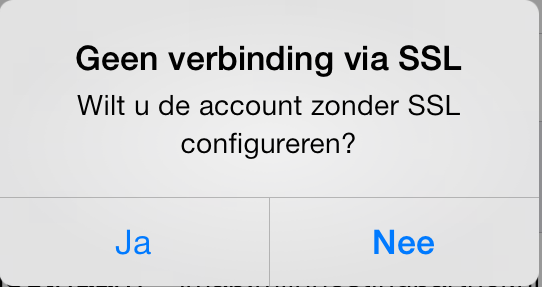
10) Then the iPhone / iPad will check the settings again. This can also take a very long time and you should just wait until the iPhone has checked the settings, this can take up to 5 minutes so keep this in mind. In many cases he asks again if you want to set up the account without SSL and then you need to tap 'Yes' again. After this second time it is often faster and your account is then saved on your iPhone / iPad.
11) To test the mail you can send a message to yourself. As soon as the mail is sent it should come back immediately after manual retrieval. If this is indeed the case, then your mail account has been successfully configured.
12) If sending a message does not succeed then this is probably due to the smtp port which is normally set to 25. Some internet providers block this port and then you must use port 26.
This can be set up in the following way:
12.1 Tap the account in the screenshot from step 3.
12.2 Tap the mail address behind account.
12.3 At the bottom of the screen behind "SMTP" tap "smtp.mijnhostingpartner.nl".
12.4 Here you tap the smtp server, this is probably under "main server".
12.5 At the bottom you will now see "Server Port 25" when you tap this you can change the port to 26 or 58712
.6 After this tap the top right of the screen on "Done".
12.7 Finally you can repeat the test from step 11 to see if the mail works correctly.
If you have any questions you can always use the chat or create a ticket in the customer panel.