
Categories
Email setup - TypeApp mail
If you want to use the mail App called TypeApp then you first need to create a mail address.
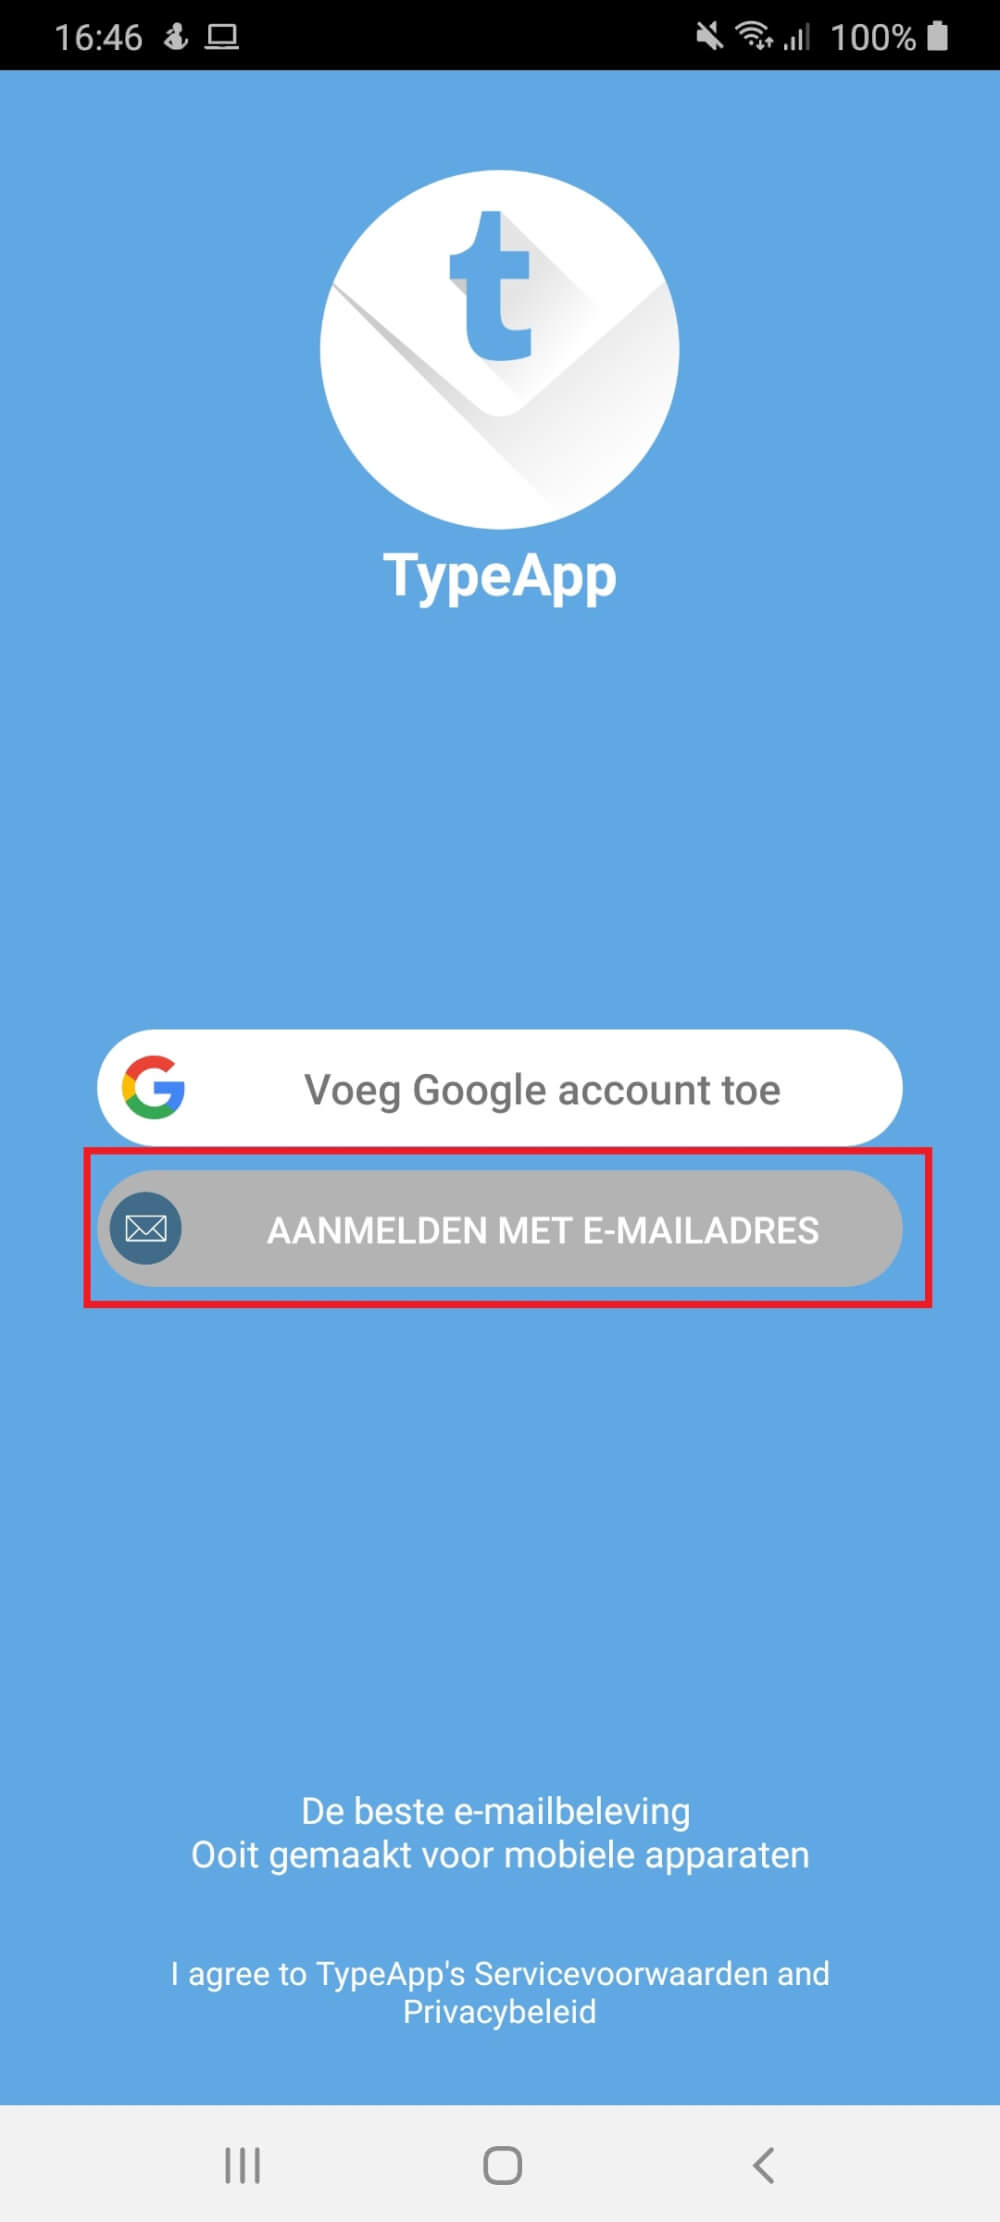
1) Download the app and then click on sign up with mail address.
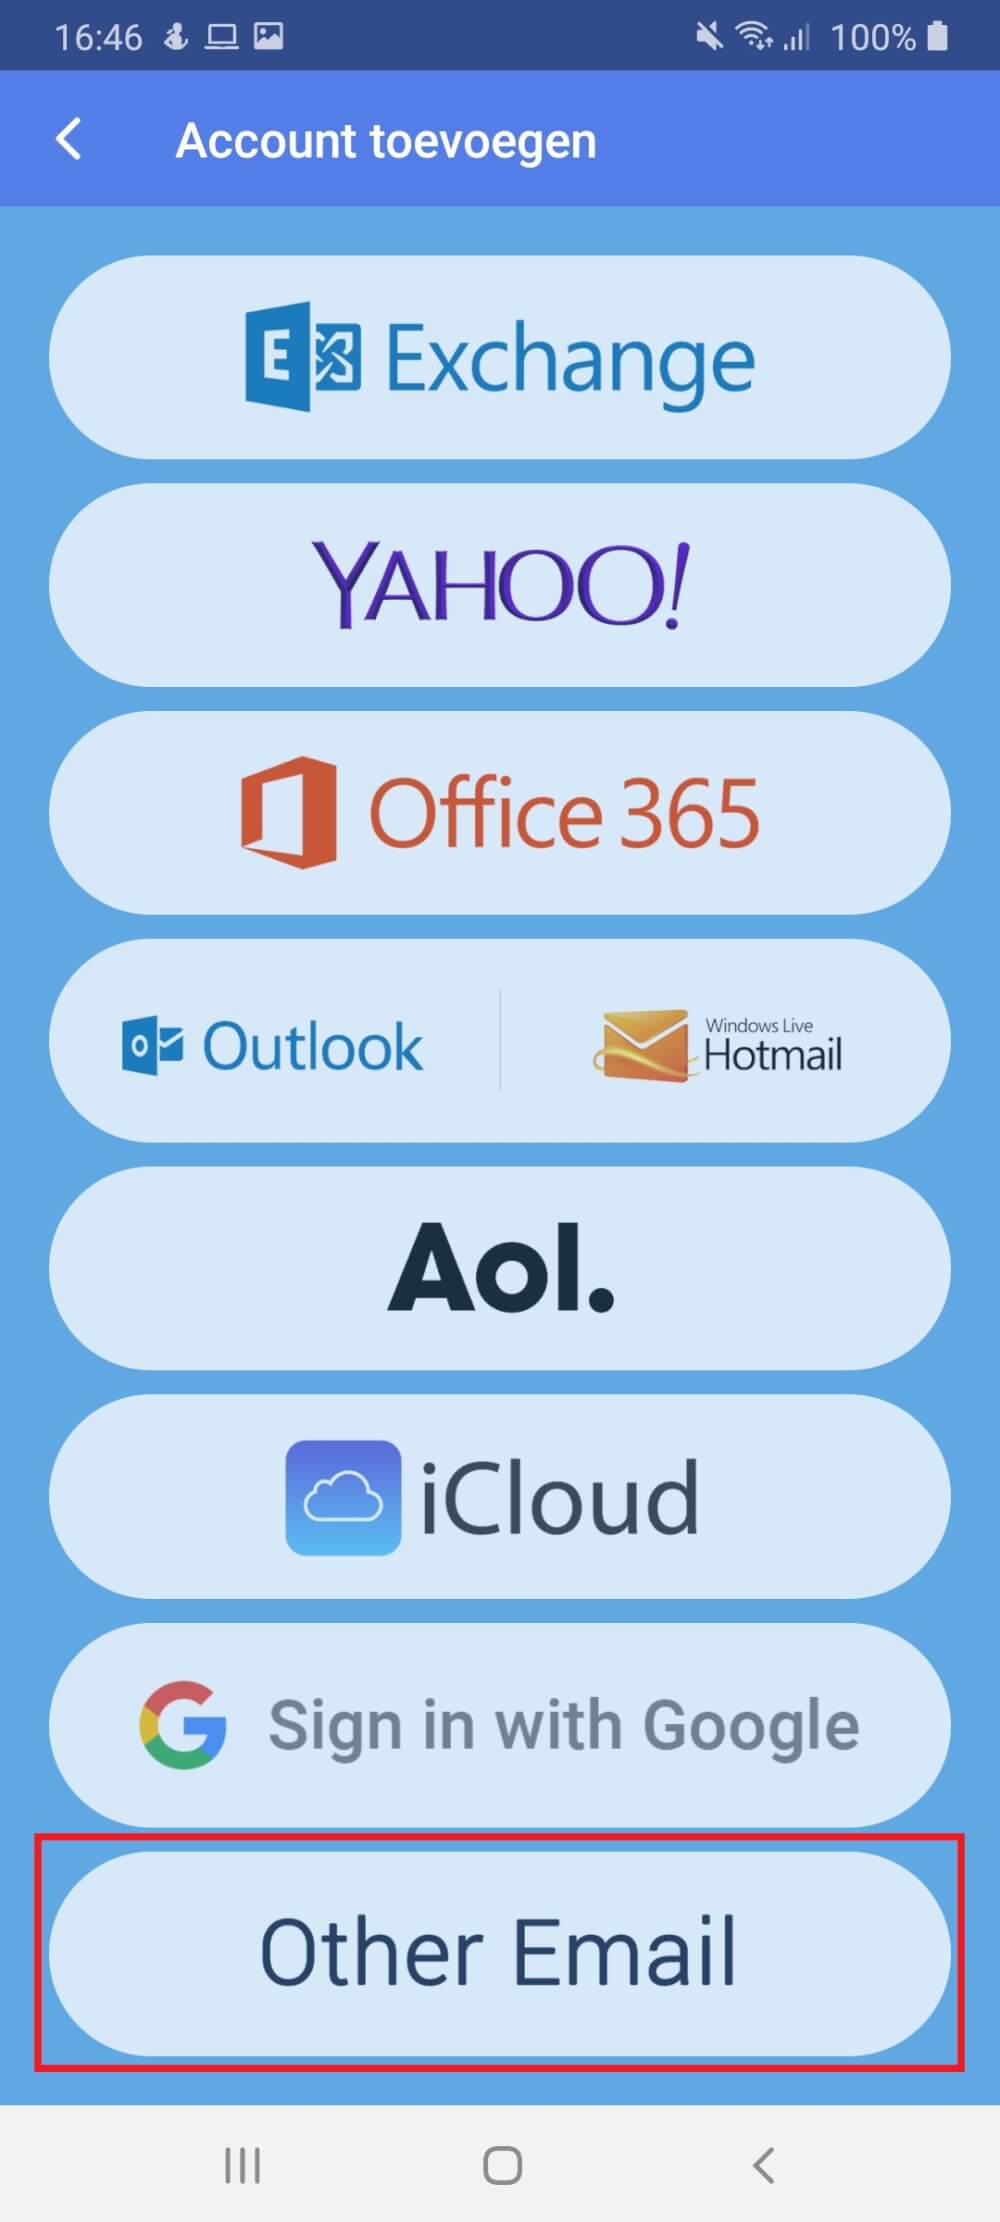
2 ) Then click on Other Email
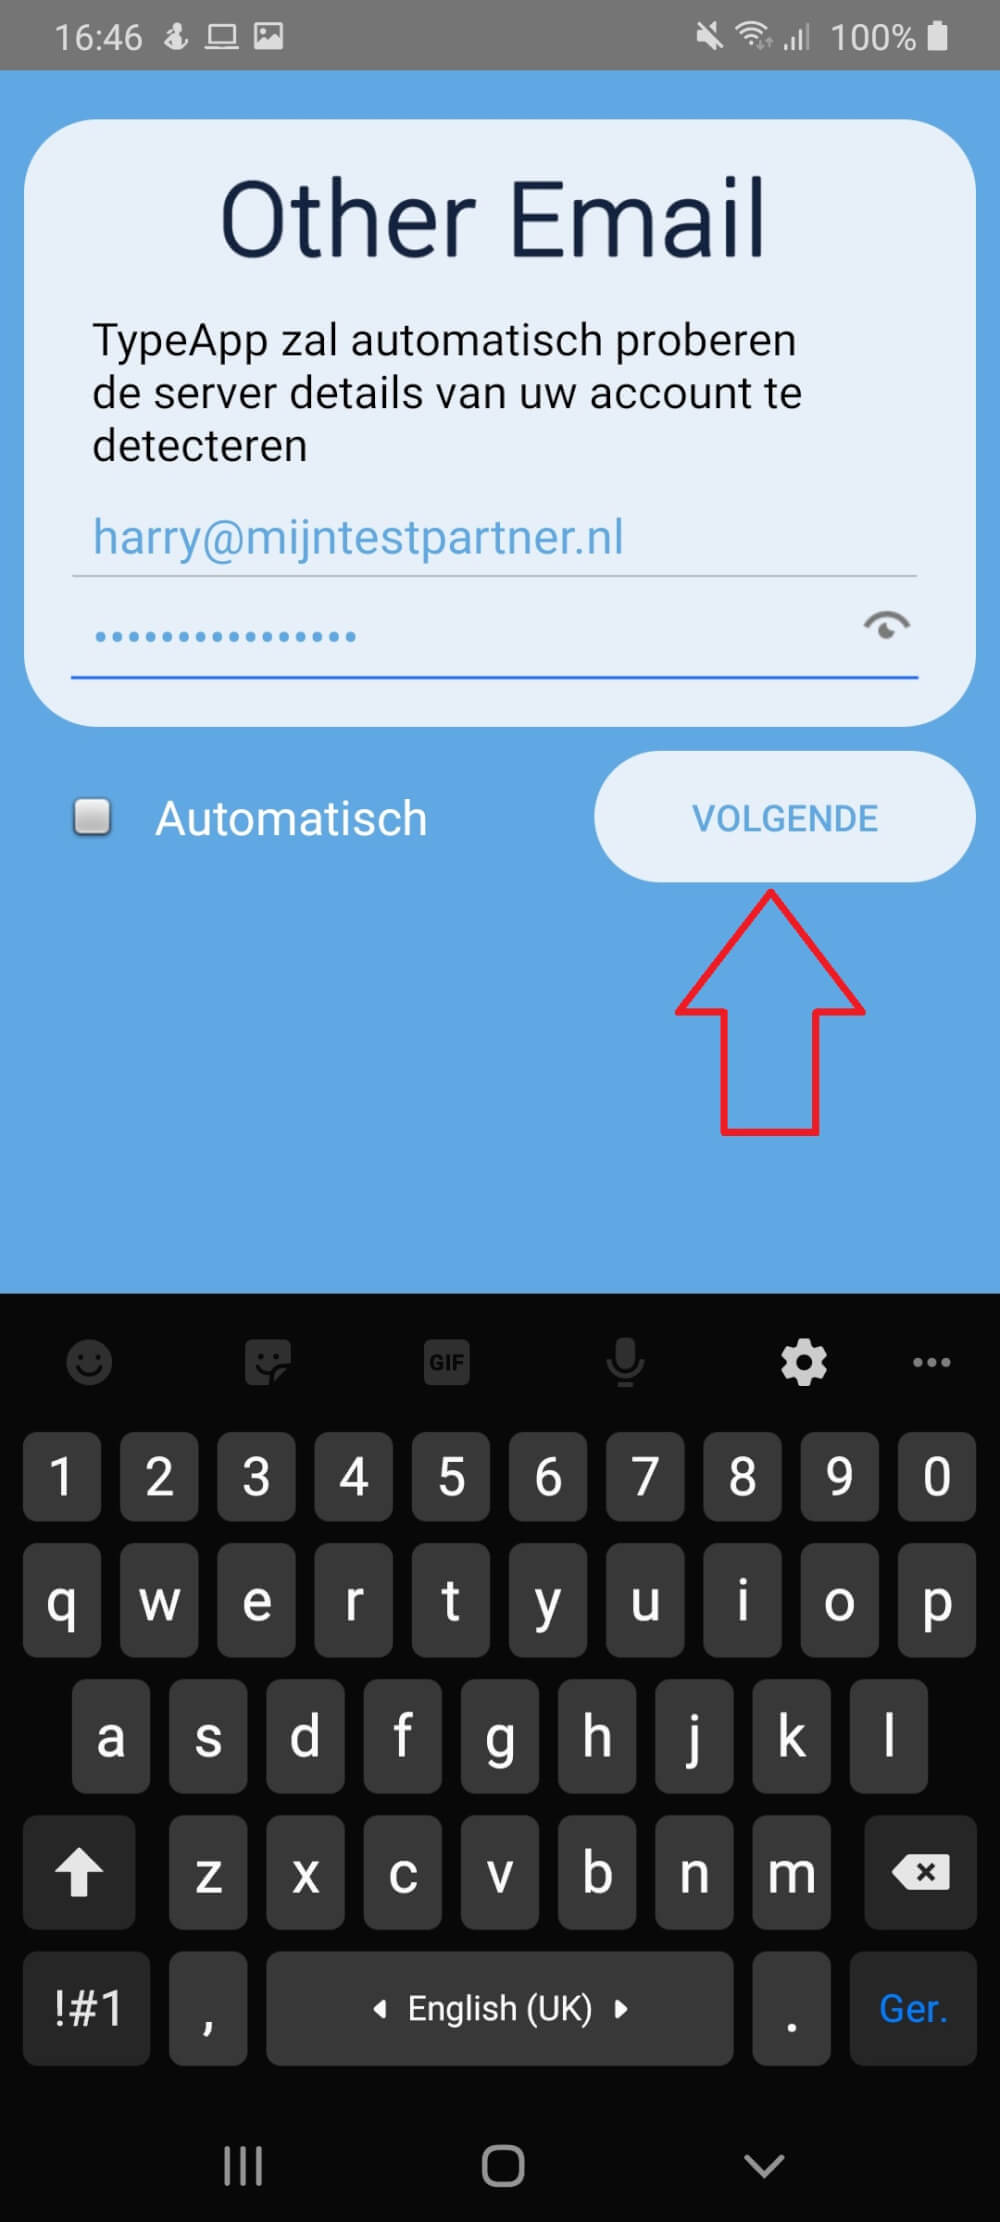
3 ) After this you will see the screen below. Uncheck automatic and fill in your details. Then click on next.
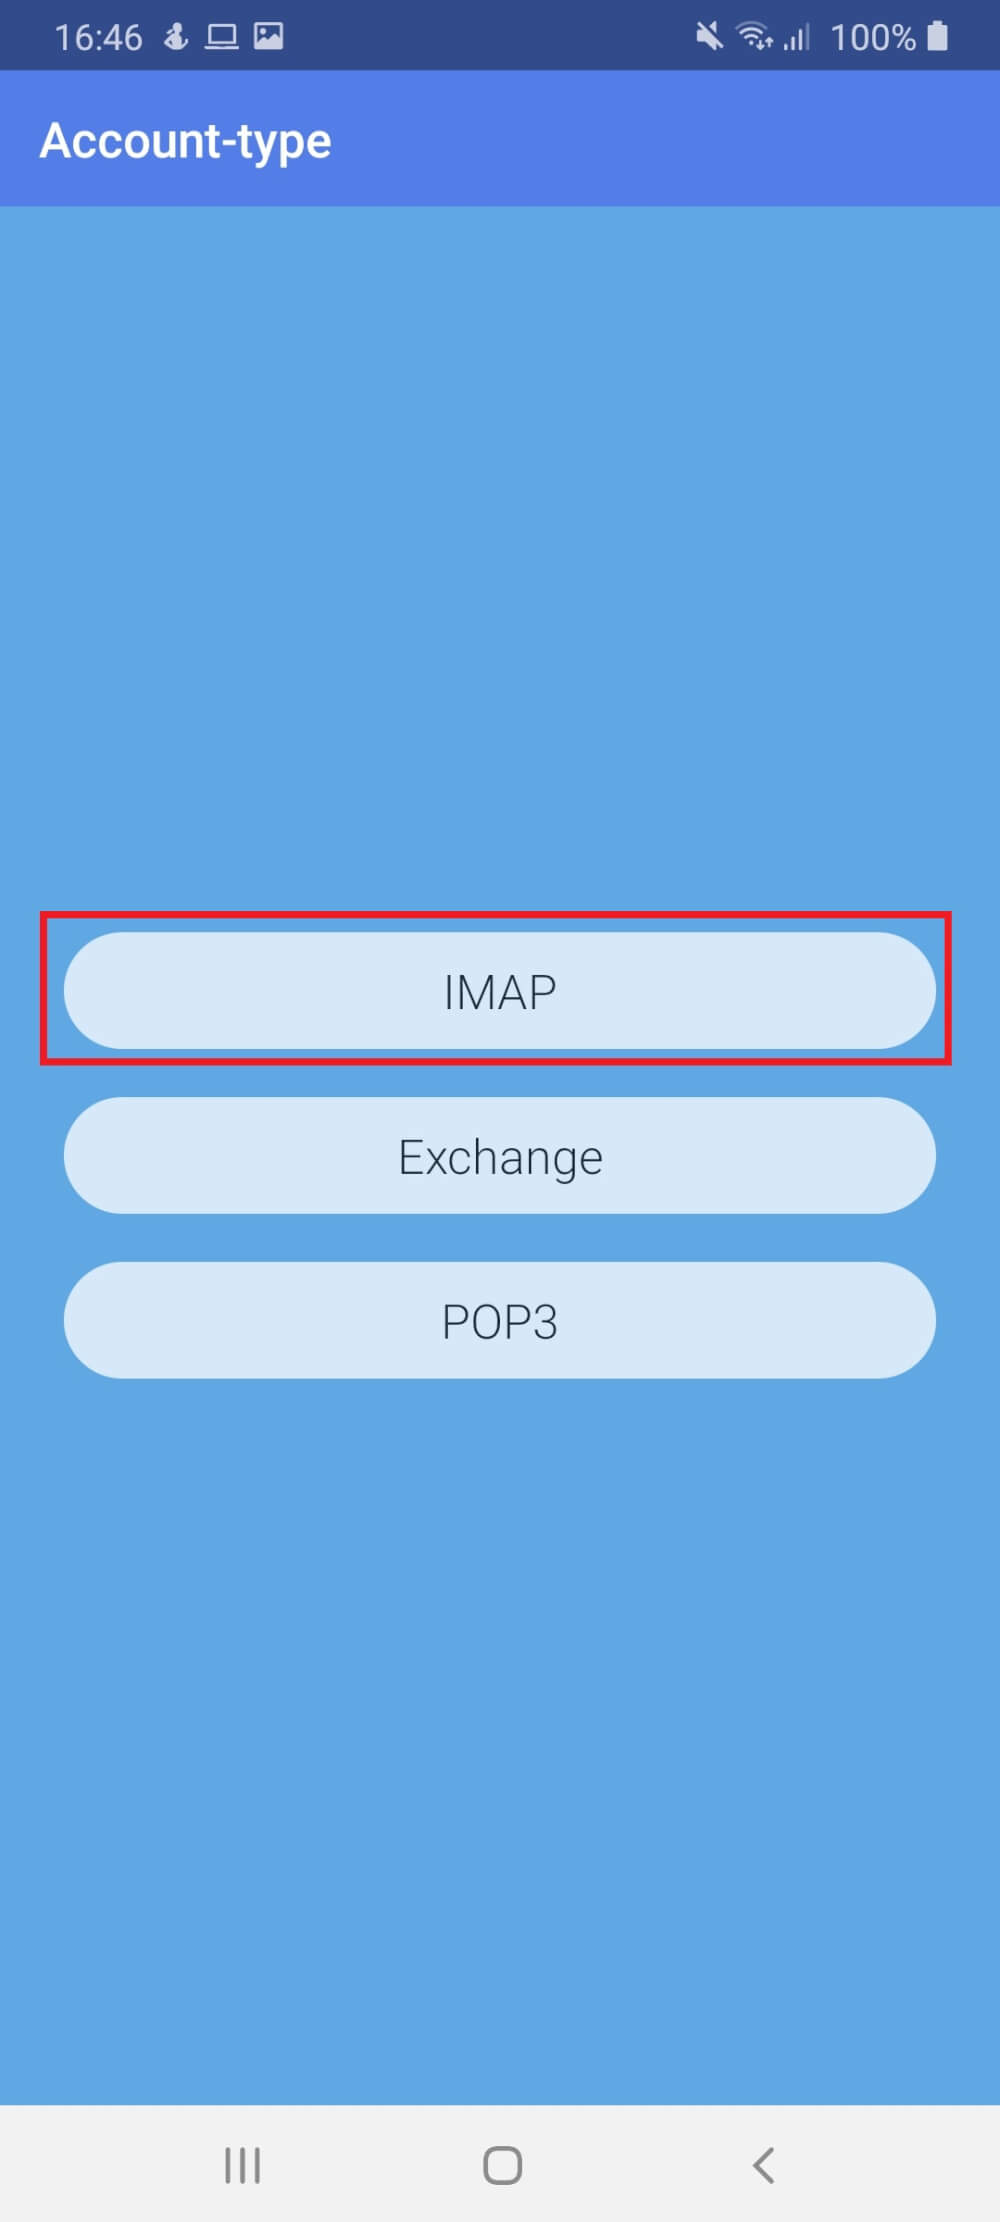
4 ) Then click on IMAP.
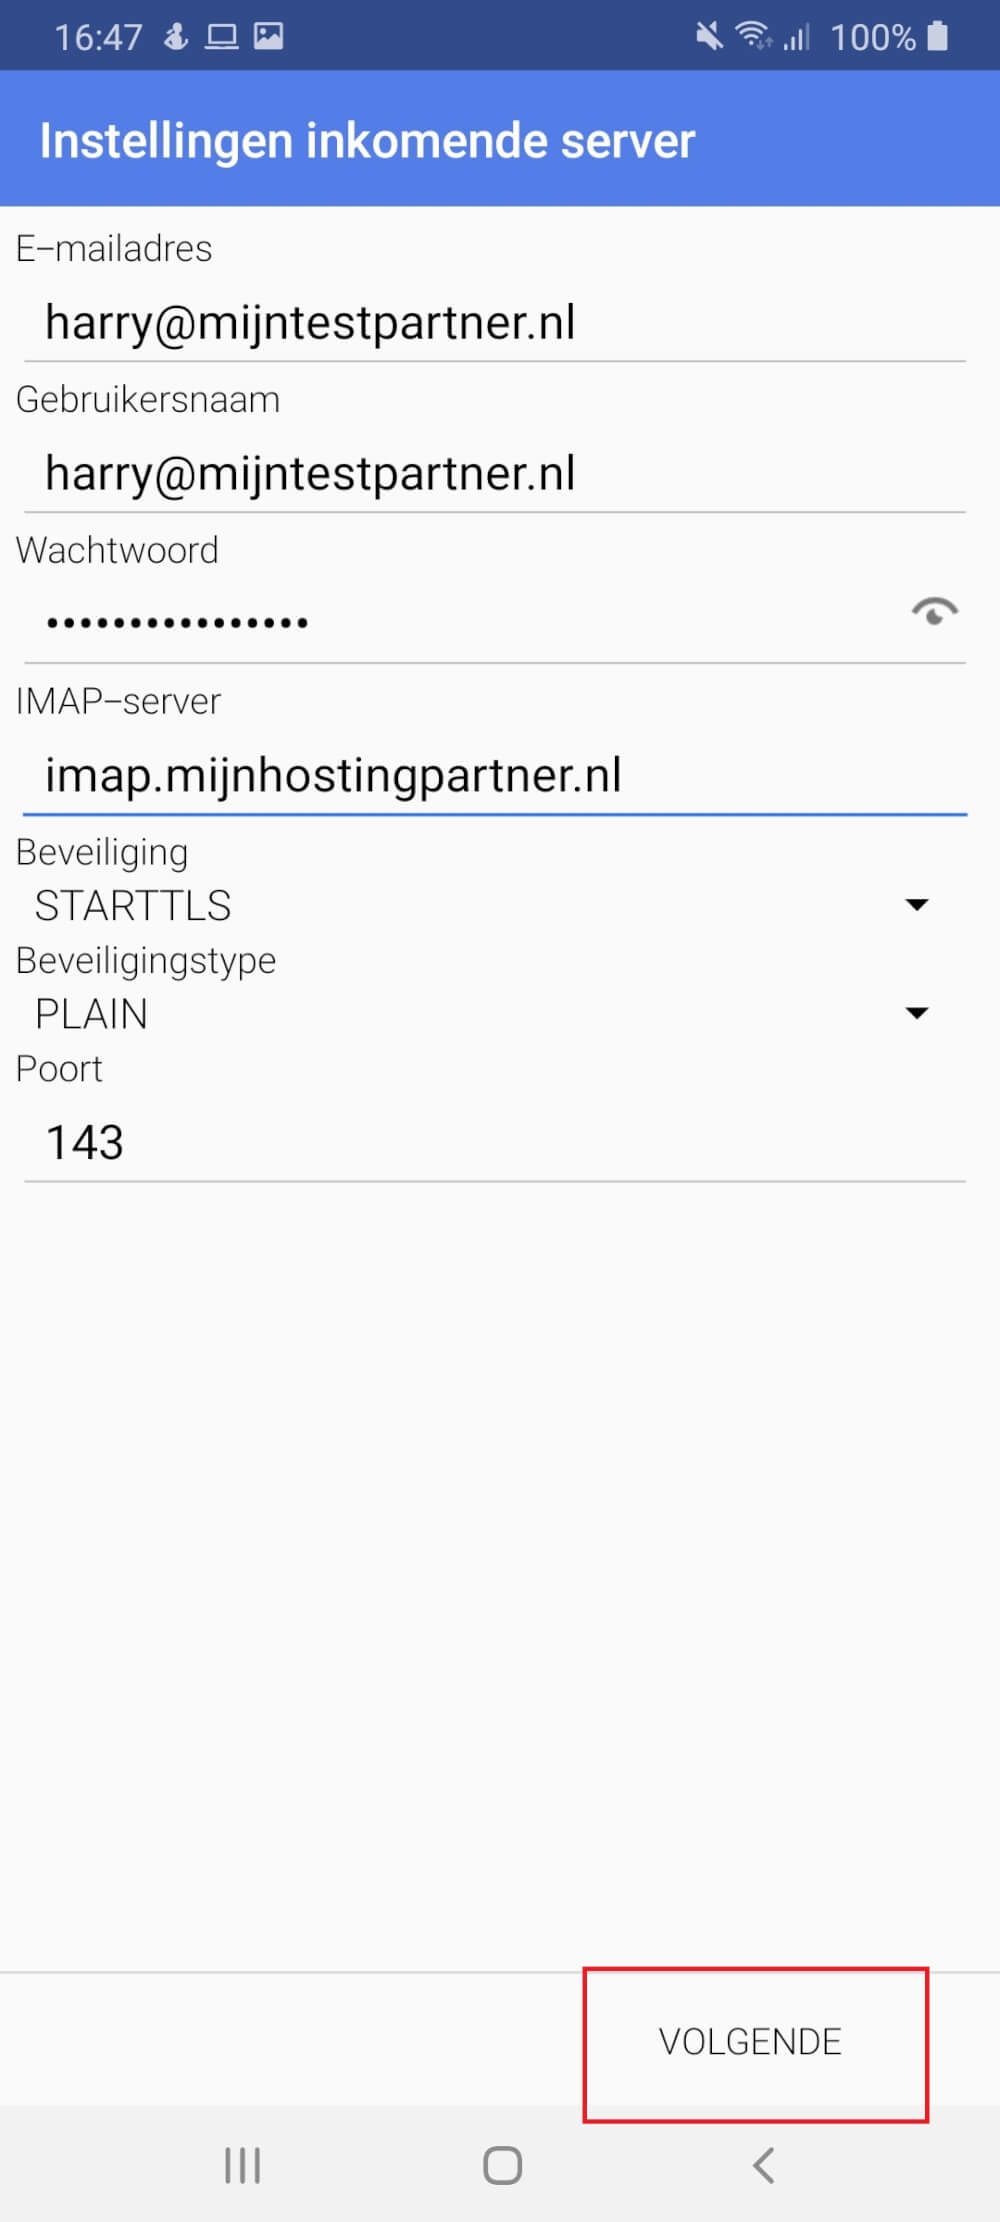
5 ) Fill out the incoming server imap.mijnhostingpartner.nl and set the security to STARTTLS.
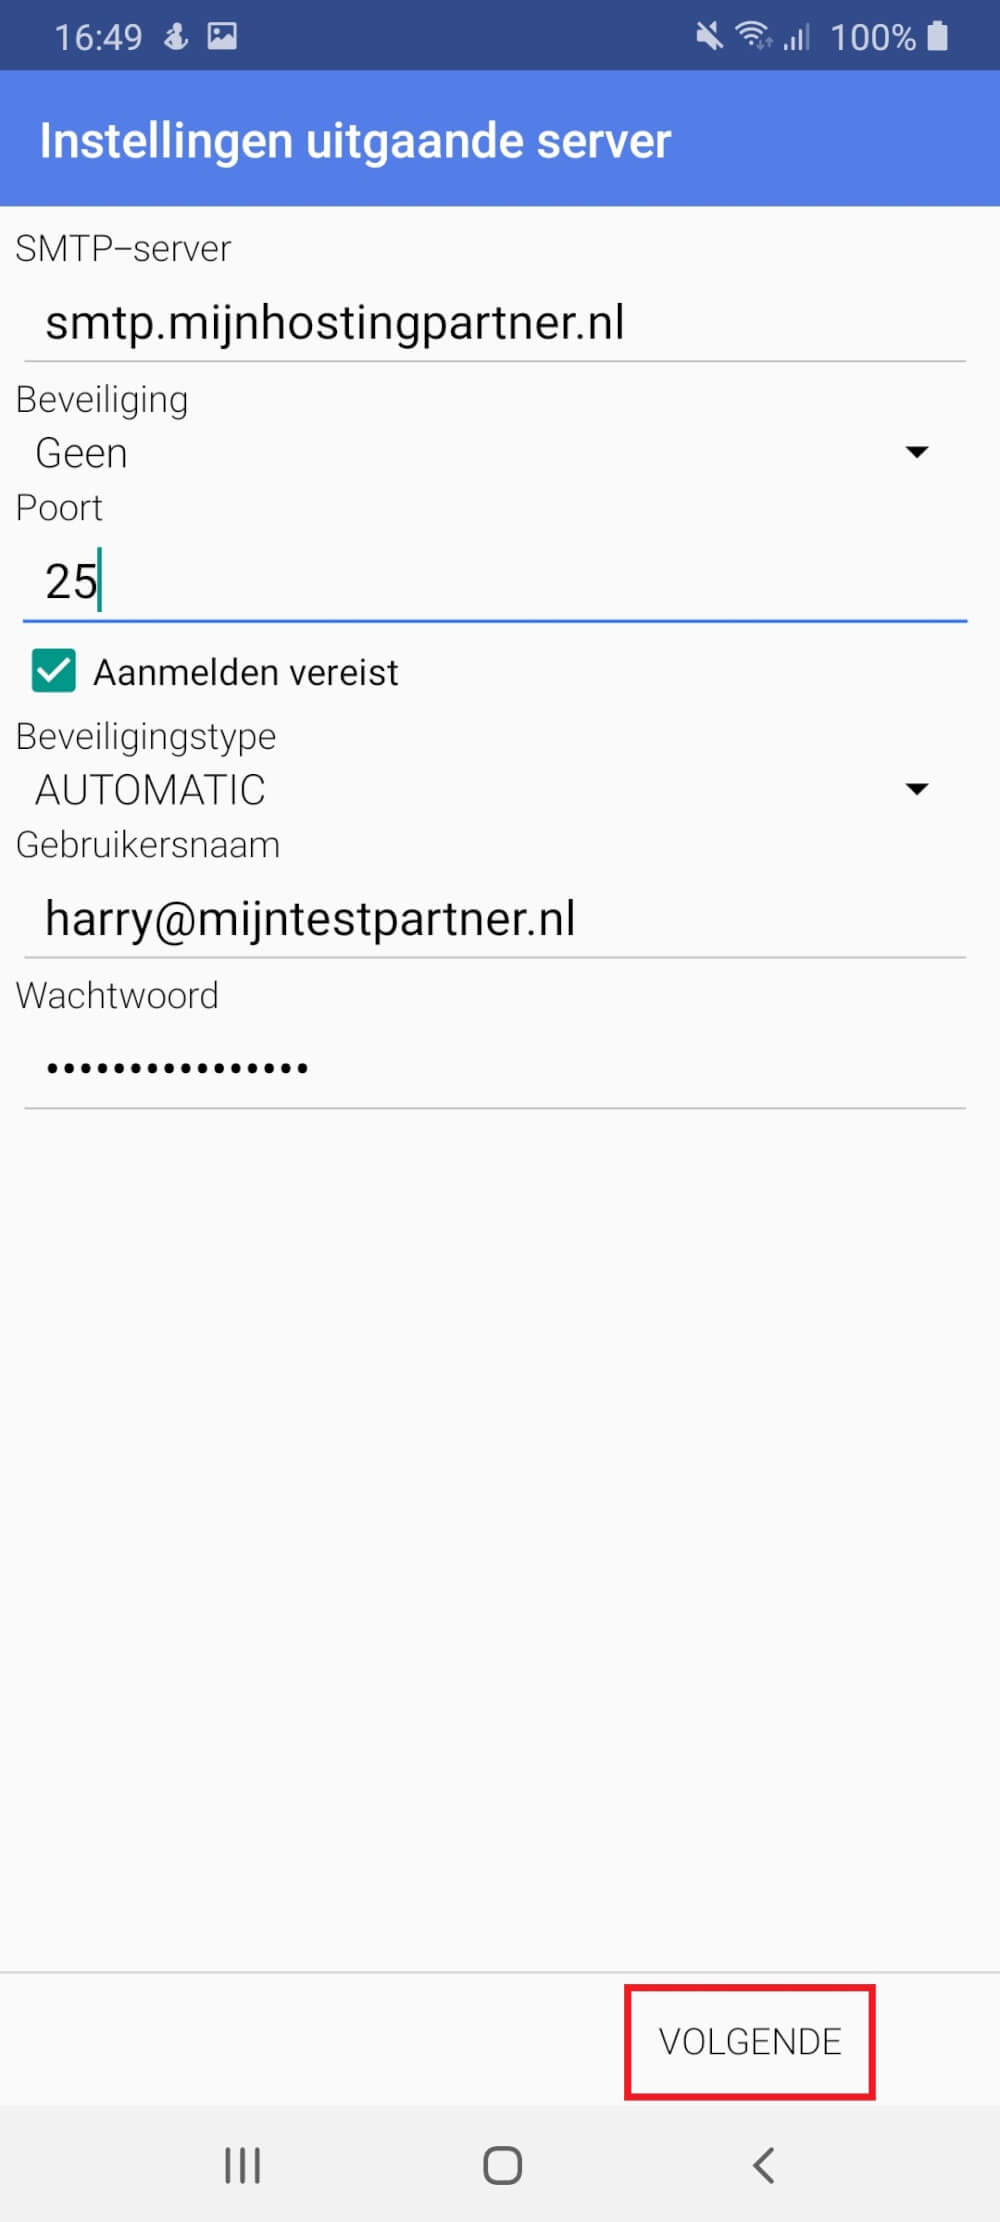
6 ) Then fill in the smtp server smtp.mijnhostingpartner.nl and set the port to 25.
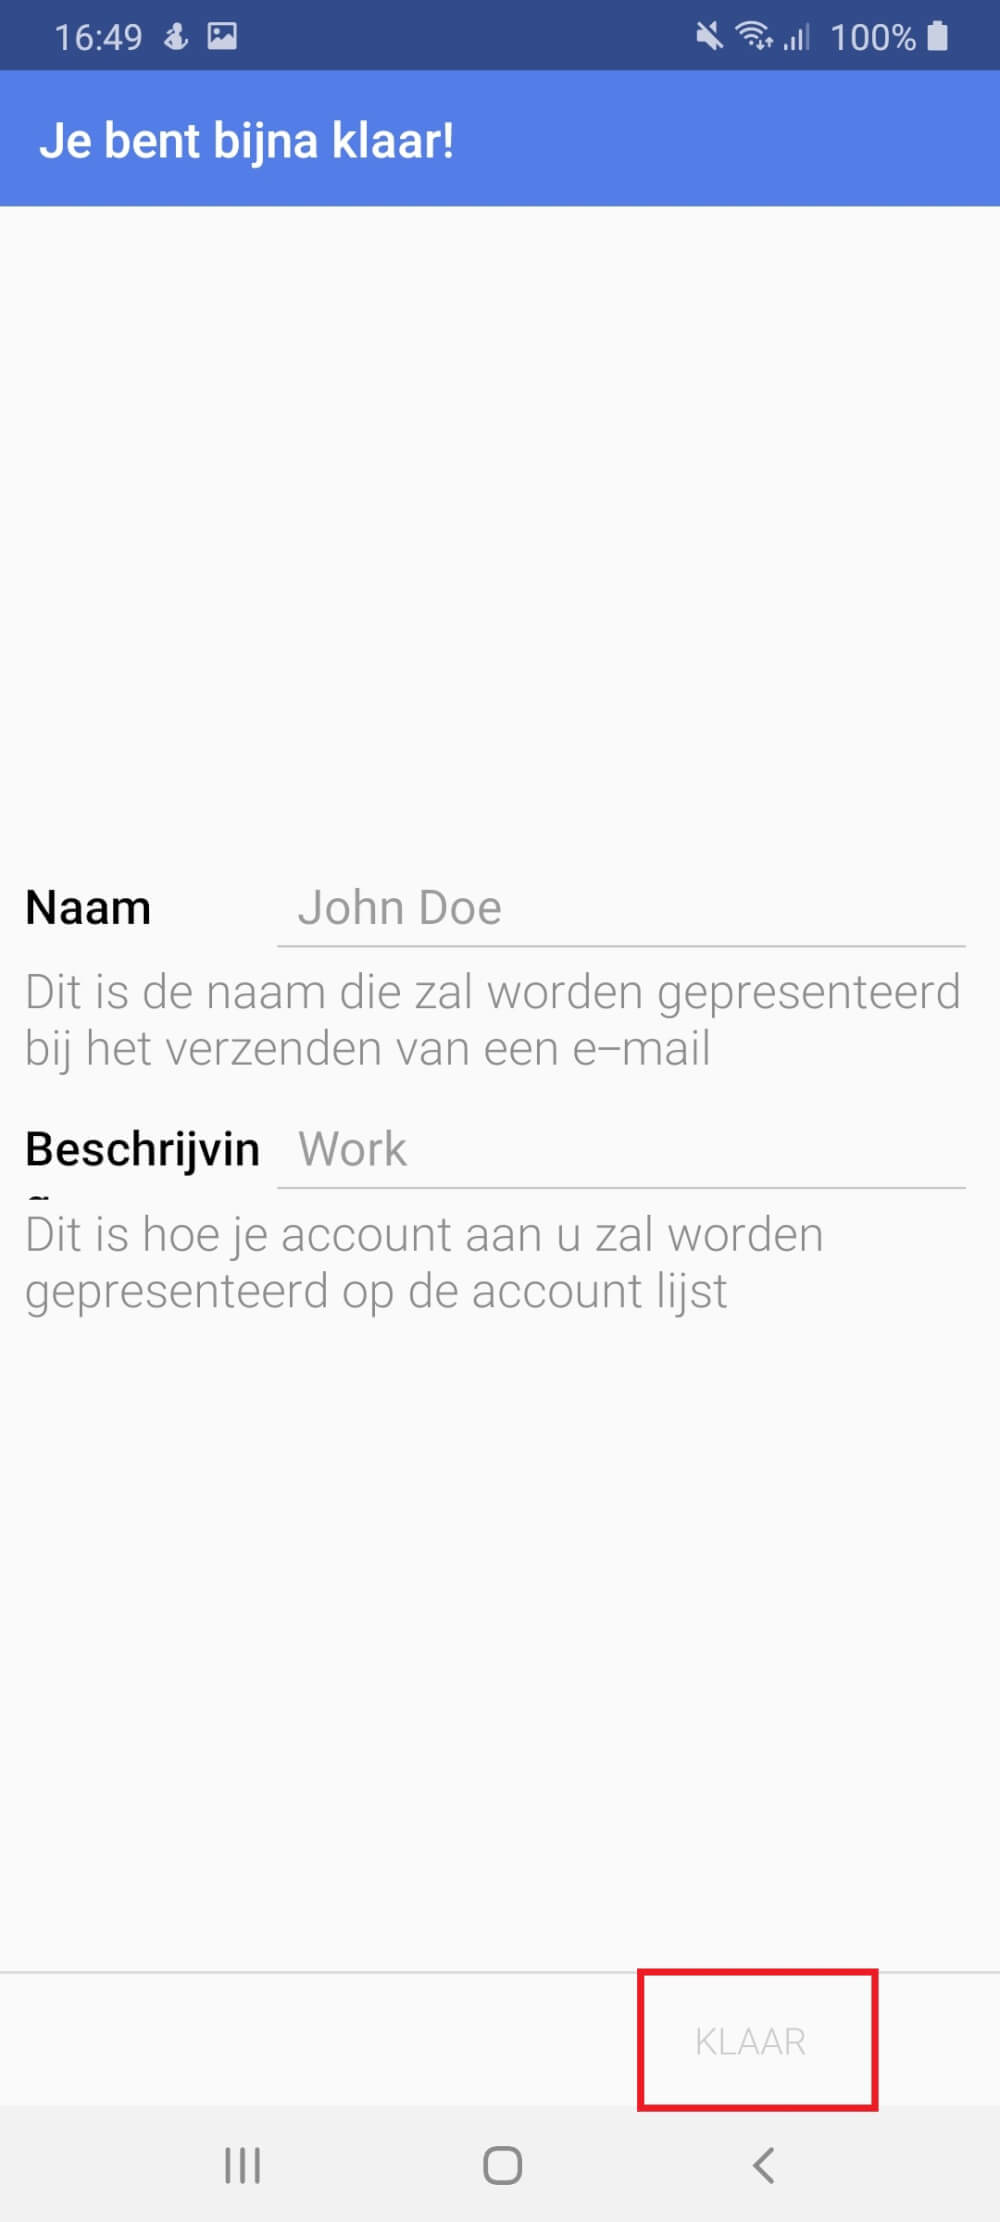
7 ) Then fill in the following information as you wish.
After this you are ready to use TypeApp as a mail client. If you have any questions about this, you can always see if there is a chat employee present.