Categories
Email setup - Outlook via control panel
This article explains how to set up an email address from MijnHostingPartner.nl within Outlook, especially for the latest versions of Outlook, it sometimes becomes difficult to manage the advanced settings. This way you can bypass this and access all the settings in any case. Which can be applicable not only so when setting up a new email address, but also for changing or viewing the settings used.
As always, first check that you have the correct data for the mail address by testing it briefly through the webmail, which is accessible in any browser with:
webmail.mijnhostingpartner.nl
To start this, close Outlook completely and go to the control panel / control panel within Windows, this can be done via the start menu and then type in Control panel. After this you open it and come to the following screen:
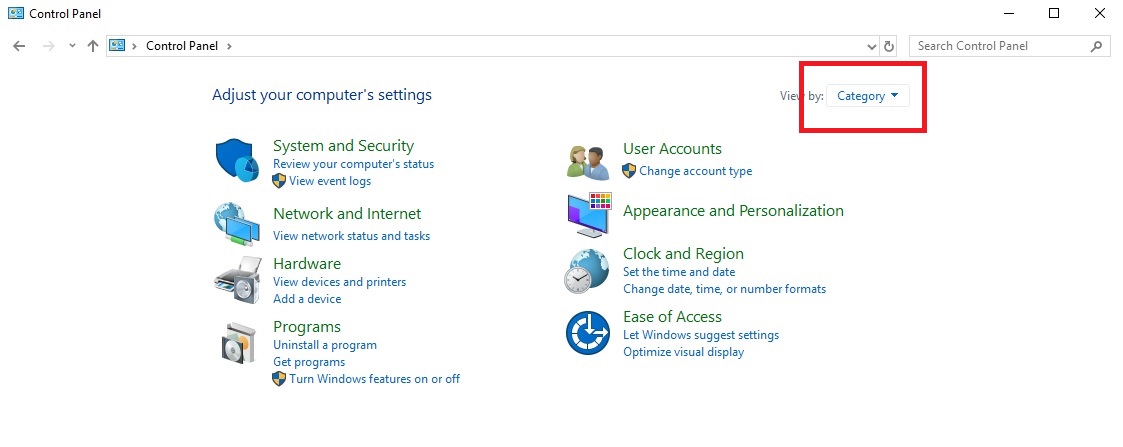
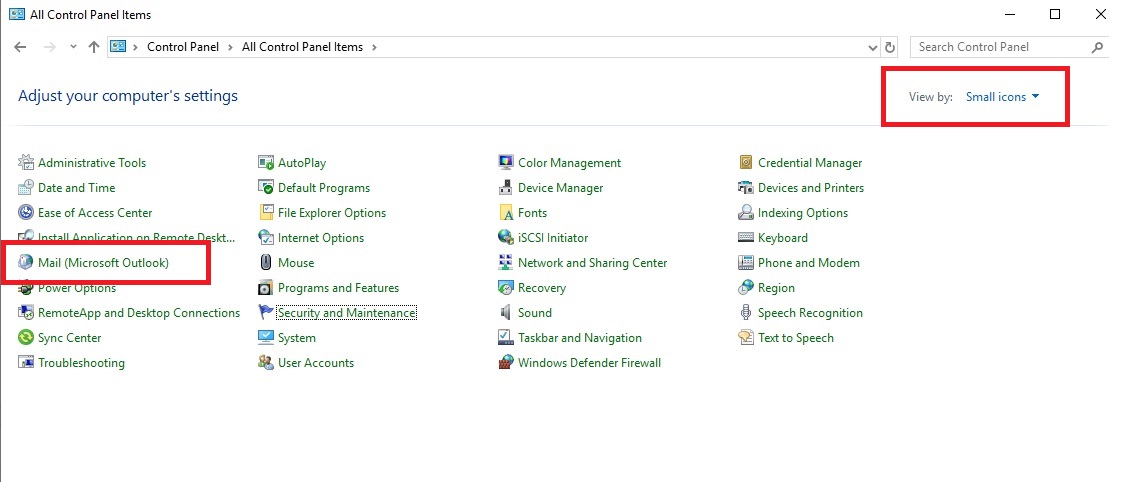
Here go to the option, and select small icons, and then to Mail (Microsoft Outlook) can also be described as Mail 32 or 64 bit.
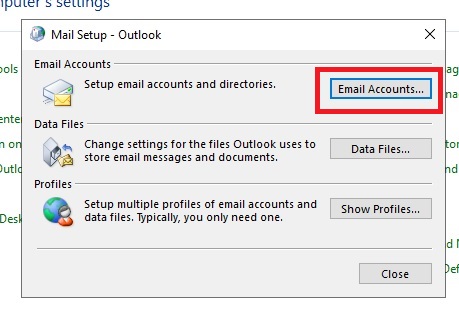
After this, the following screen will open, here you can click on Email Accounts to continue.
Click on your email address to change with change or repair, or add a new one with the new option.
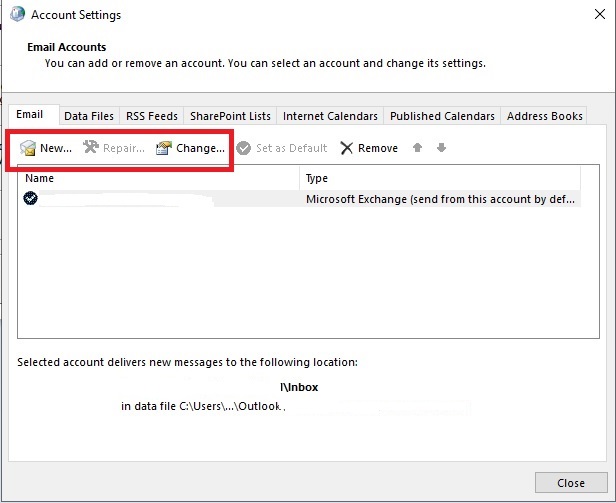
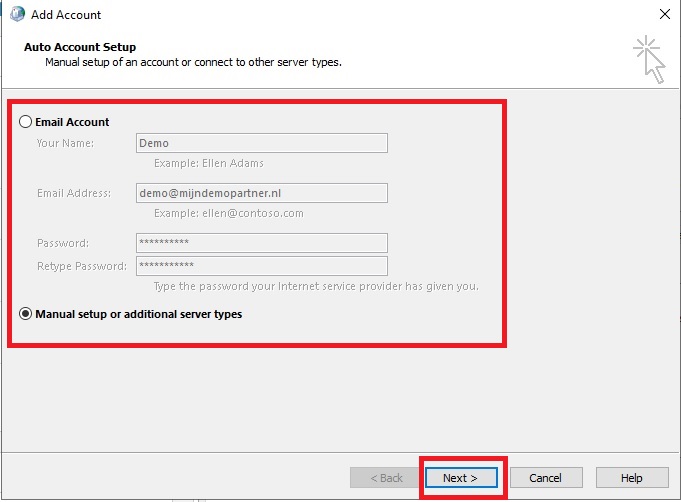
With add new email address fill in the necessary data, then select to enter it manually to continue.
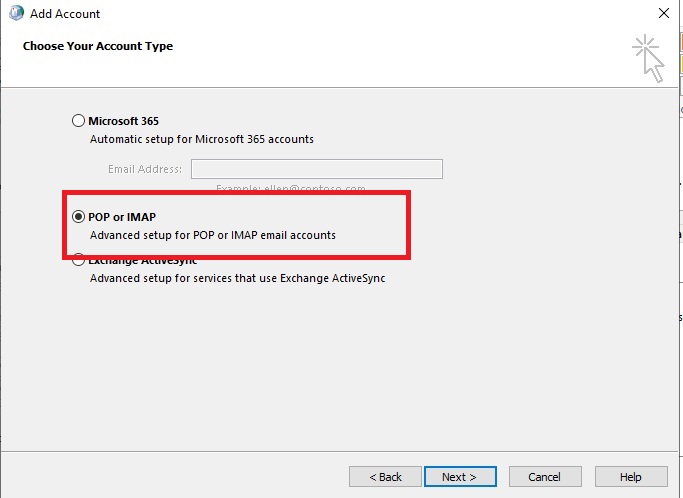
After continuing, select the option to continue POP / IMAP. After this you can proceed to those settings.
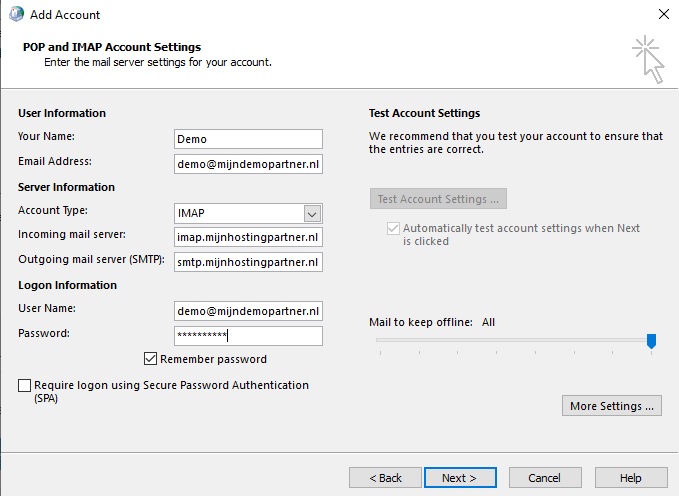
You then complete the necessary settings, we strongly recommend using IMAP. This works better between the webmail and locally within Outlook. So select that option. And enter:
imap.mijnhostingpartner.nl
smtp.mijnhostingpartner.nl
Once again the login information, email address and associated password.
After this, select More Settings to view and manage the additional settings. If you have previously chosen to repair or change the existing mail account you will be taken to this screen immediately.
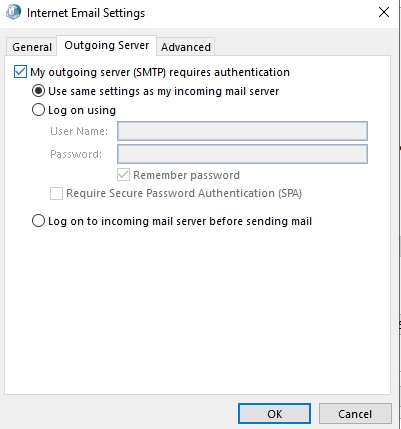
At the More Settings screen go to Outgoing Server, and uncheck My outgoing server SMTP requires authentication. The same settings can be used for this as for the incoming server.
Then go to the third tab Advanced, to see the settings such as ports and security. These can vary by network and location, so check the options you have. We have the actual ports in the next article, use those to troubleshoot further should you not succeed with the default ports:
Default data is indicated as follows in the screenshot:
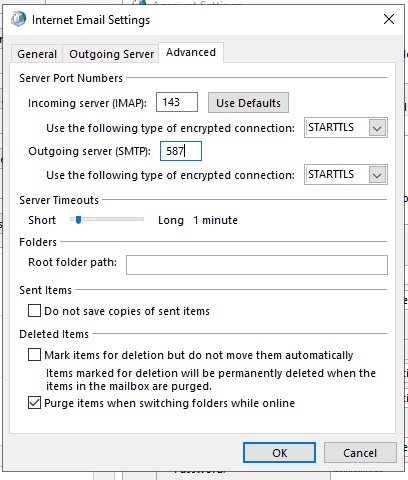
Make sure you also turn on security here, so see the article above for the actual data for this.
After this it is a matter of pressing OK and testing the account settings. Here you can immediately see whether it works or not. Then finish this.
If it does not work, take screenshots of your settings as we have done here. And report this to us in a ticket, together with your IP address as you can check on watismijnip.nl for example. Then we can check for you what is going wrong here. Remember, as long as the webmail works in a browser, you can always access your email.