Categories
Setting up e-mail - Android 7
Notice! This article is out of date. Below is the new version of this article:
Setup e-mail - Android 14
Setup e-mail - Android 14
To set up your email account from your web hosting at MijnHostingPartner.nl within Android 7, you can follow the following steps. These steps take into account the Gmail app.
For the standard Email app of Android just use the original article from Android 5.
Always check first if you can login to the webmail with the email account via the following link.
1) Goto the settings of Android 7 to set up your mail account.
After this you can go to settings within your phone and select Accounts.
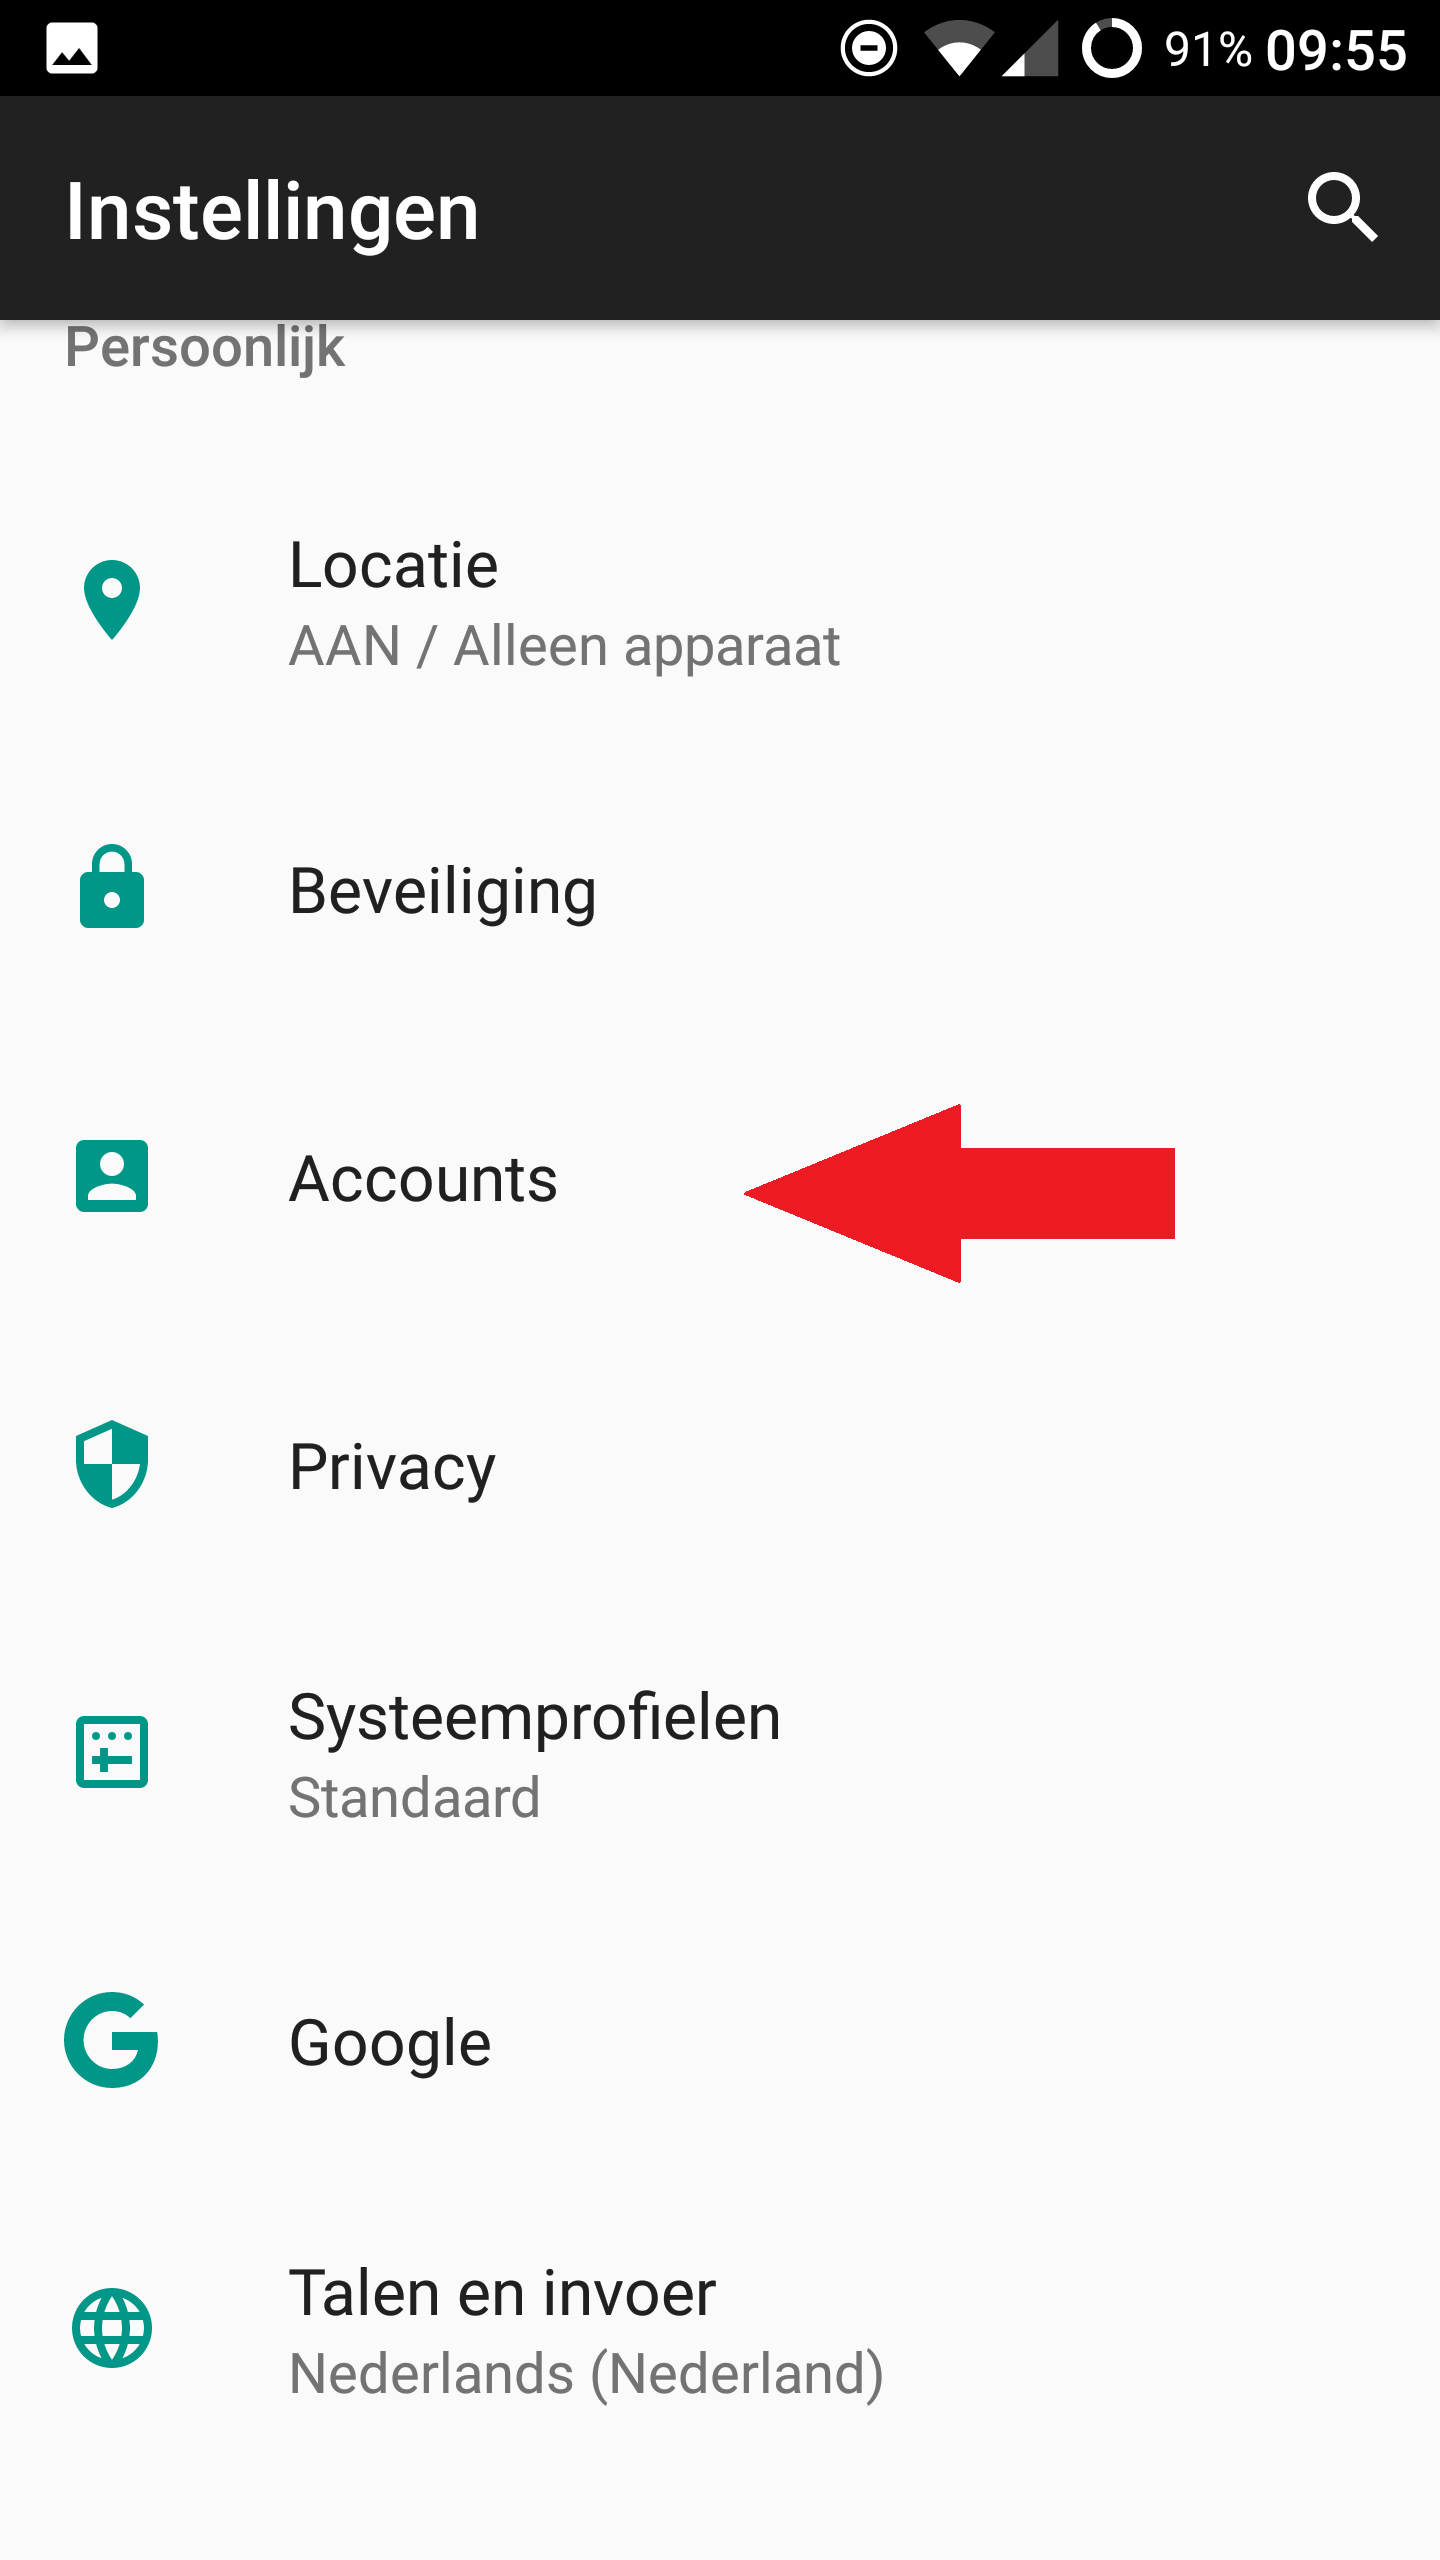
2) Set upEmail Account on Android 7
Then click on Add Account and select IMAP for gmail.
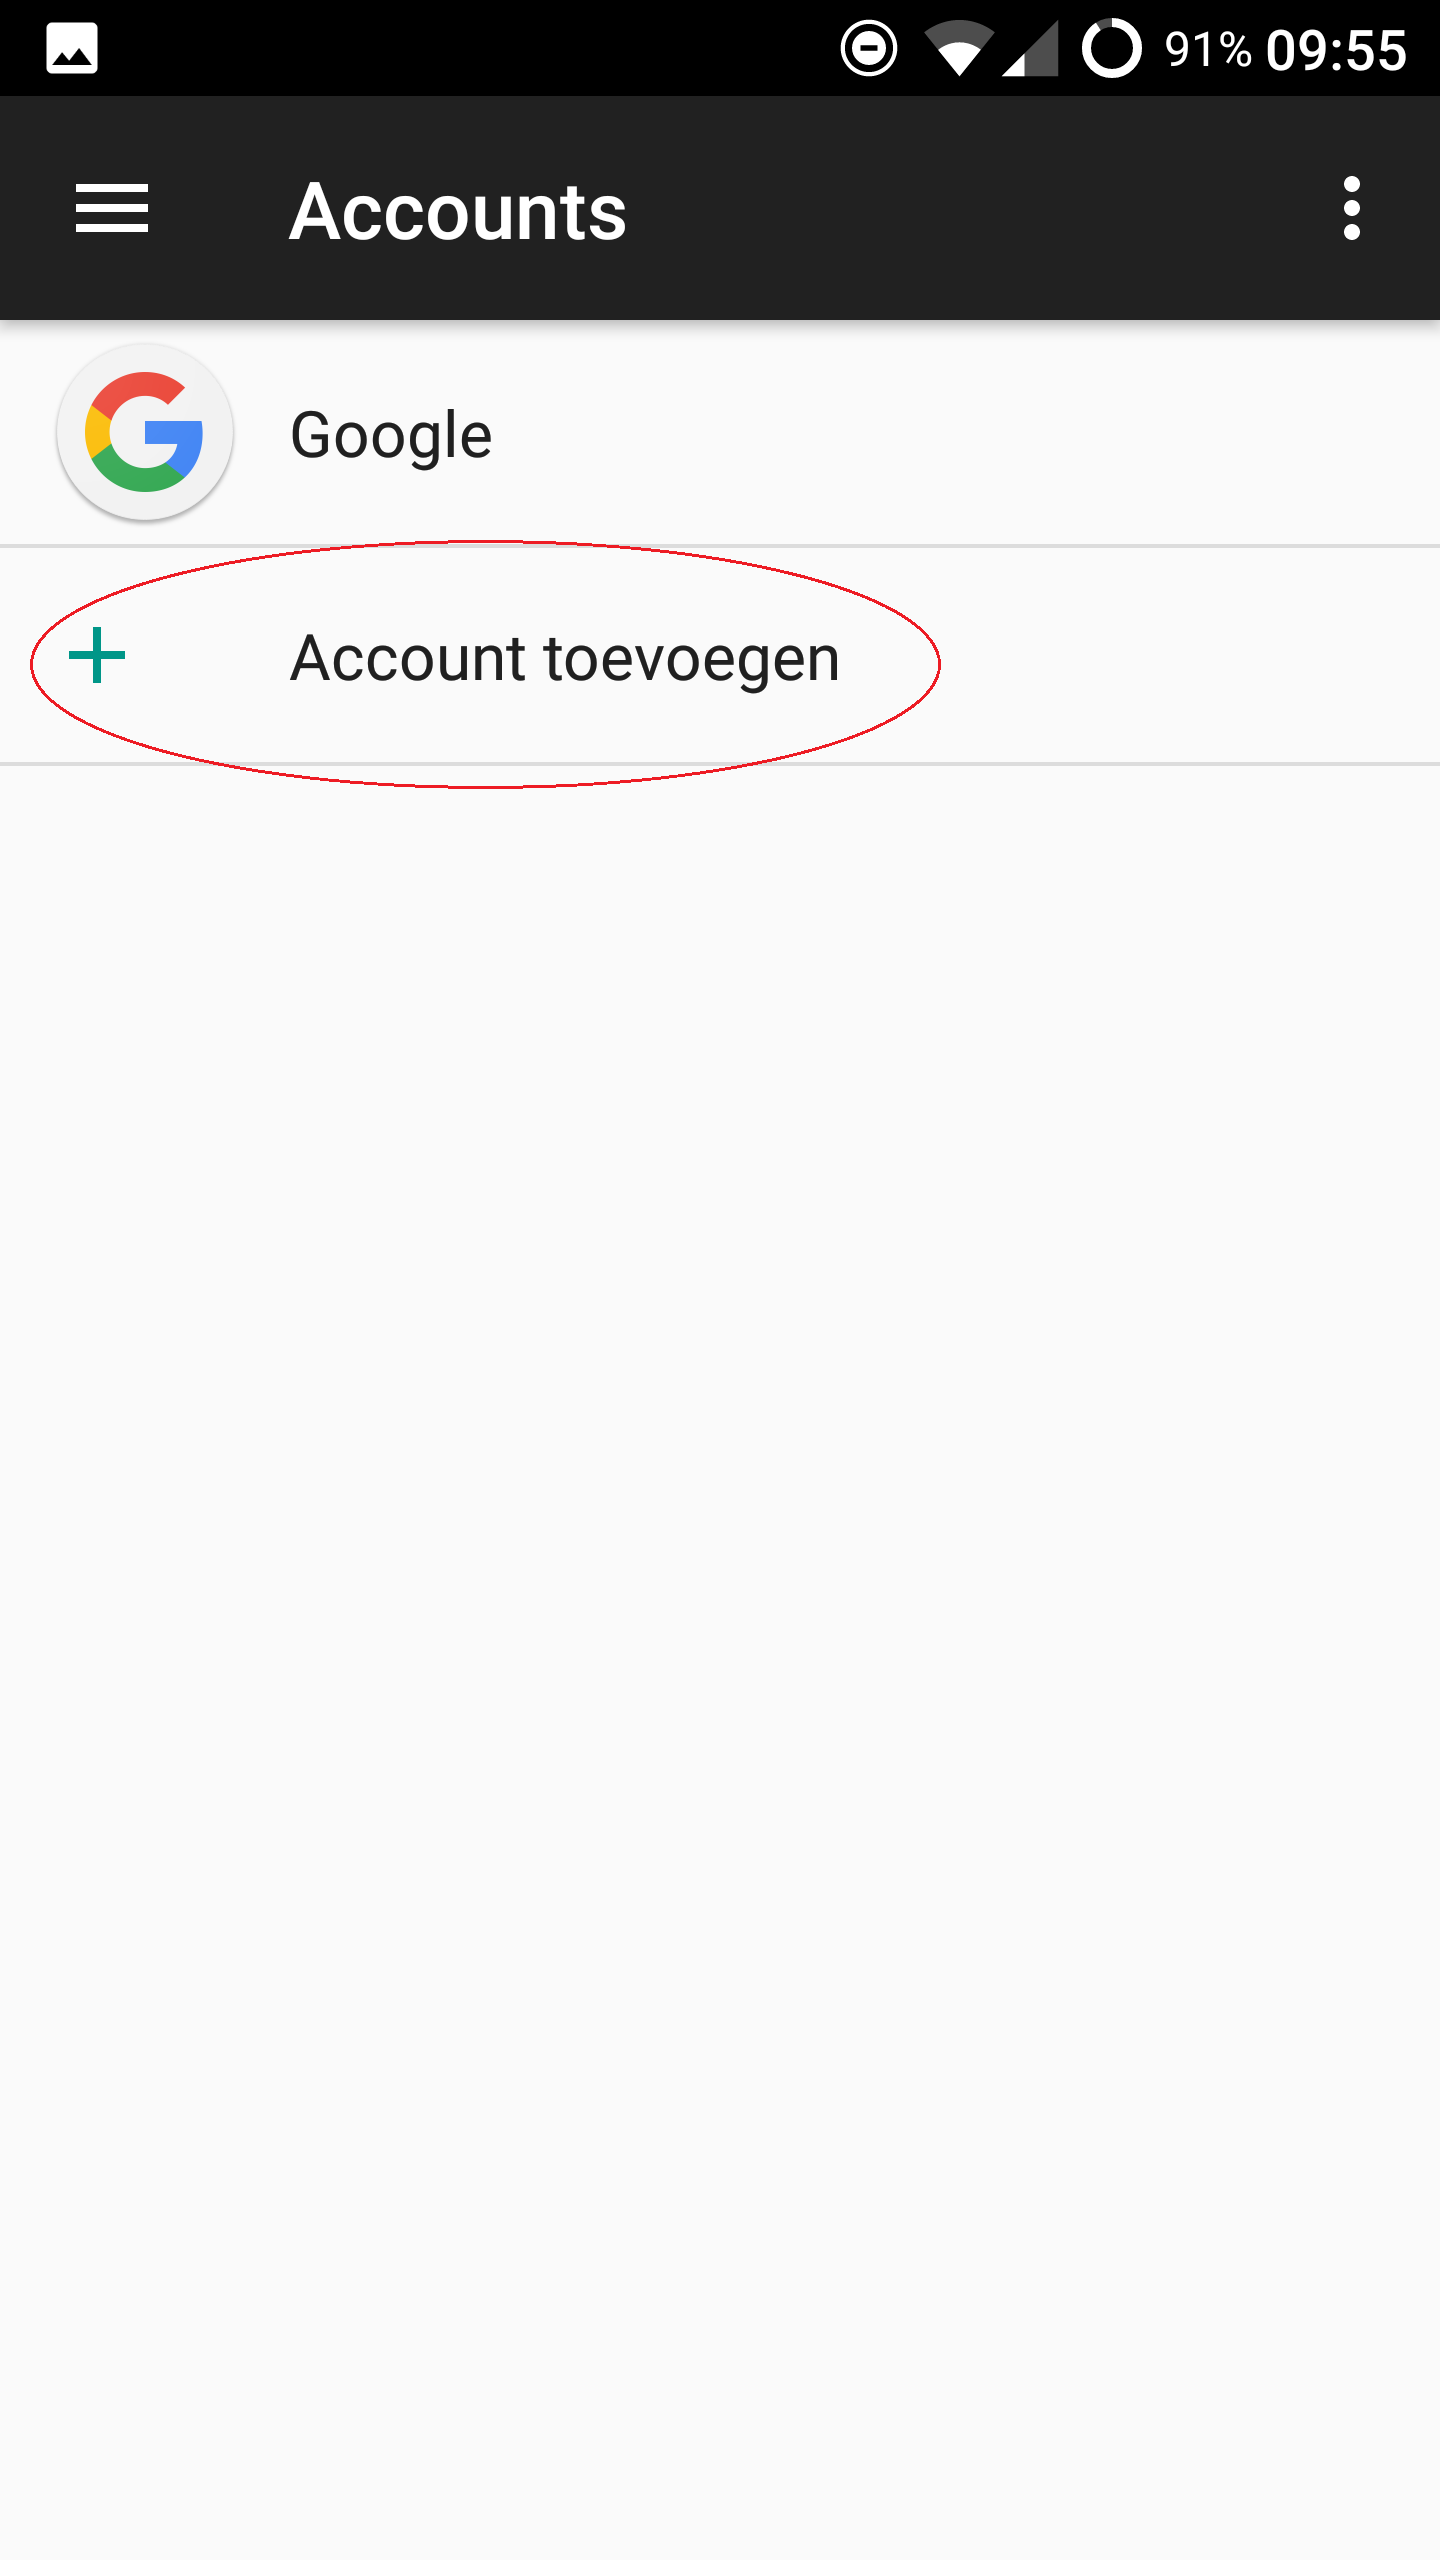
3 ) Set up an email account on Android 7
Enter the email address in the next screen and combine it with the server mijnhostingpartner.nl. This must first be put down without the Imap.
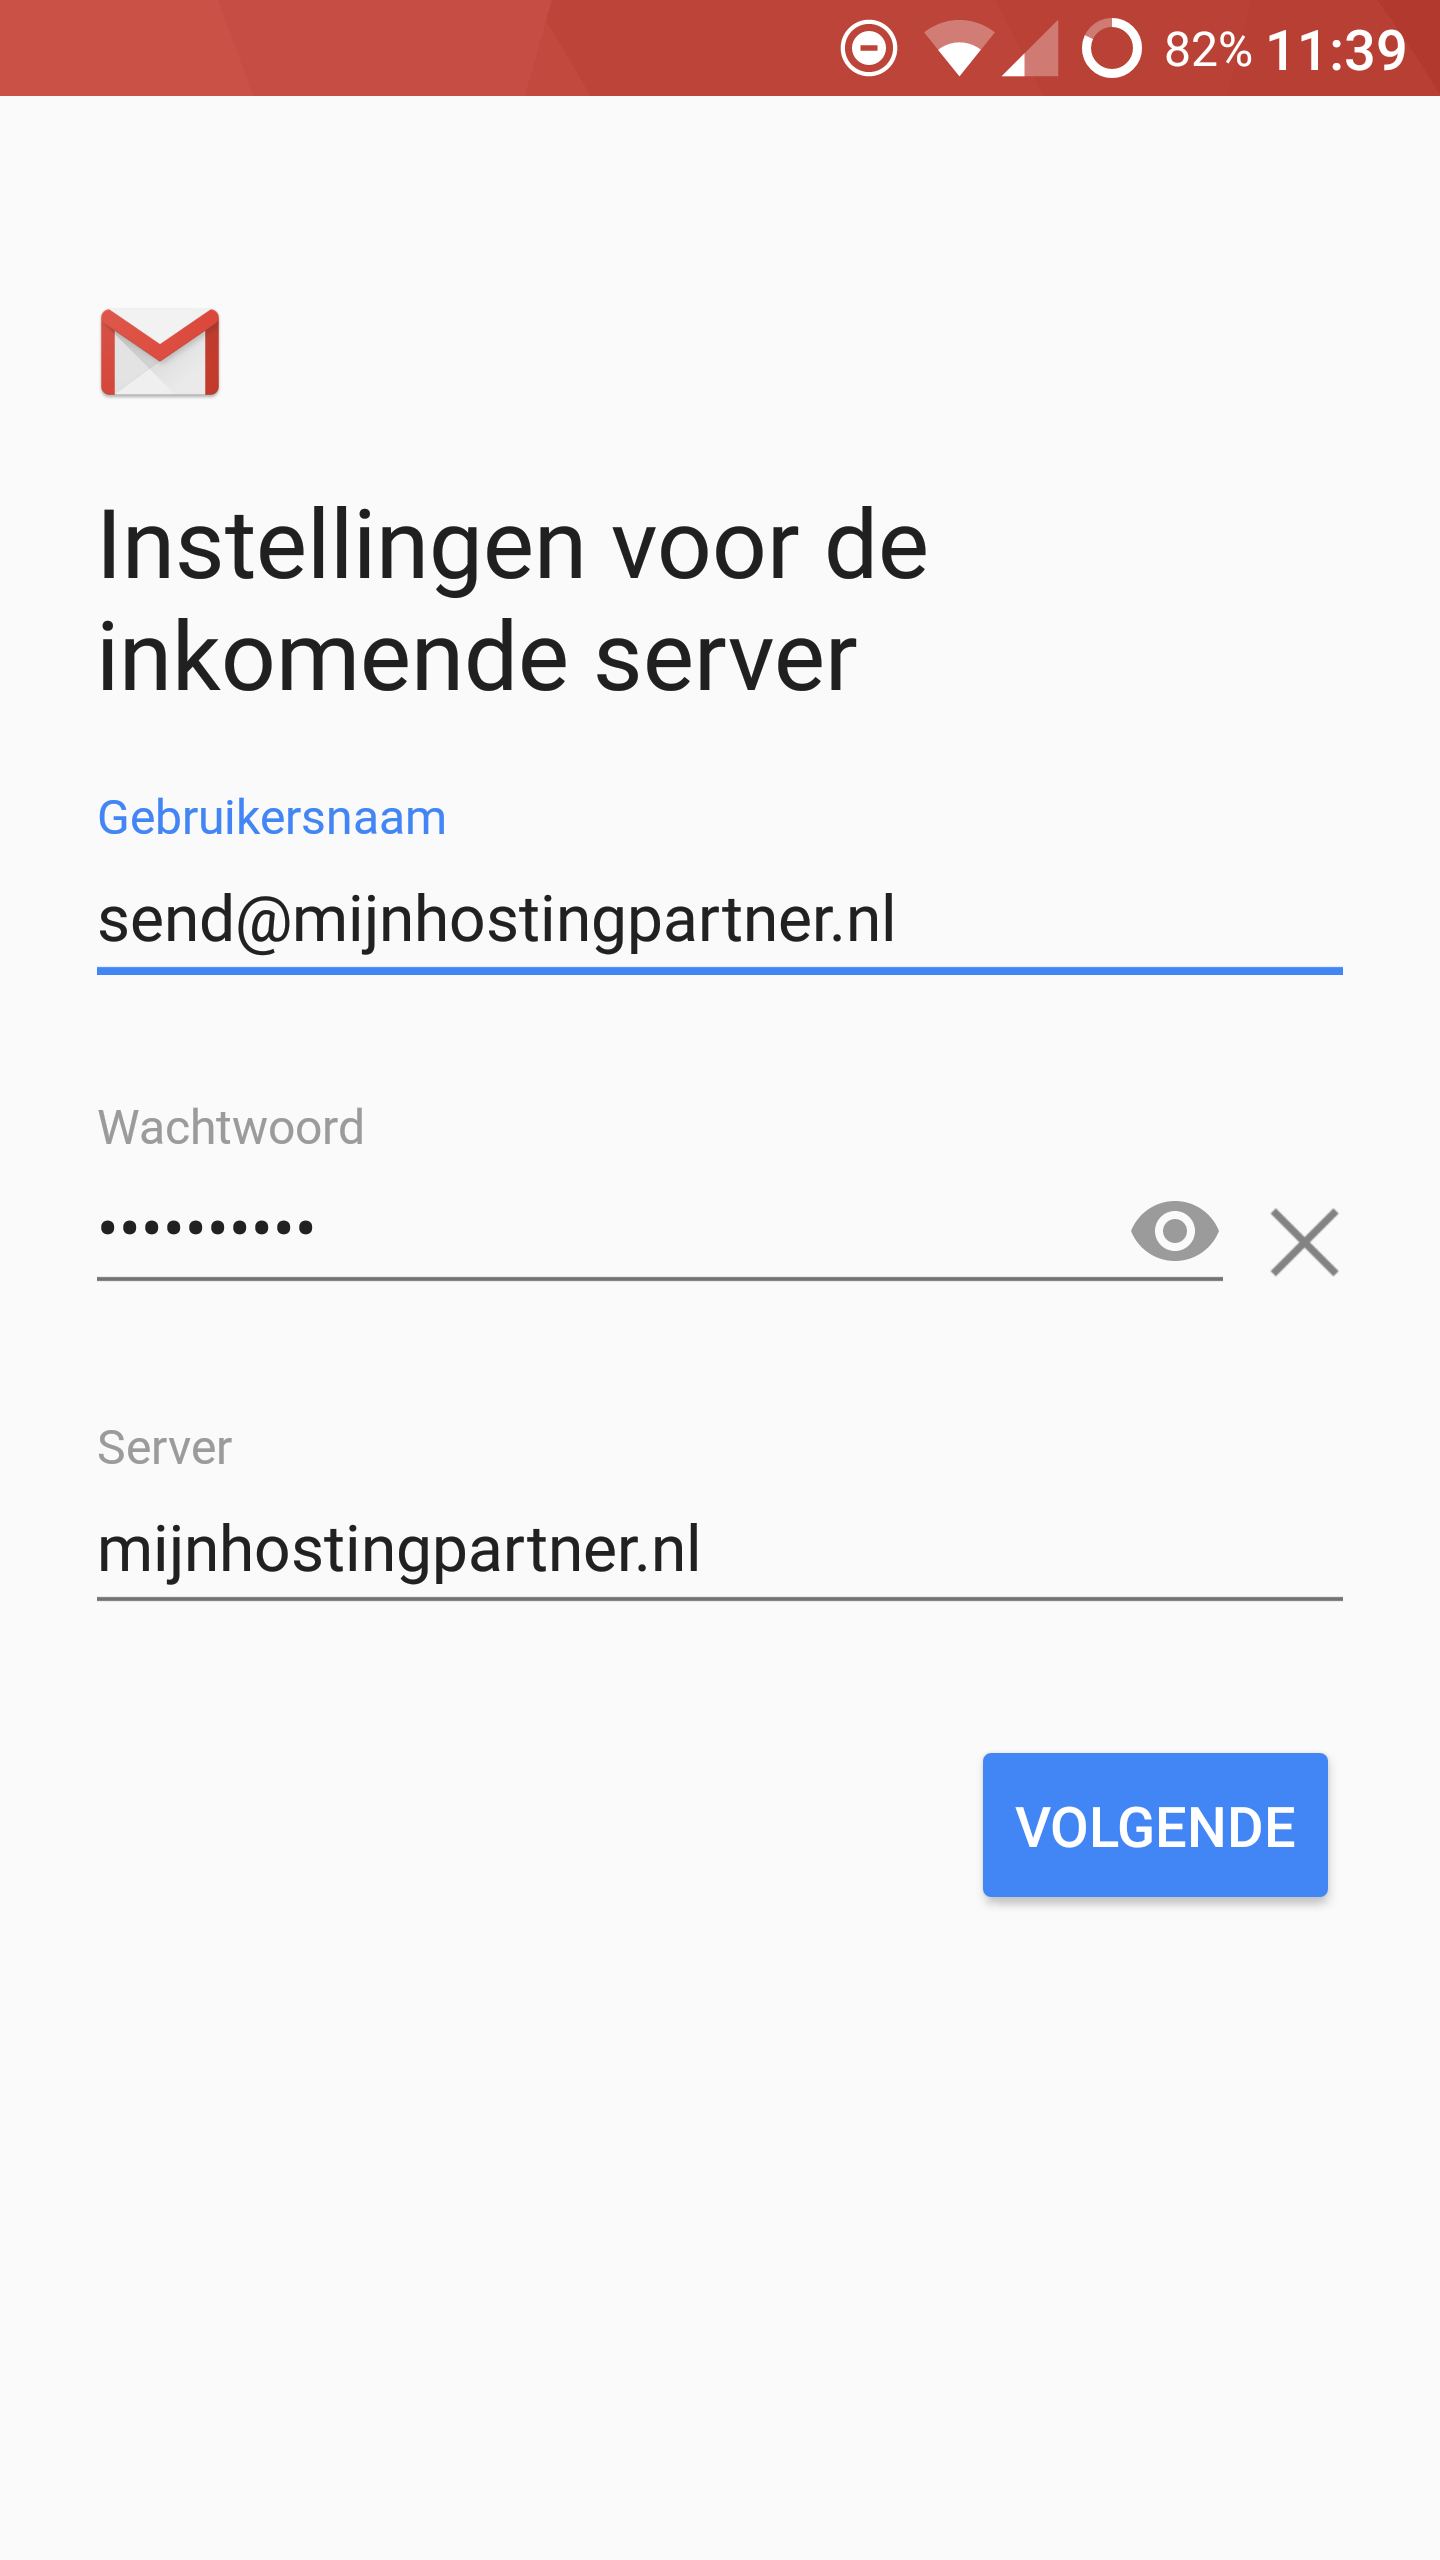
4) Email Account Setup on Android 7
In the additional settings that then appear in the next screen, change the host to the full one. And change the settings
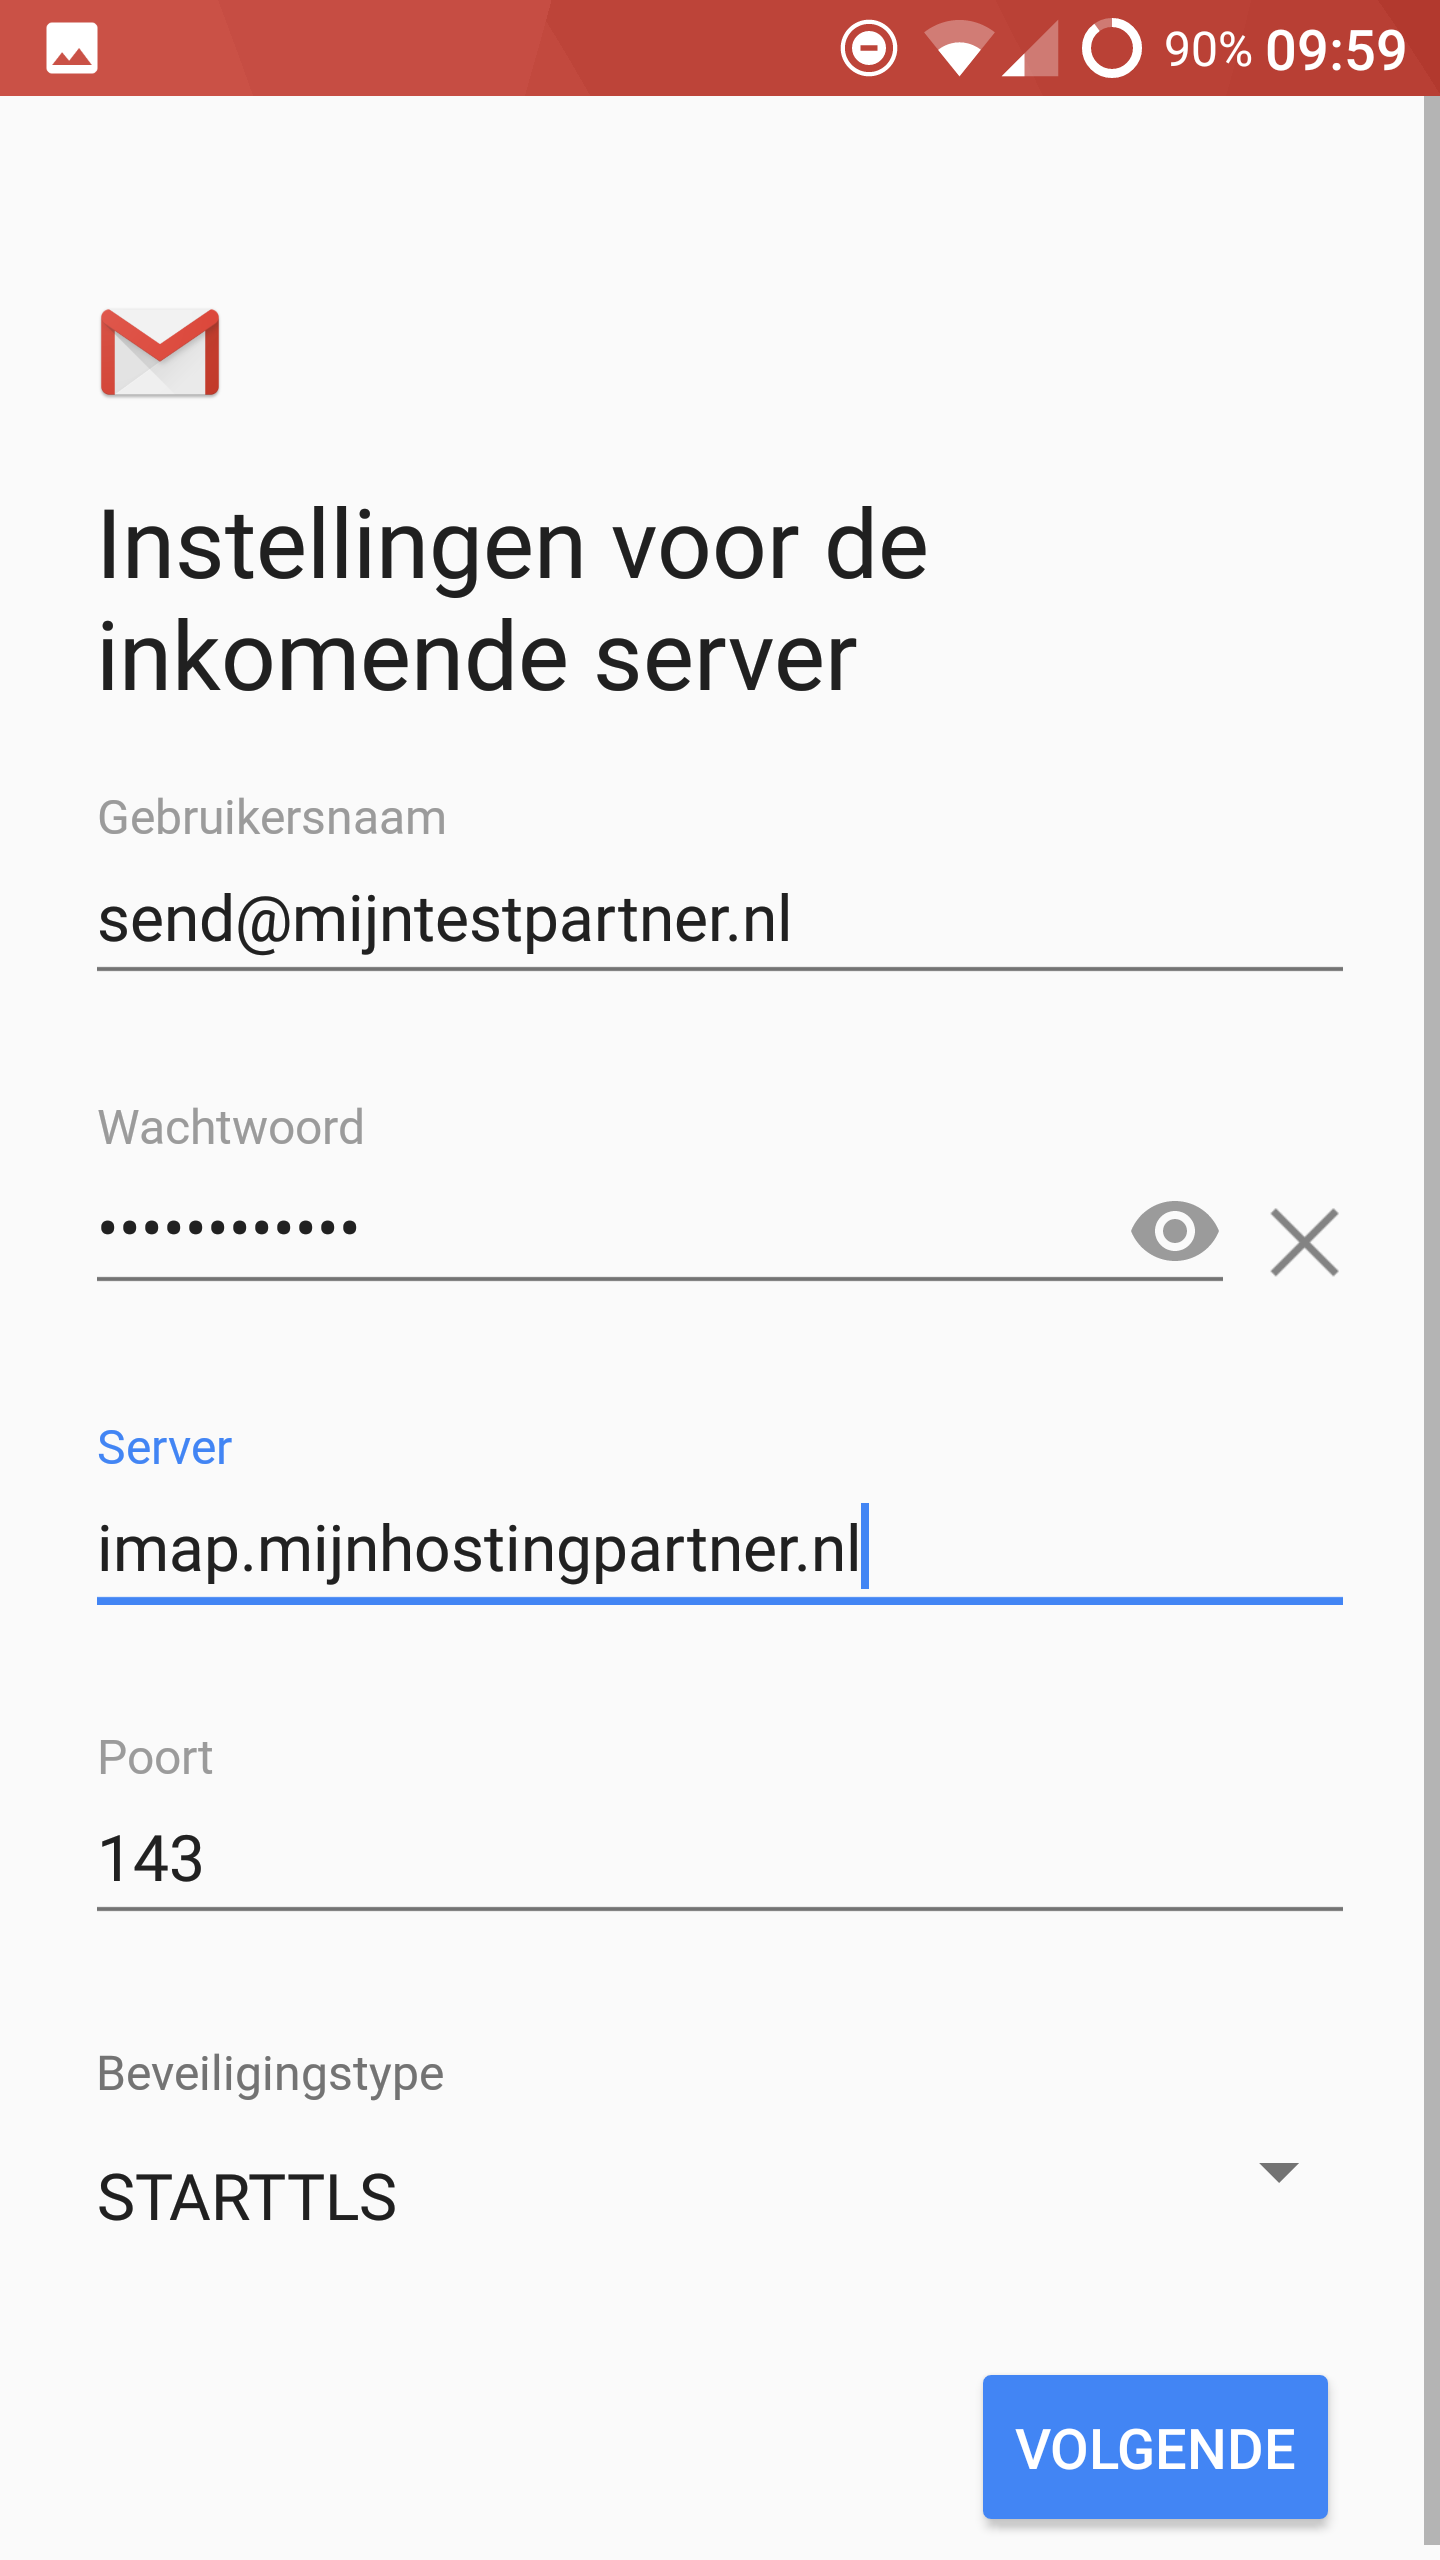
5) Email Account Setup on Android 7
Outgoing mail server is to sign up again in the following way to make the additional settings.
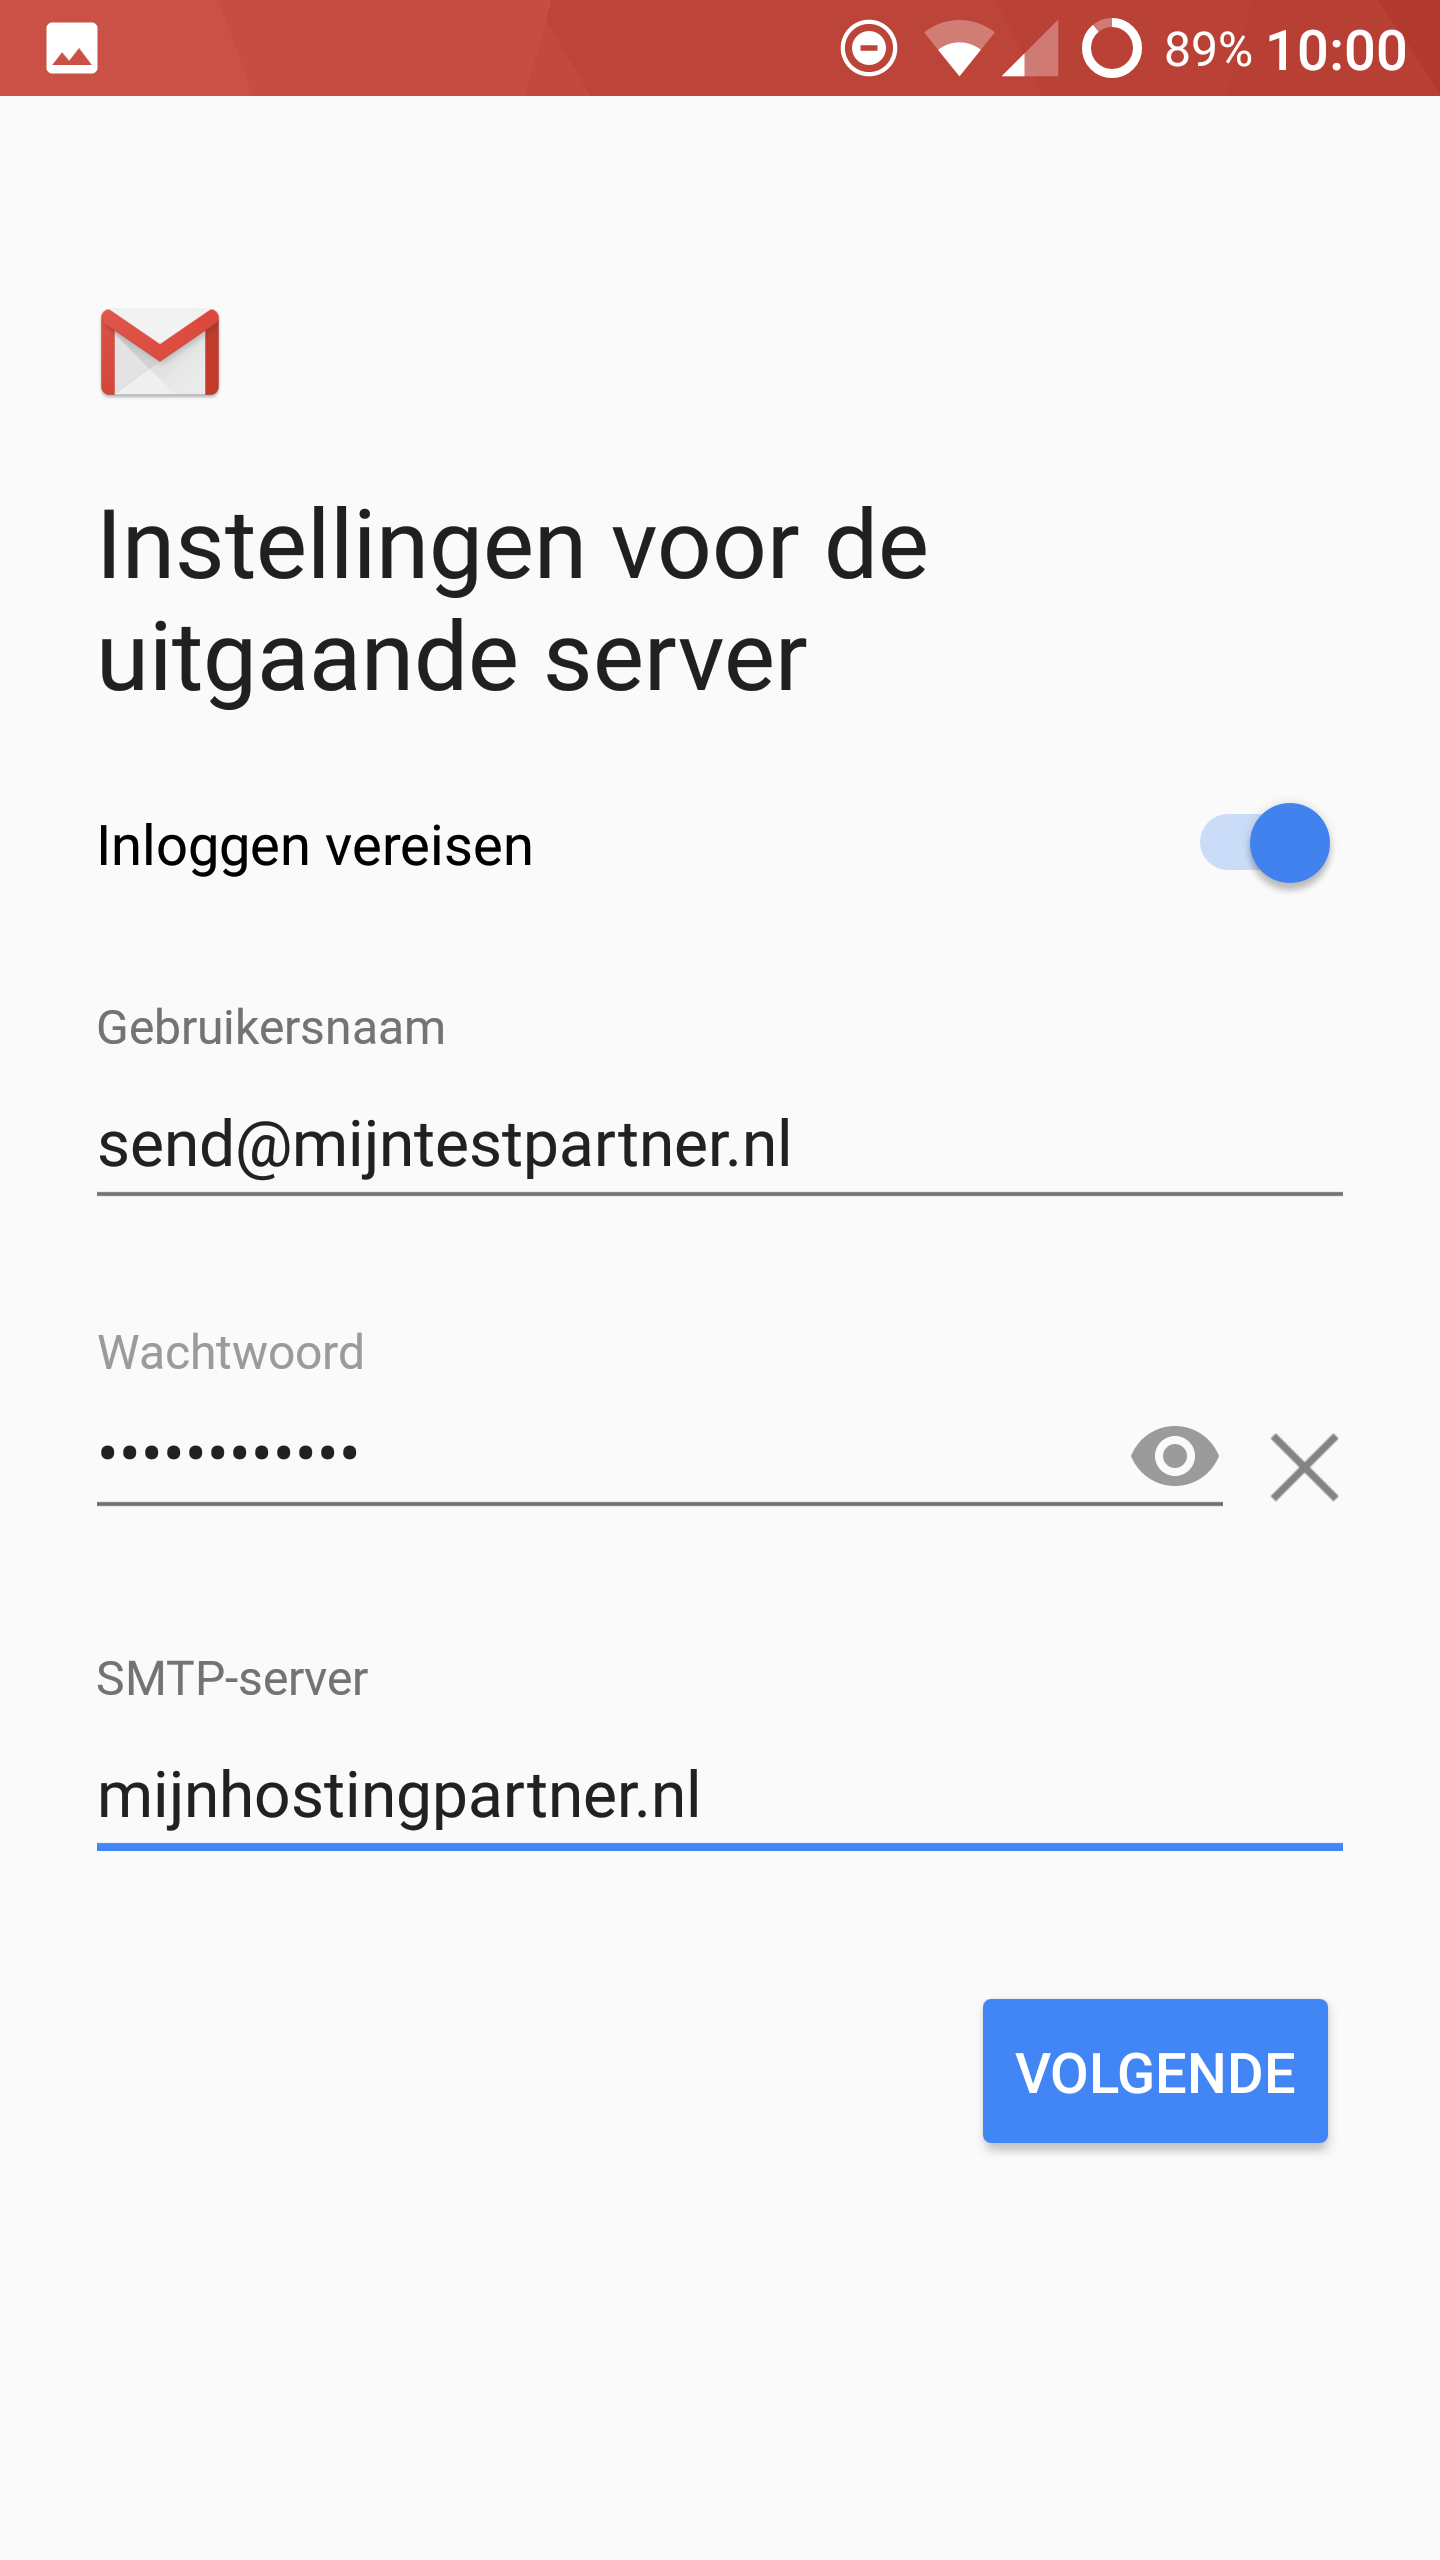
6)Email Account Setup on Android 7Click on continue here. The security is discussed in the next screen.
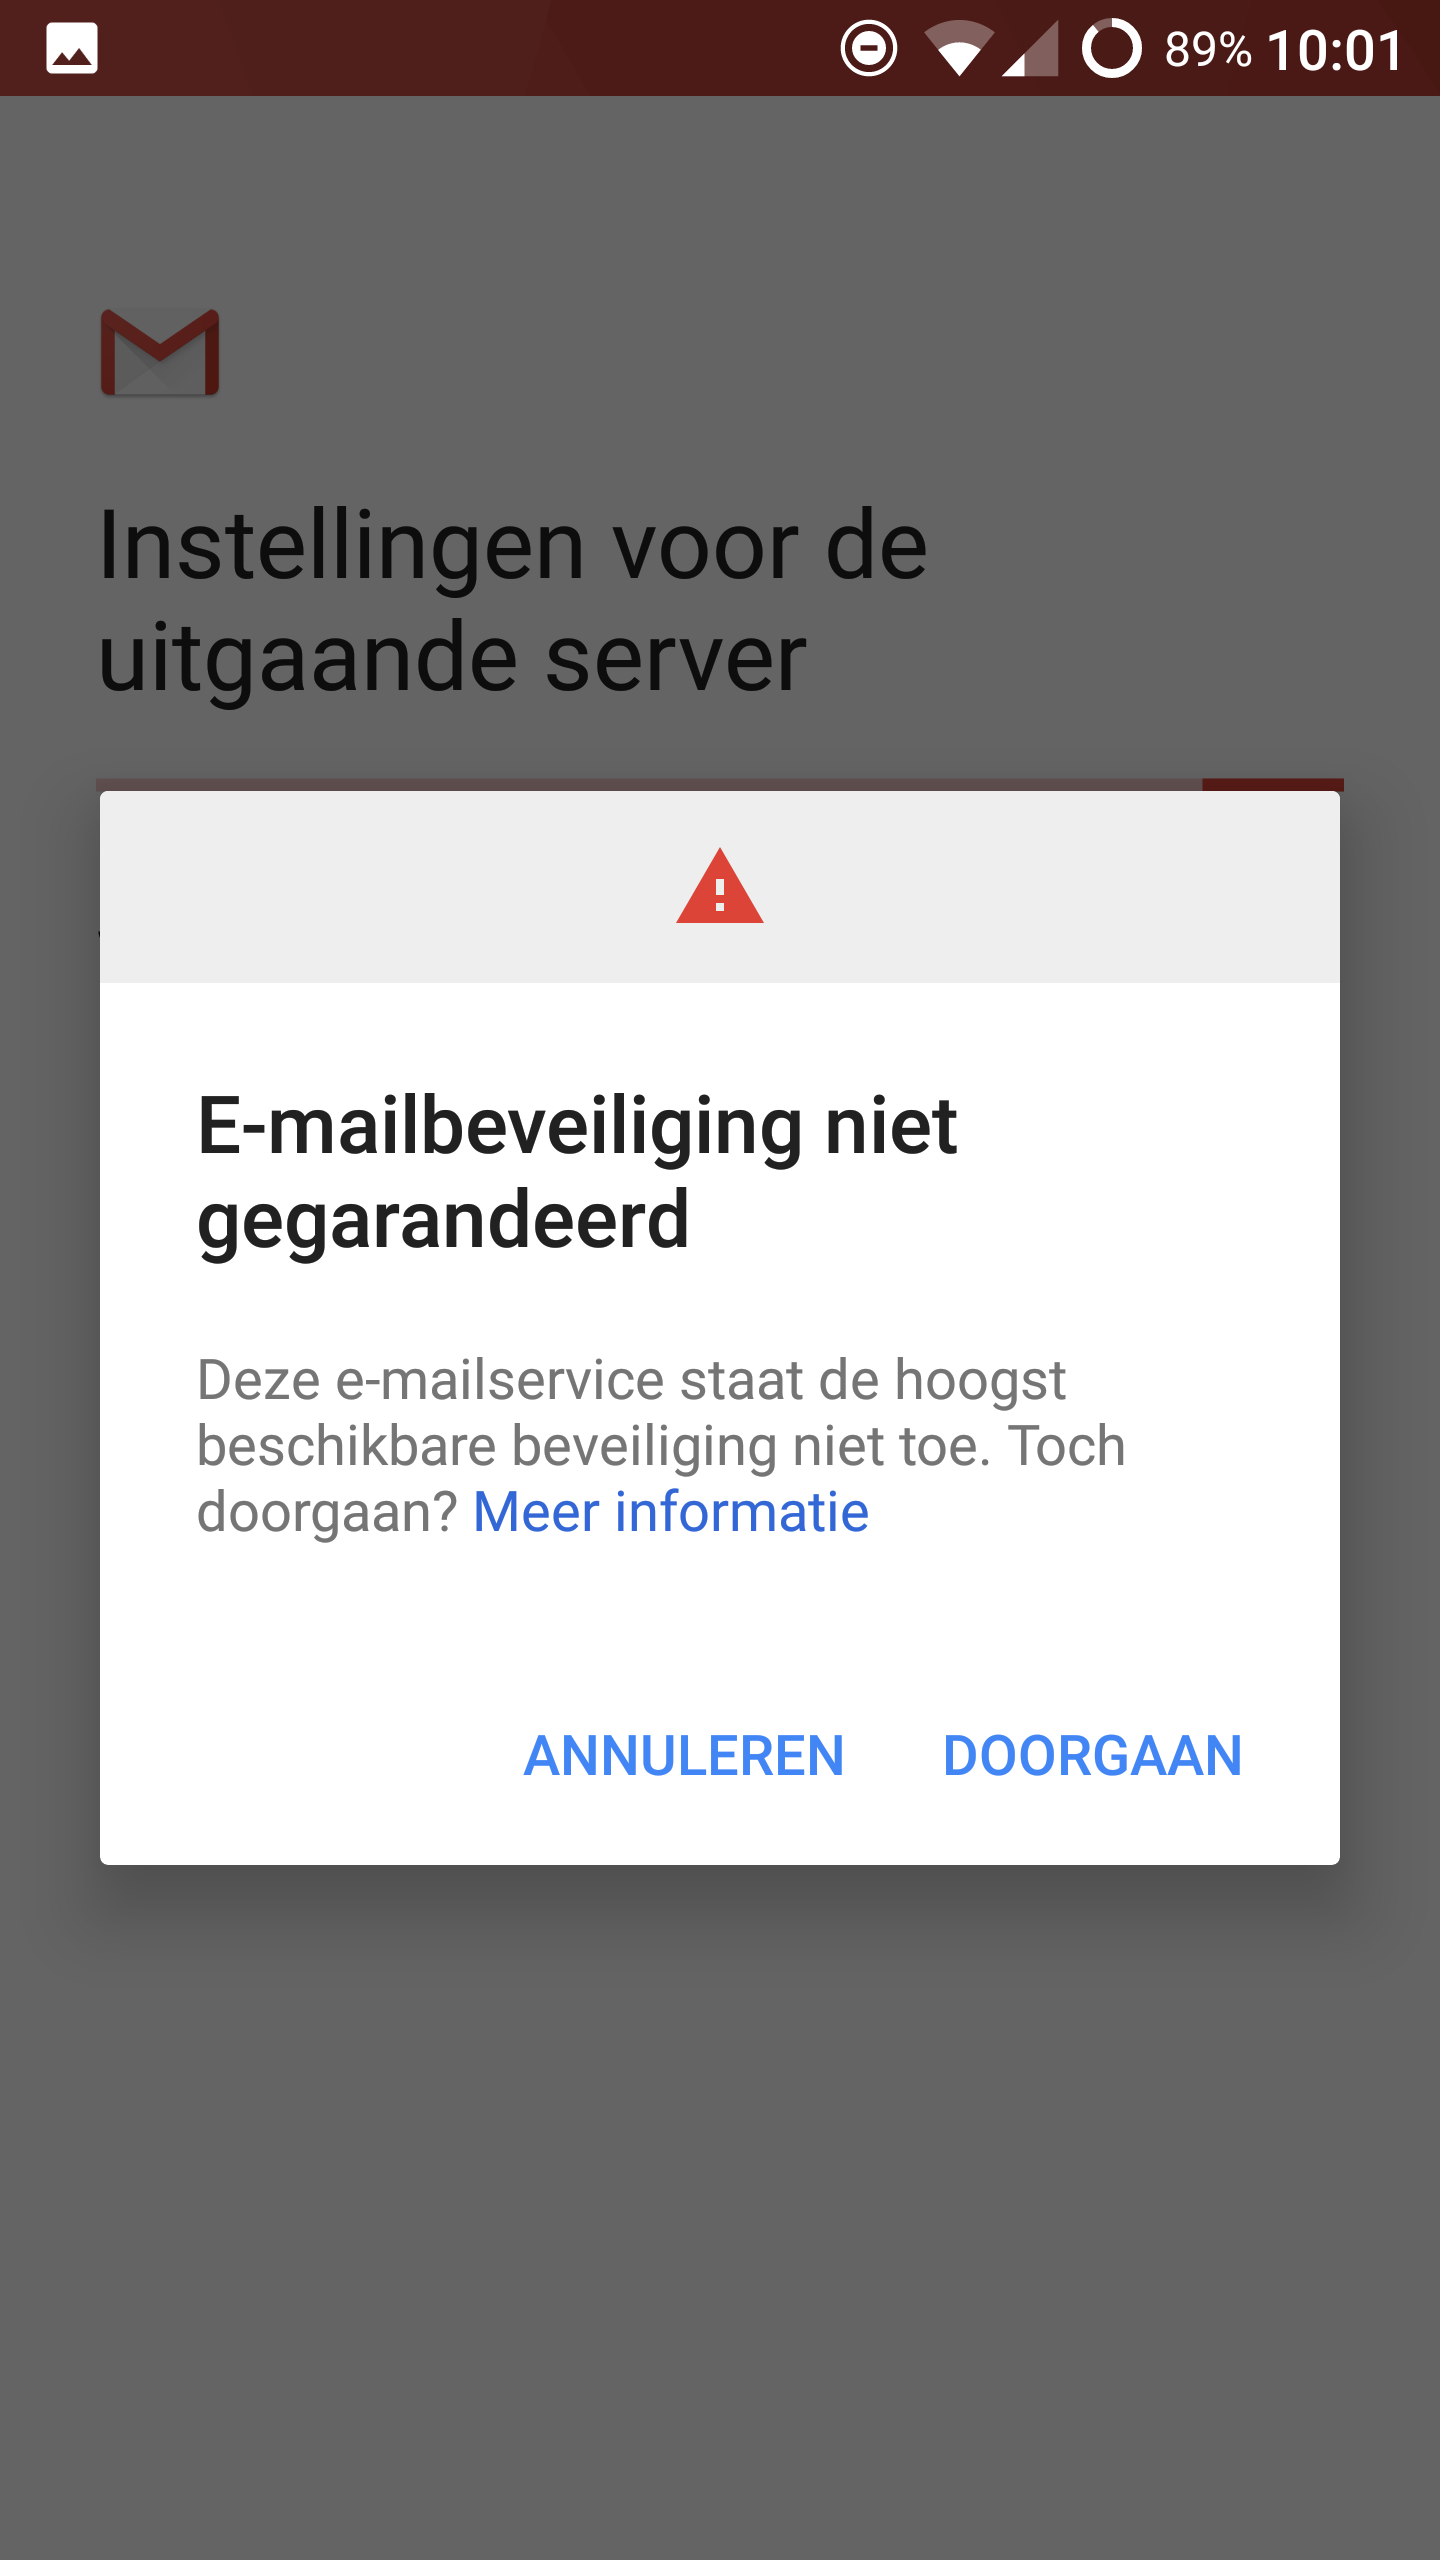
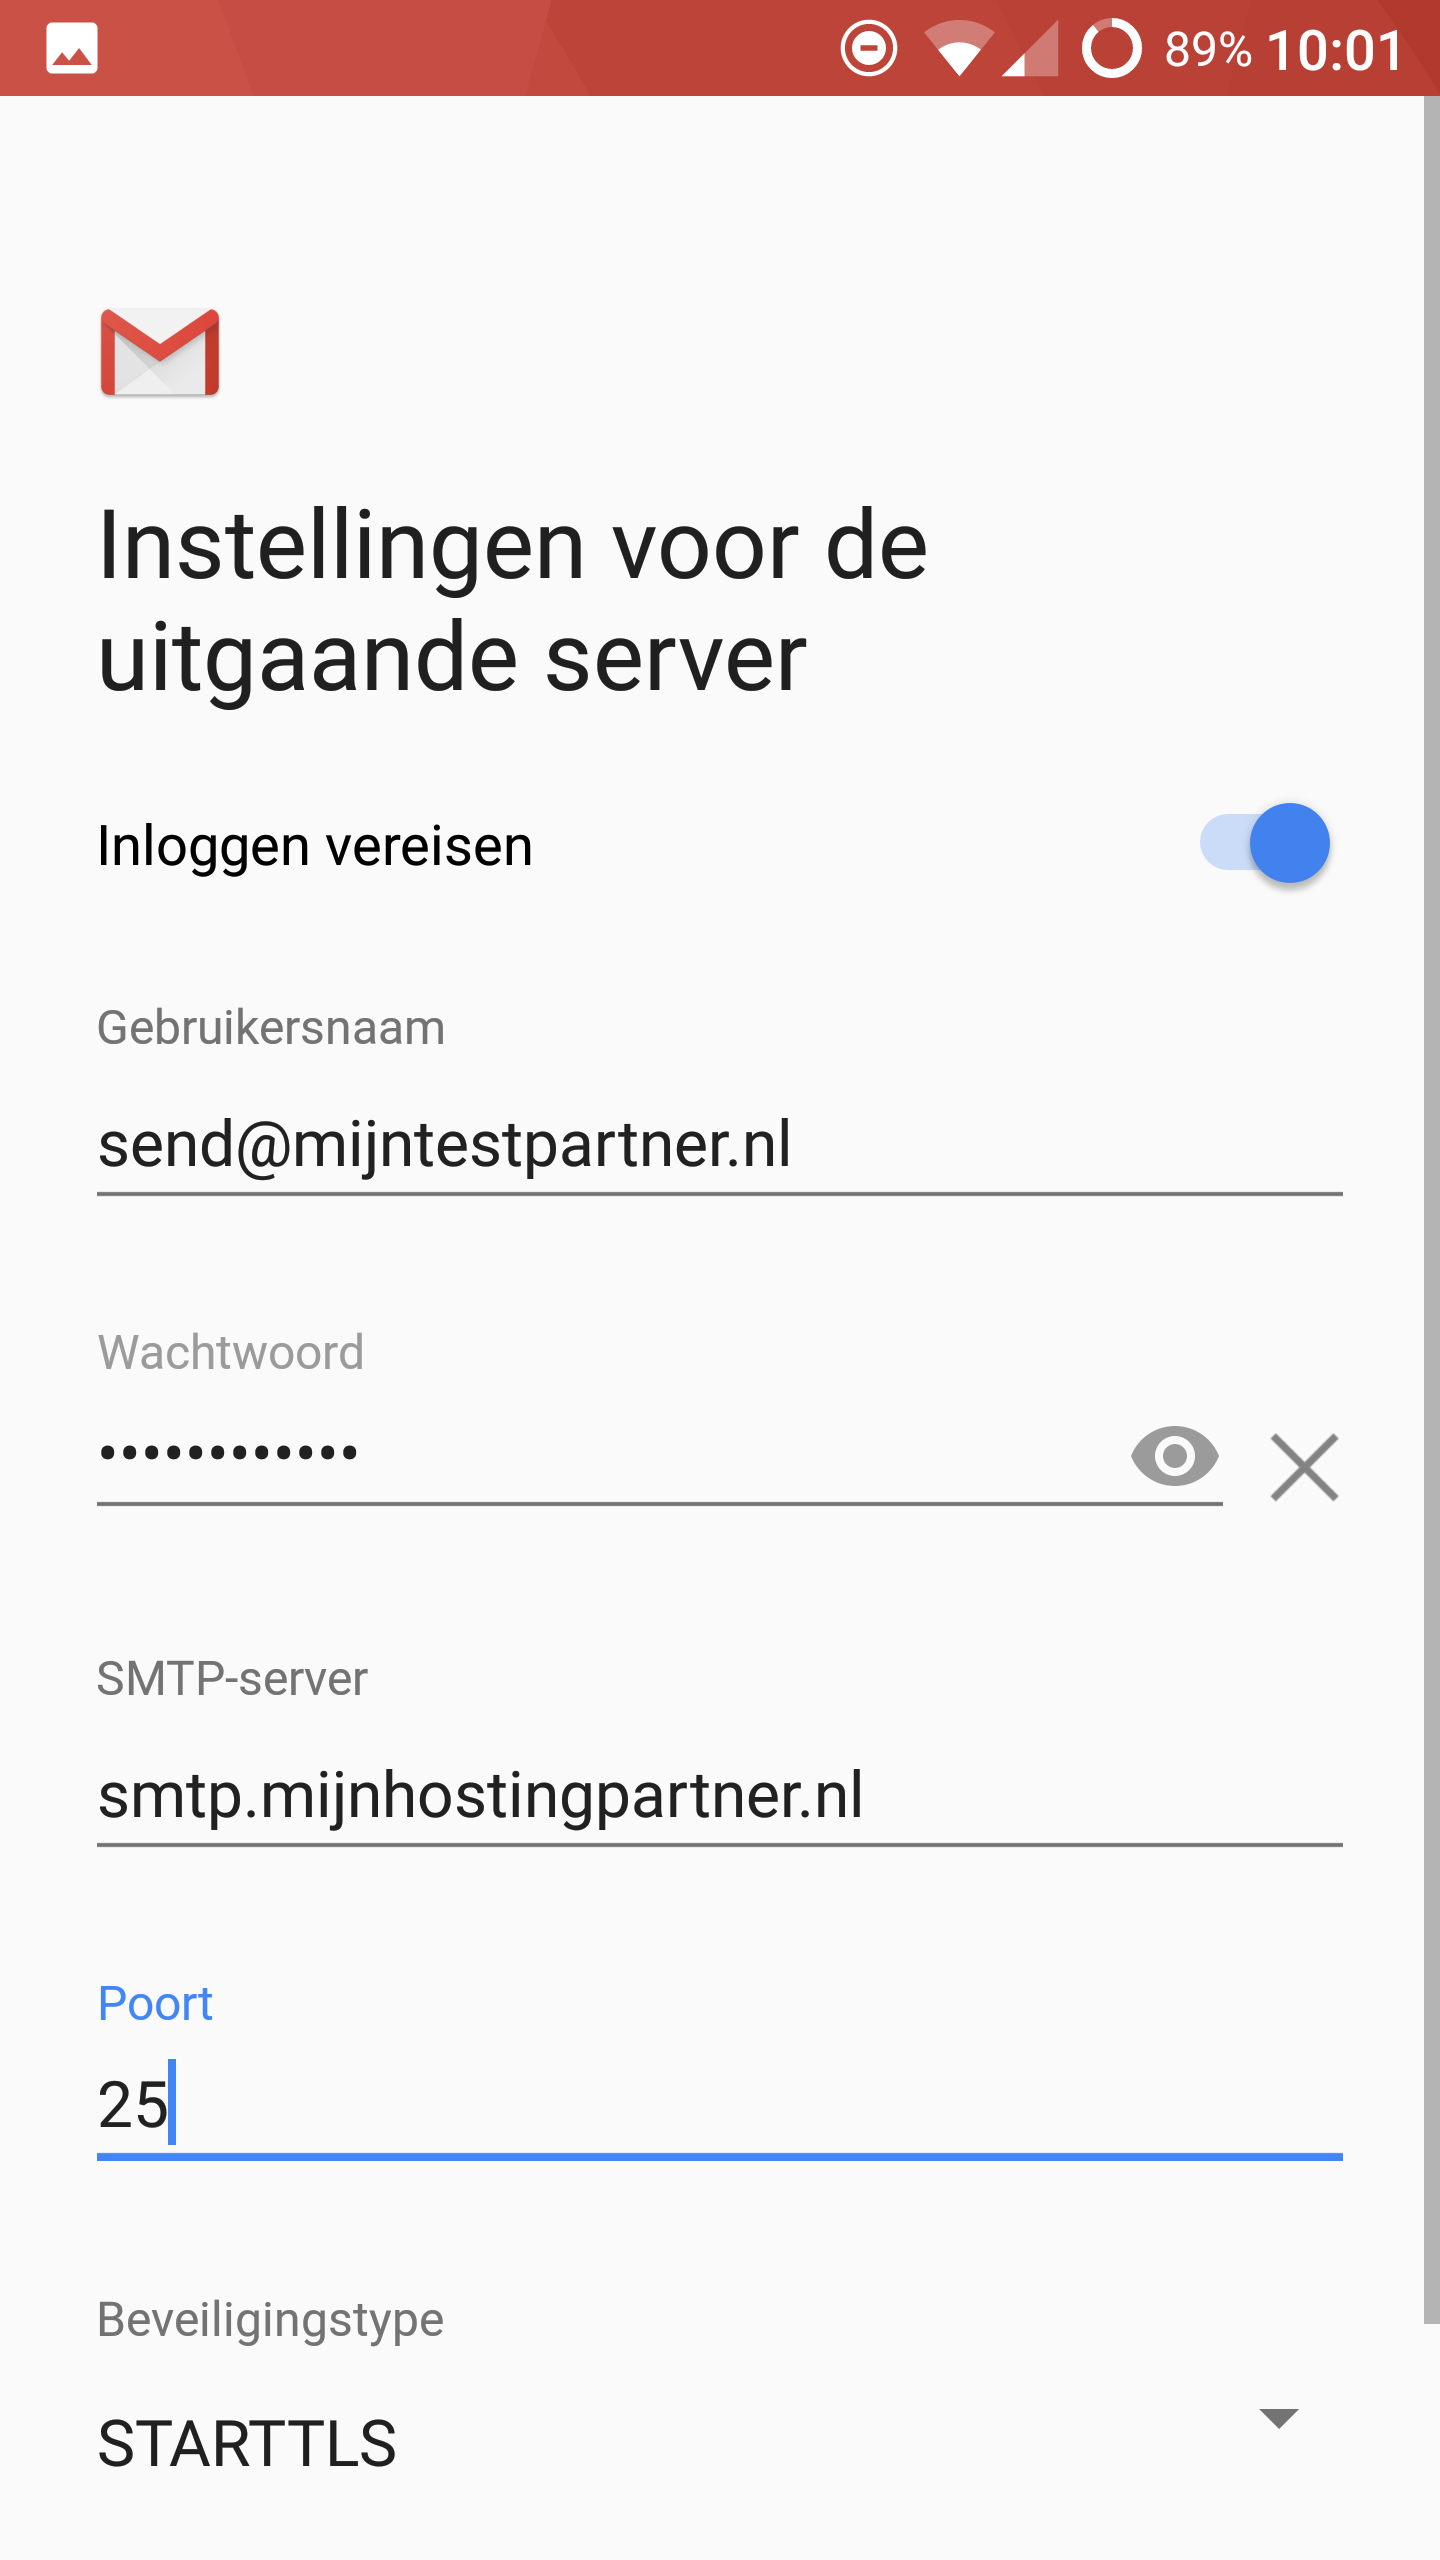
7 ) Email Account Setup on Android 7
Here you further adjust the settings as below. This should always be smtp.mijnhostingpartner.nl with port 25 or 26. or 587
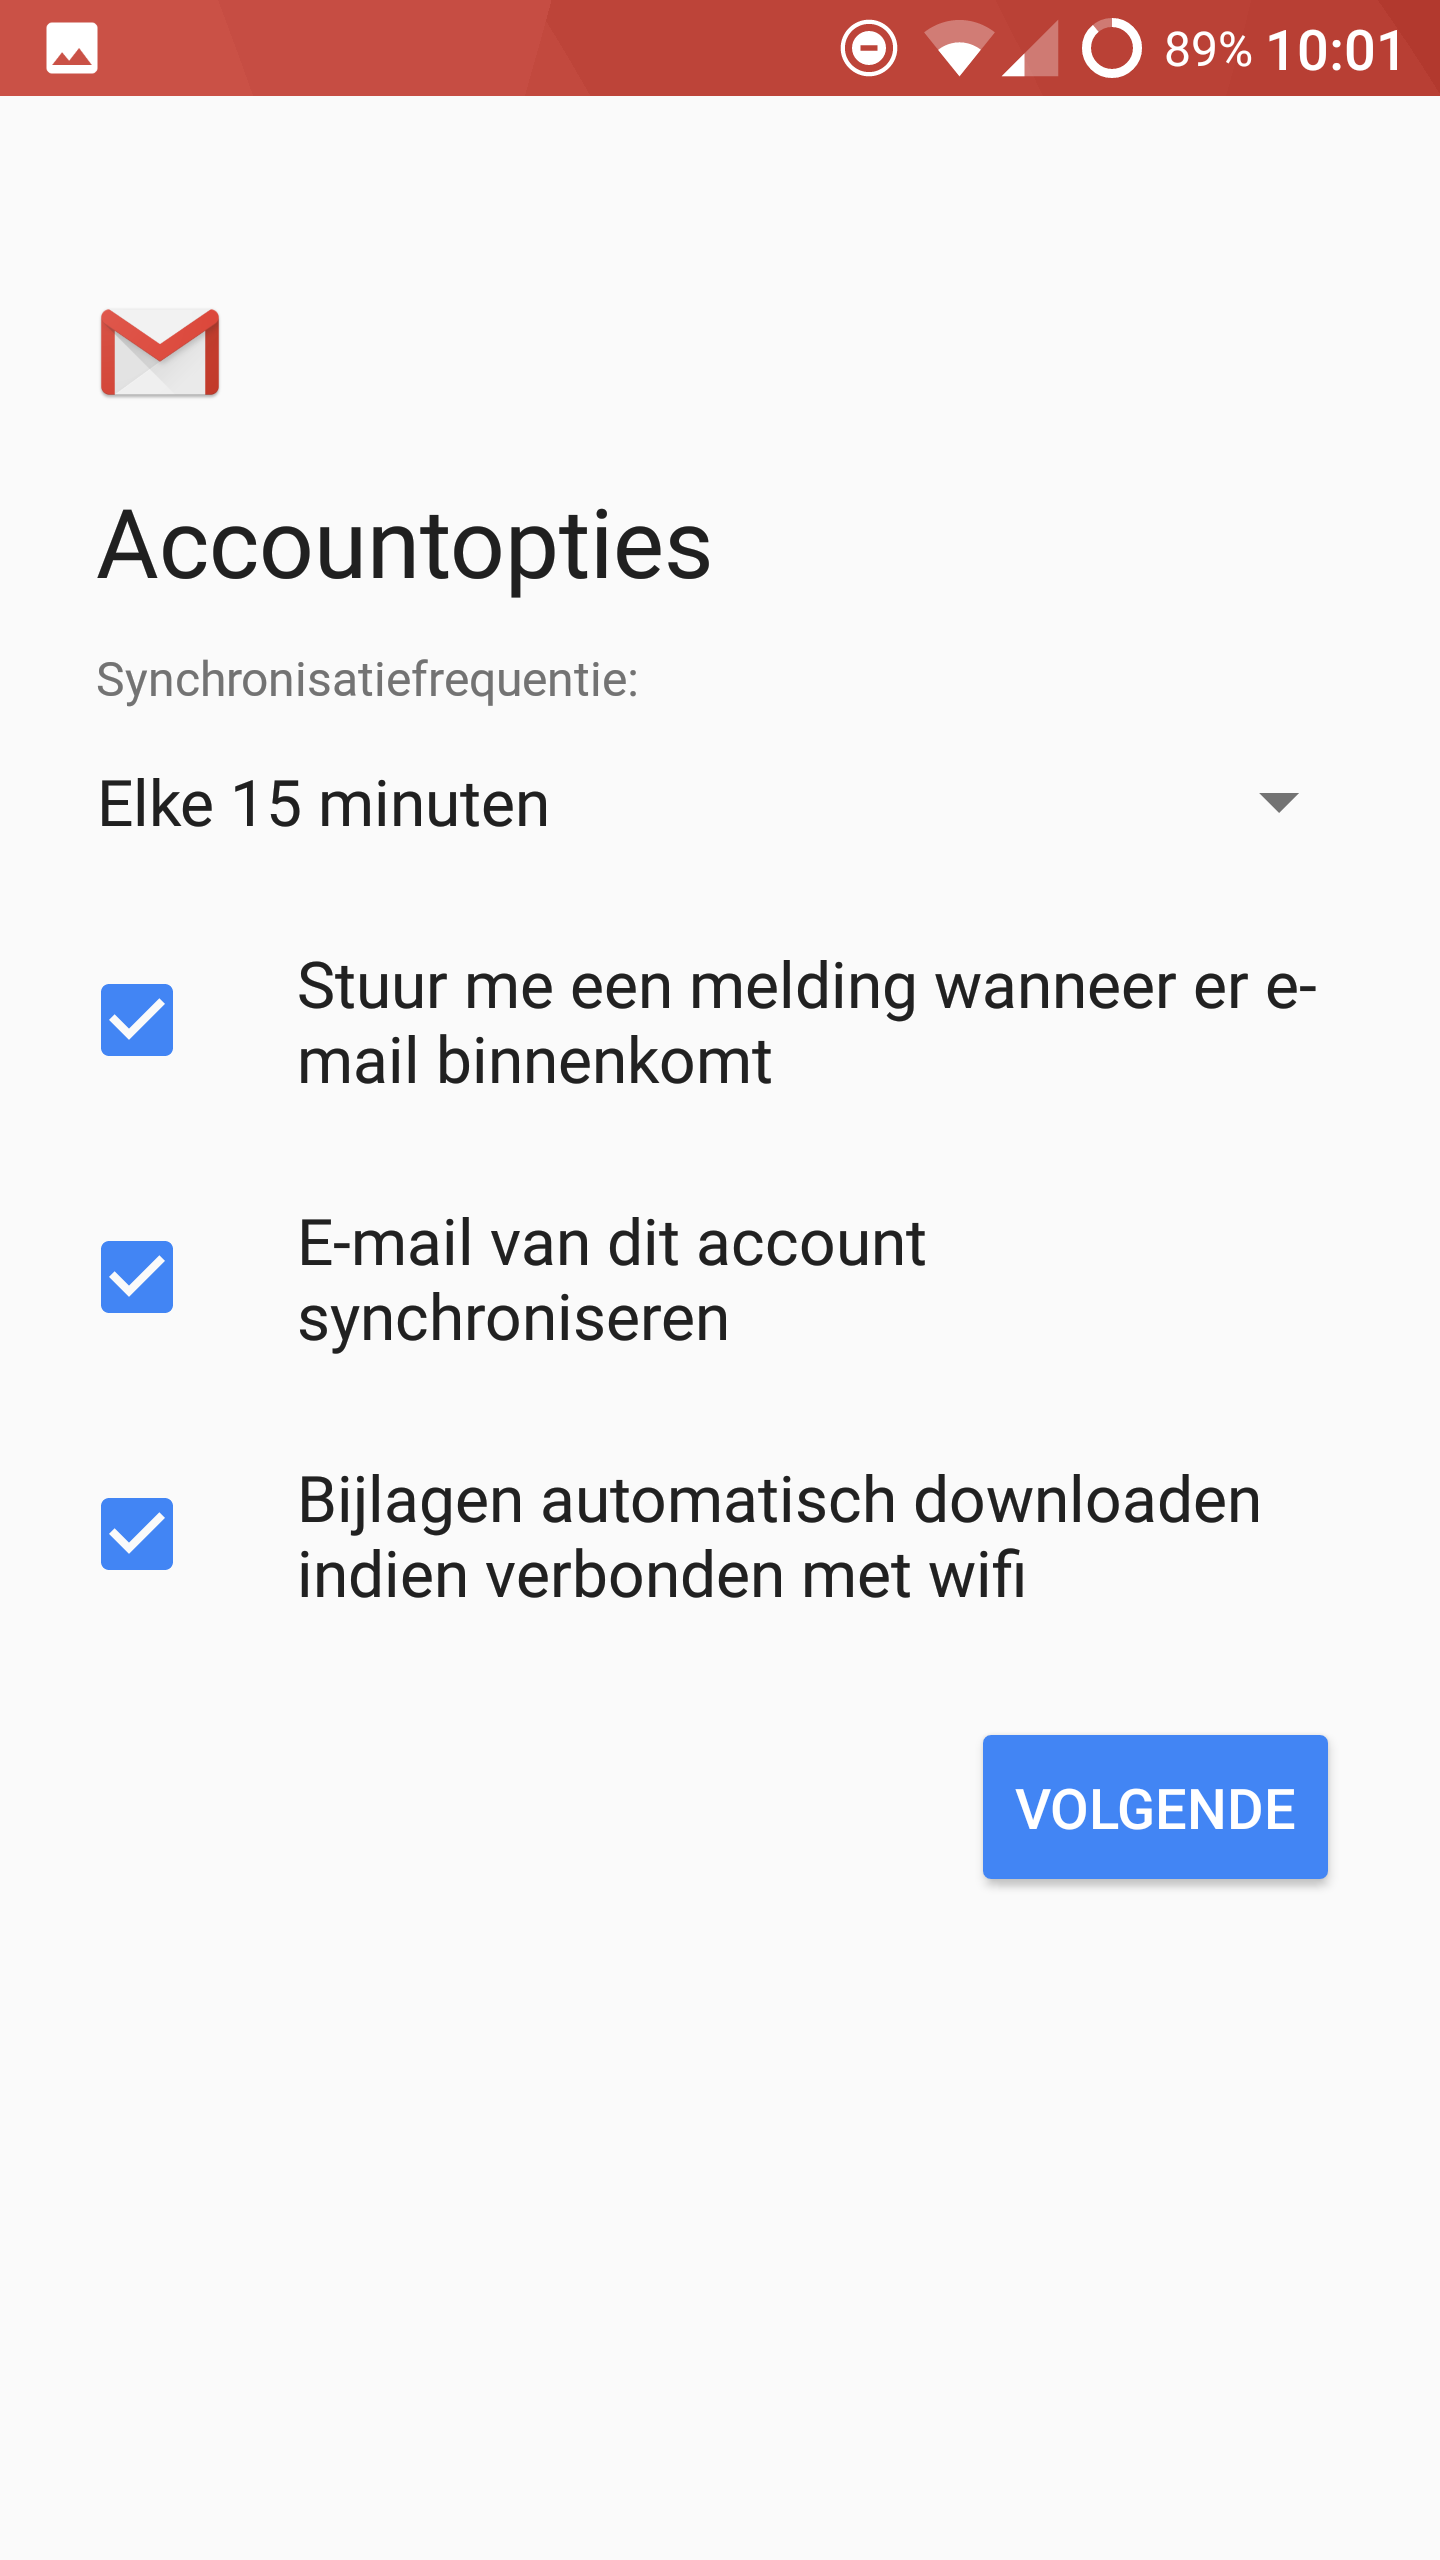
8) Email Account Setup on Android 7Adjust the settings to your liking.
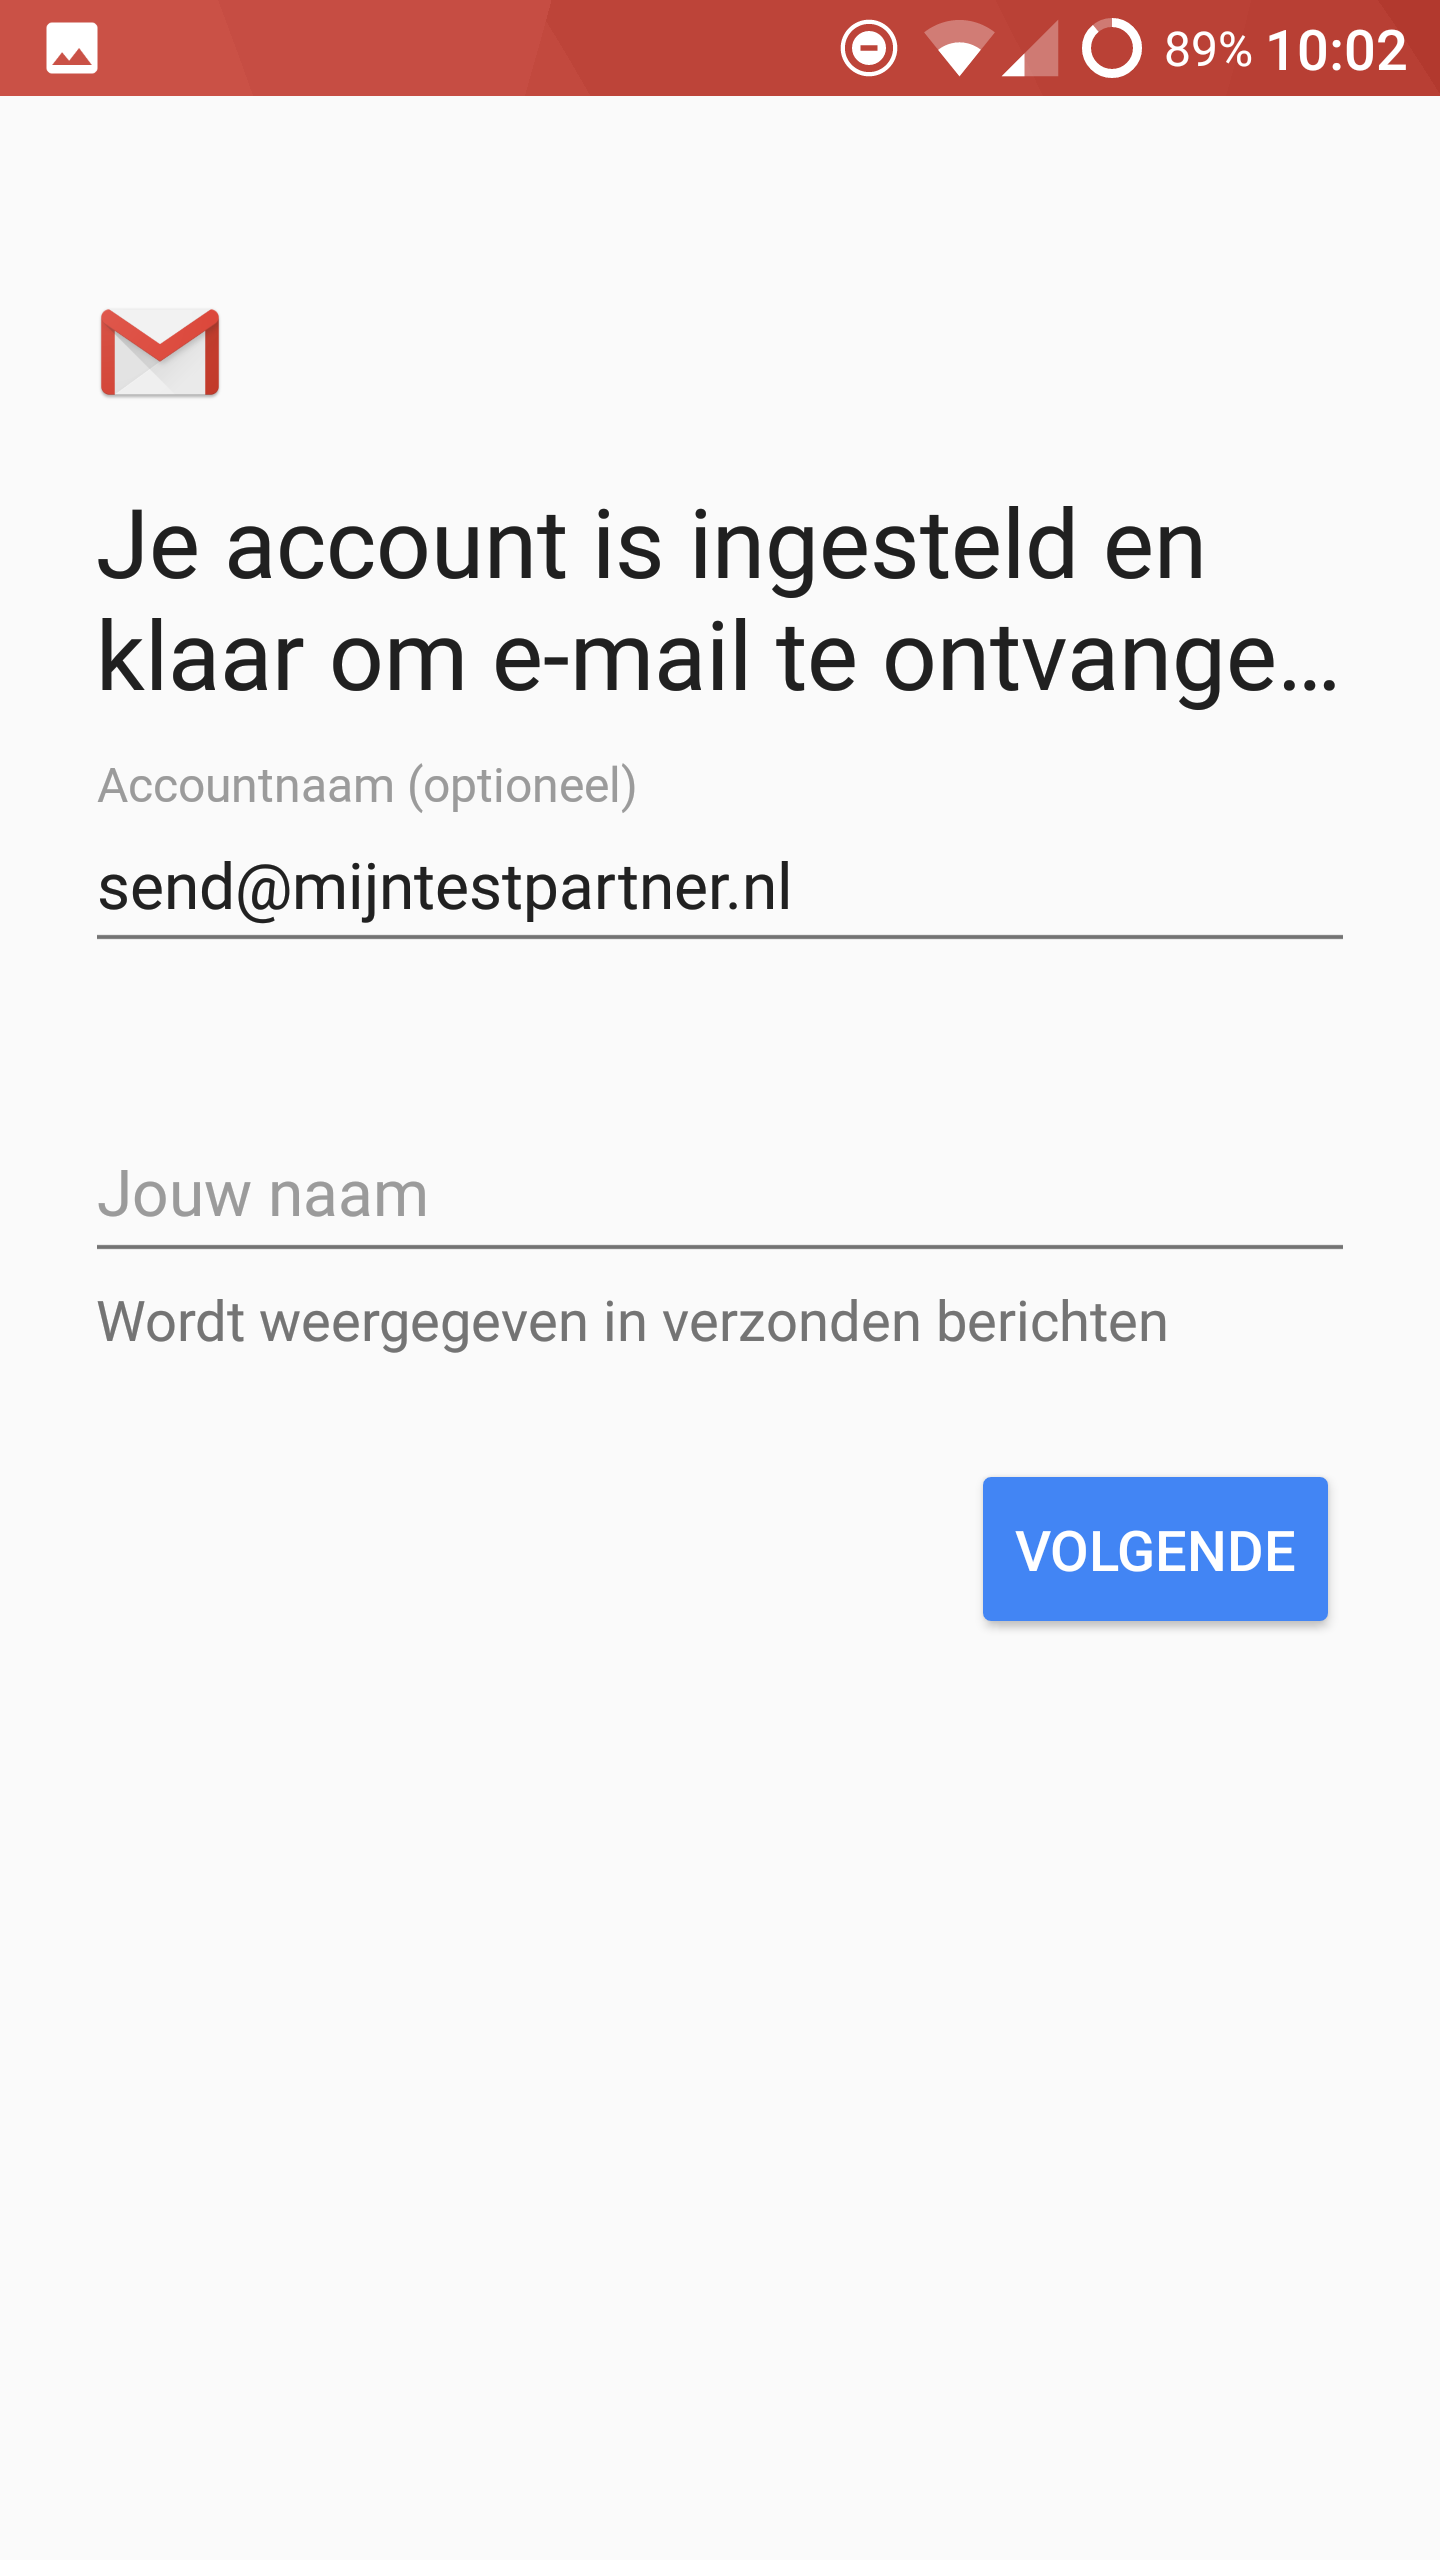
9) Email Account Setup on Android 7Finally enter the account name. Account name refers to what you see in the list of active emails. The field Your name is what other people see when you send an email to them.
If you have any further questions you can ask them via the online chat or via the ticket system. A colleague will then help you. We do ask that you make sure to take screenshots of your settings.