Categories
Editing DNS via the customer panel
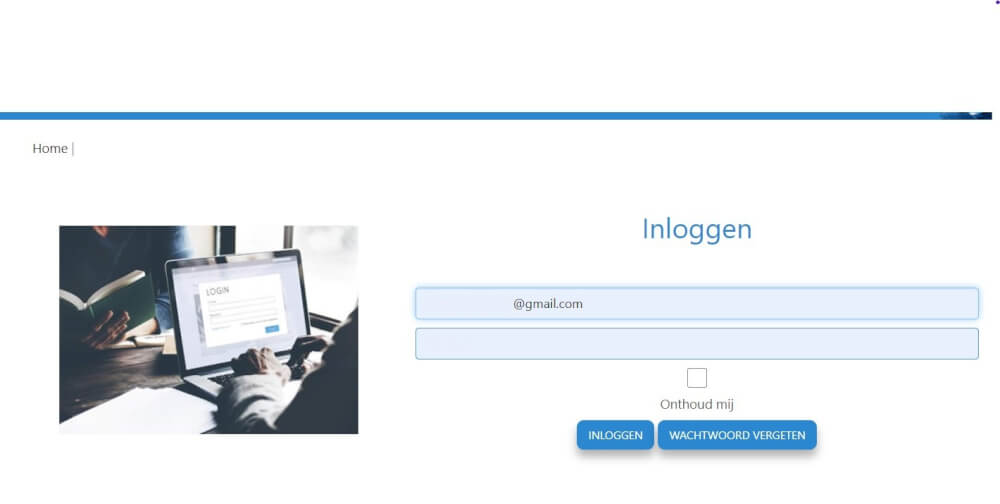
To edit the DNS in the customer panel, the following steps can be performed: First,
login to the customer panel in the following way.
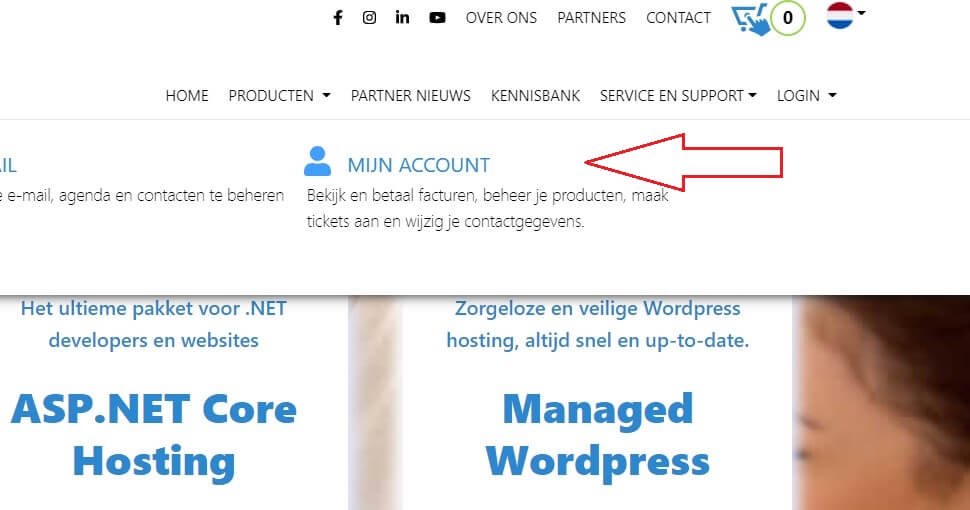
And then the account:
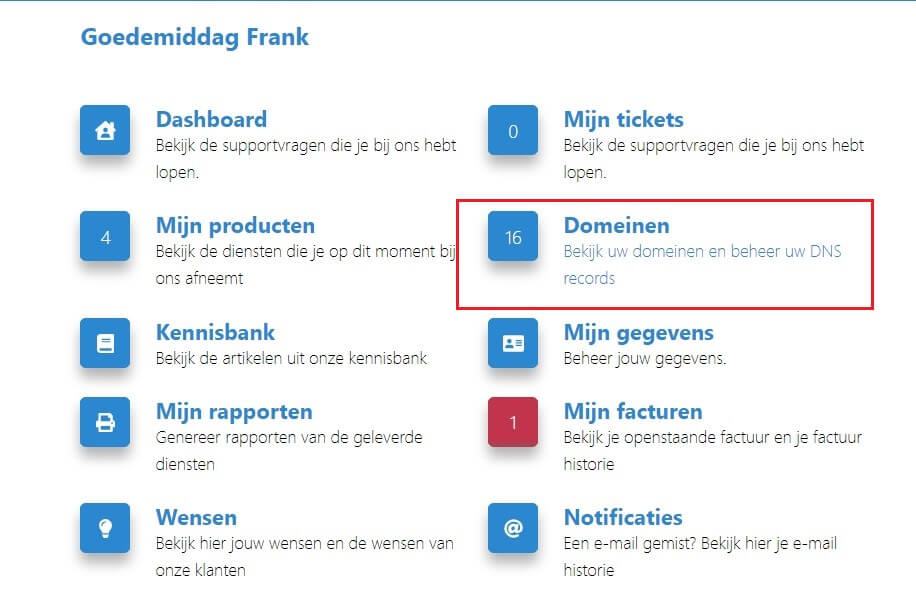
In the dashboard, select the Domains:
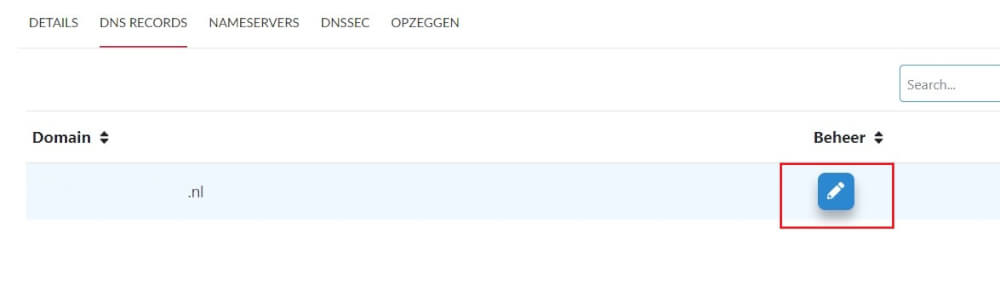
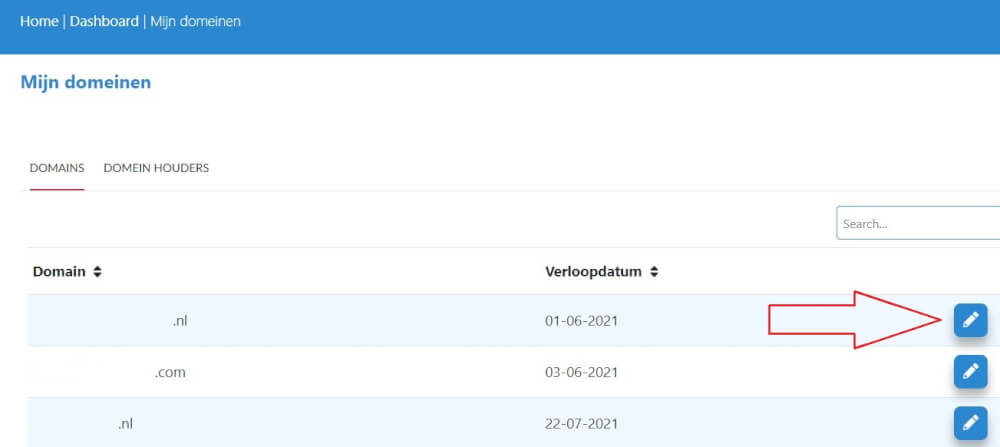
And then select the domain to edit with the pencil:
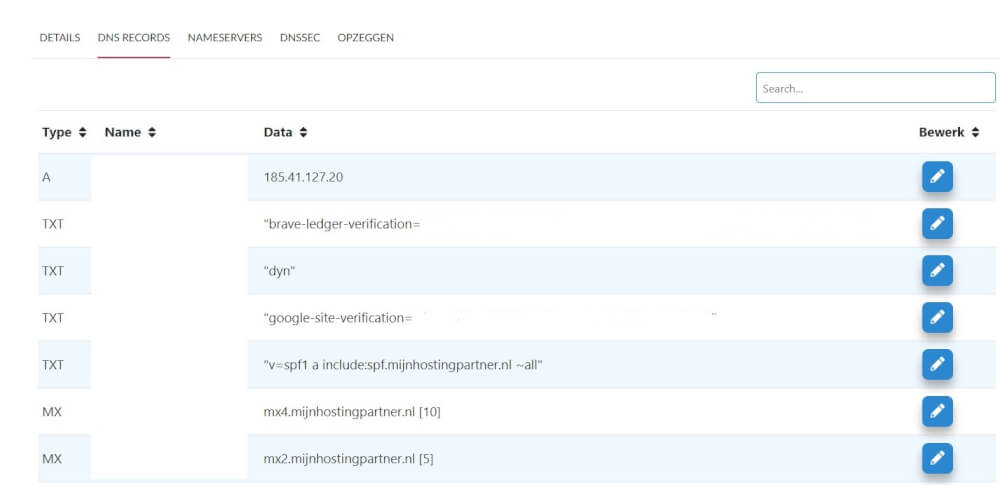
Select the DNS records tab:
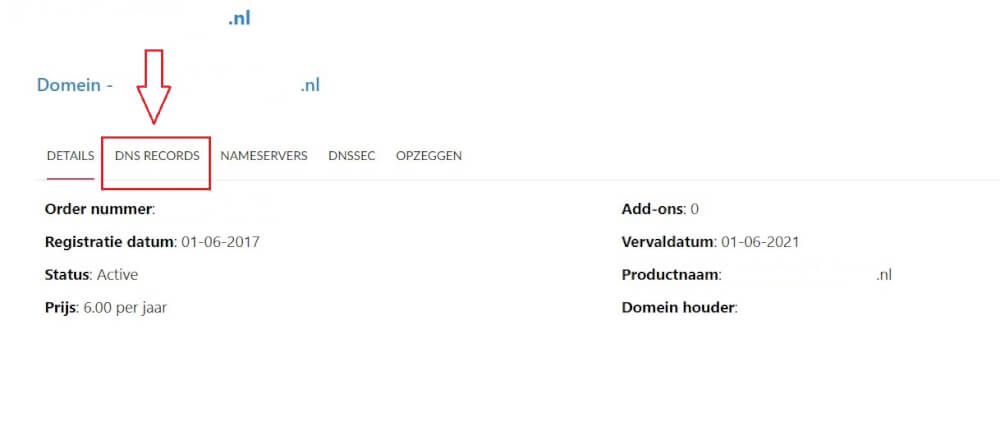
In that screen, there is then to select the domain name once more, and then to edit the DNS records with the pencil;