Do not appear in your analytics yourself
There are several methods to avoid showing up in your Google Analytics or statistics yourself. This is important to consider so that you don't cloud your stats with your own work on the website. In this blog post, we look at how you can set this up and take it into account within your own network and usage.
Exclusion of your IP address in Google Analytics
Google Analytics is the most widely used software for tracking your website statistics. Thanks to its integration with Google Search Console as well as Google Ads and AdSense, it gives you a comprehensive overview of your website that many other tools cannot present in the same way.
For this reason, we focus on this tool, as most users need to use it. In Google Analytics 4 (GA4), you can exclude your own IP address to prevent your own visits to your website from being counted. This helps to ensure that the data in GA4 is more accurate. Here are the steps to set this up:
1. go to the administrator settings in Google Analytics 4
Open your GA4 account and go to the Administrator (Admin) section at the bottom left of the GA4 interface. Select the property for which you want to exclude the IP address. 2.
2. set up an IP filter via the data settings
In GA4, you use data filters to exclude IP addresses.
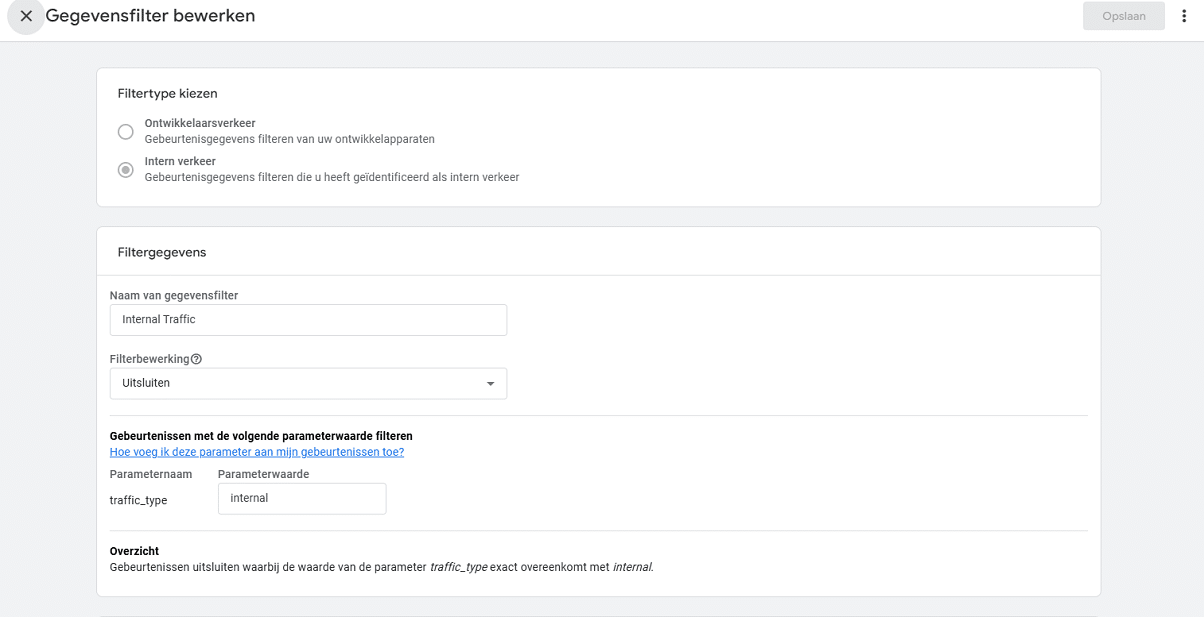
Proceed as follows: Under the selected property, click on Data settings and then on Data filter. Click on the Create filter button. Select Exclude traffic from internal IP addresses. 3.
3. define the filter configuration
Now define the details of the filter: Give the filter a name, e.g. "Exclude own IP address". Set the filter status to "Test" if you first want to see how it works without finally filtering data, or to "Active" if you want to apply it immediately. Under IP address matches, select the option that suits you best: matches for a specific IP address. starts with for an IP range. Enter your own IP address and save the changes. Your IP address will then no longer be included in the statistics.
Please note
The changes are not retroactive. Only the data from the time you activate the filter will be changed.
Also test whether the filter works as desired by setting the filter status to "Test" before setting it to "Active". In this way, you can exclude your own IP address from Google Analytics 4 so that you can collect more accurate data about your actual visitors.
Alternative methods
Automatically block all trackers and ads.
This way you also don't risk clicking on your own ads, which could lead to your Google AdSense account being blocked if you do this too often. The Content Management SystemWordPress, the most widely used CMS for both businesses and individuals, ensures by default that your traffic is not included in the results as soon as you log in to the admin area.
However, as soon as you want to edit a page in the frontend, you will appear in the statistics, even if you have not excluded the IP address. Therefore, instead of blocking a single IP address, you can also consider adding multiple IP addresses, but this is not always practical. Especially if you frequently log in from different locations and networks to work on your website. If you agree with yourself to only use the Brave browser to work on your website and check things on the front end, you can ensure that your statistics stay clean.
This tactic is therefore particularly useful if you change location frequently and work from anywhere, for example as a digital nomad. Furthermore, you don't necessarily have to use the Brave browser for this, you can also activate such blockers in your current browser. However, the Brave browser is a ready-made solution for this, so you only need to work via this browser. Without having to install and configure anything else.
Google Chrome is also often not the right choice with such blockers, as the blockers are often blocked with almost every update of this browser. How do you handle this on your website? Let us know via social media!
