Categories
Installing Joomla using the Application Installer
The following steps are required to install Joomla via the Web app gallery.Step 1, Finding the installation package in the control panel.
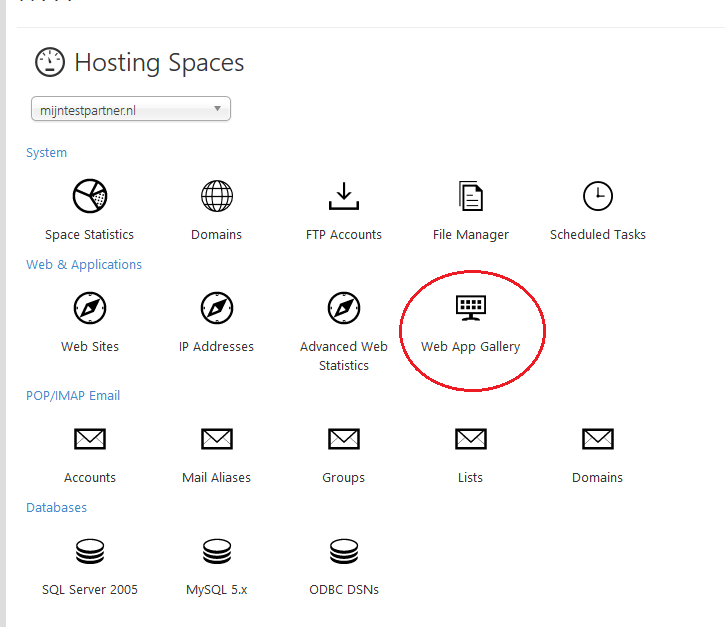
Log in with your credentials in the control panel.In the home screen, click on the web app gallery icon:
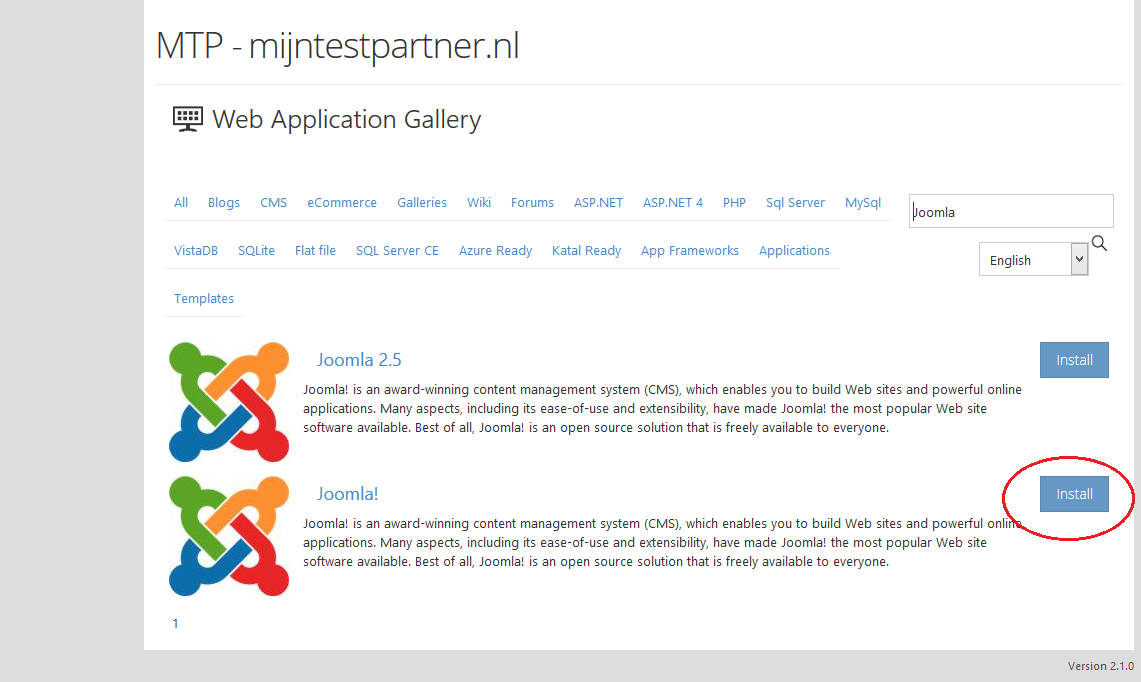
Select the second option of Joomla, the first one is an older version.
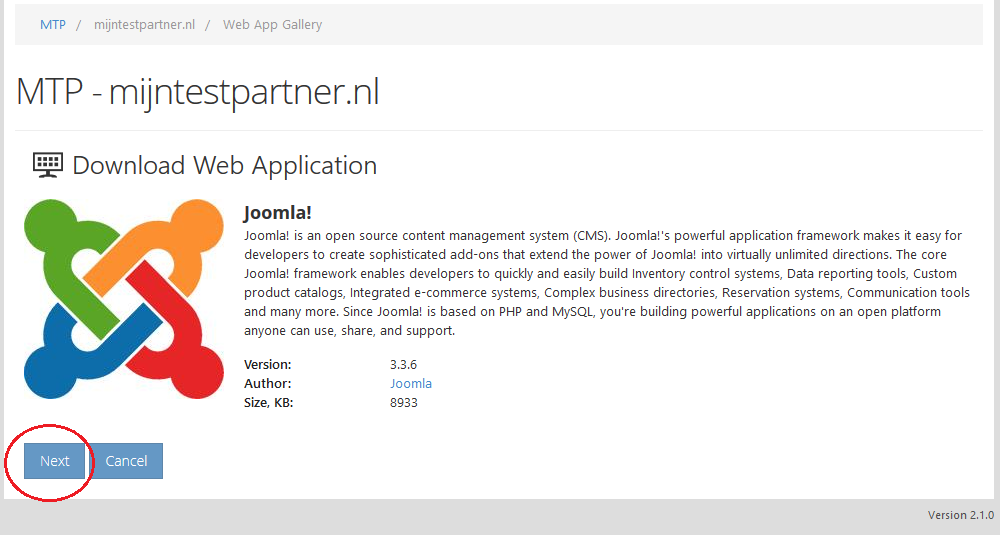
Click on next
Step 2, the data of your
Website.
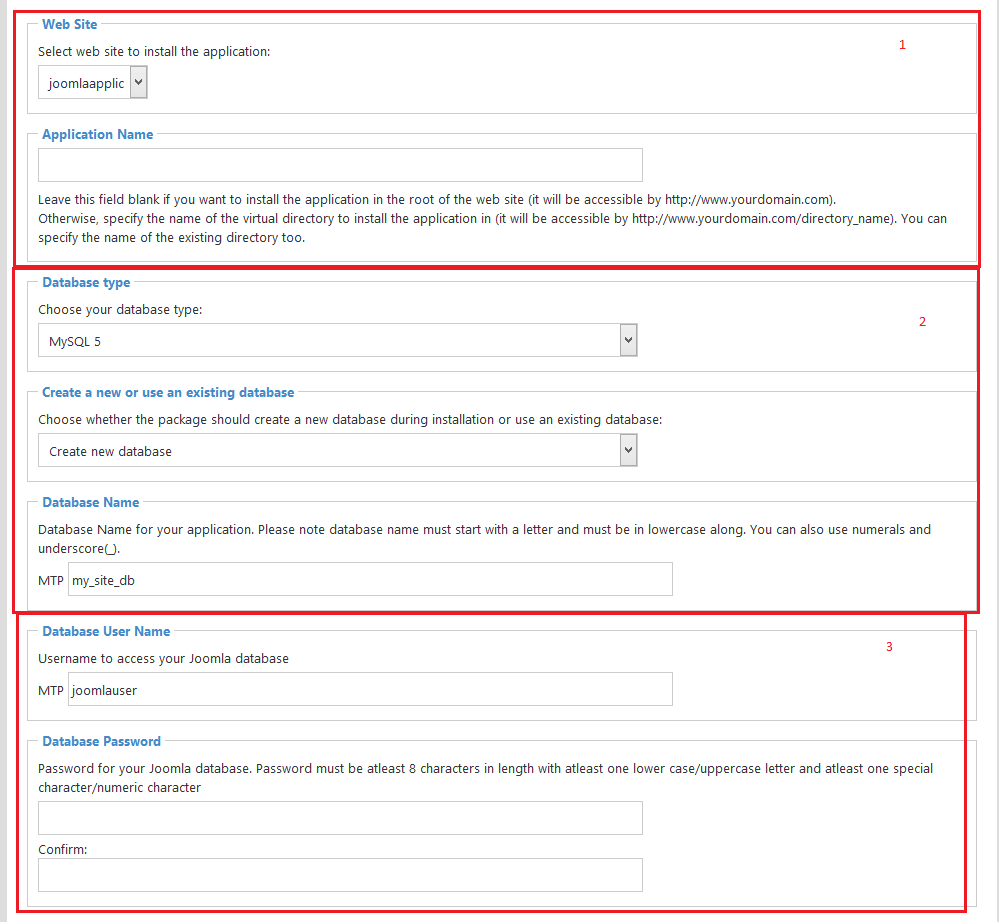
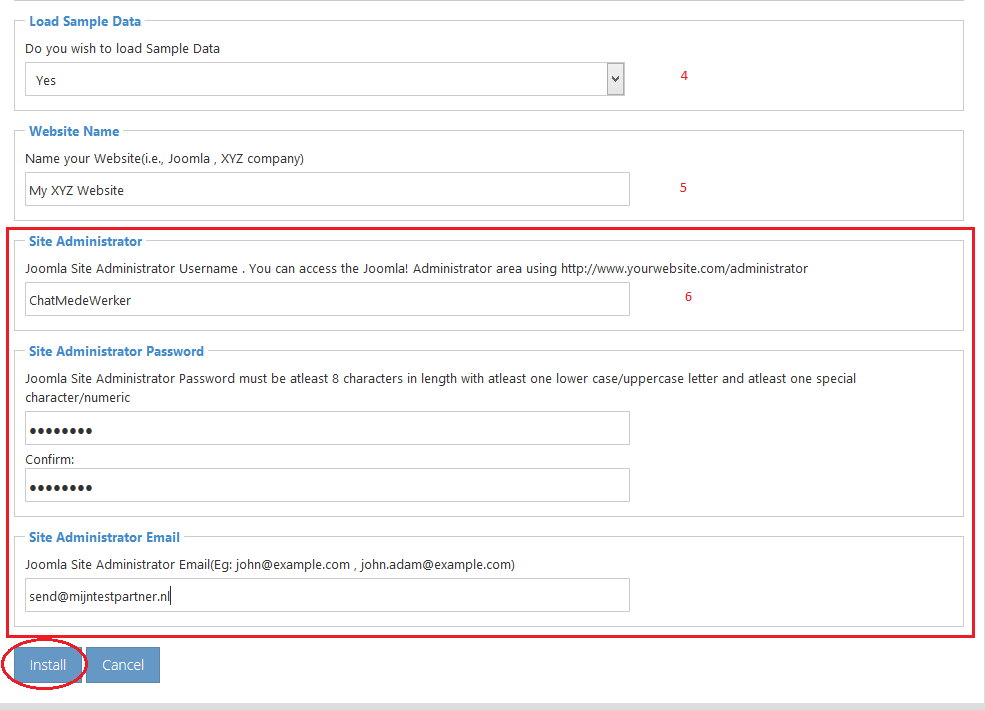
In this step we will divide it into blocks. The images below in Step 2 are on the same screen in the control panel. The different steps are numbered.
- In this block you can select the website where you want to install Joomla, also you can set the path to your website.
By default if left empty it will be placed directly in the /wwwroot directory. - In block 2 you can select the database, MySQL 5 you can leave on.
further you can choose here to create a new Database. Or you can of course select an existing one. - In block 3 you specify the data of the MySQL user and create a password. Again, you can do this with existing data.
- This point indicates whether you want to put the example site of Joomla right on it, if you have no experience then this may be useful to practice.
- Here you fill in the name of your website, your company name or something similar.
- In block 6 you fill in the remaining information for creating an Admin within Joomla. Save a backup of this information in a safe place. (USB stick, in a text document with Blowfish encryption for example)
Then press Install.
Step 3, the final actions.
After step 2 you come to the following screen: 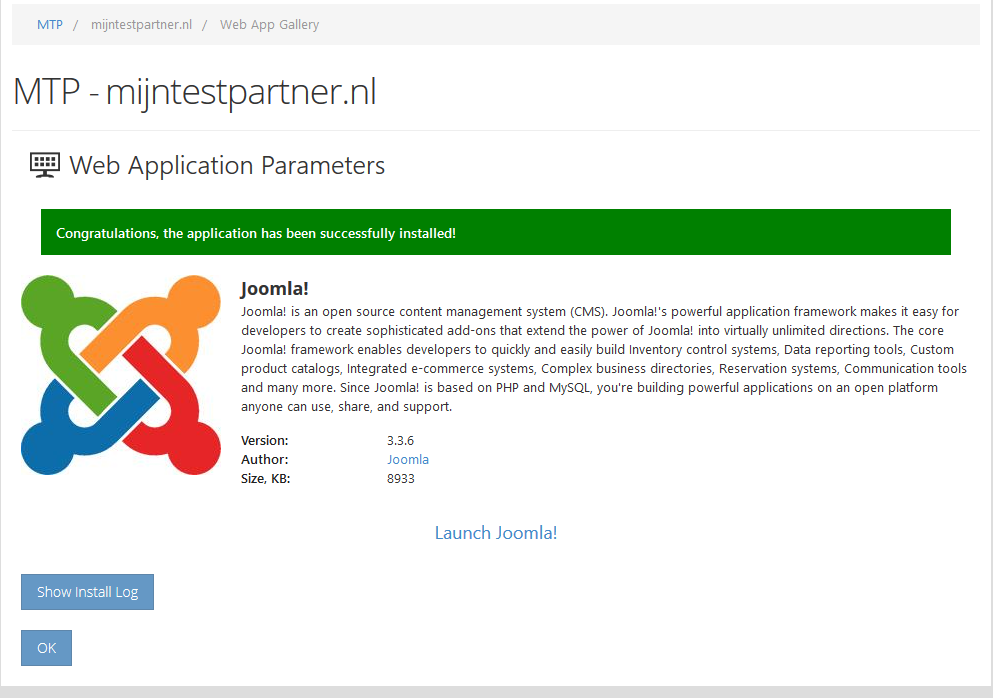
Press OK.
After this
You can go to your website in a browser of your choice. Depending on the directory you specified, the website will appear.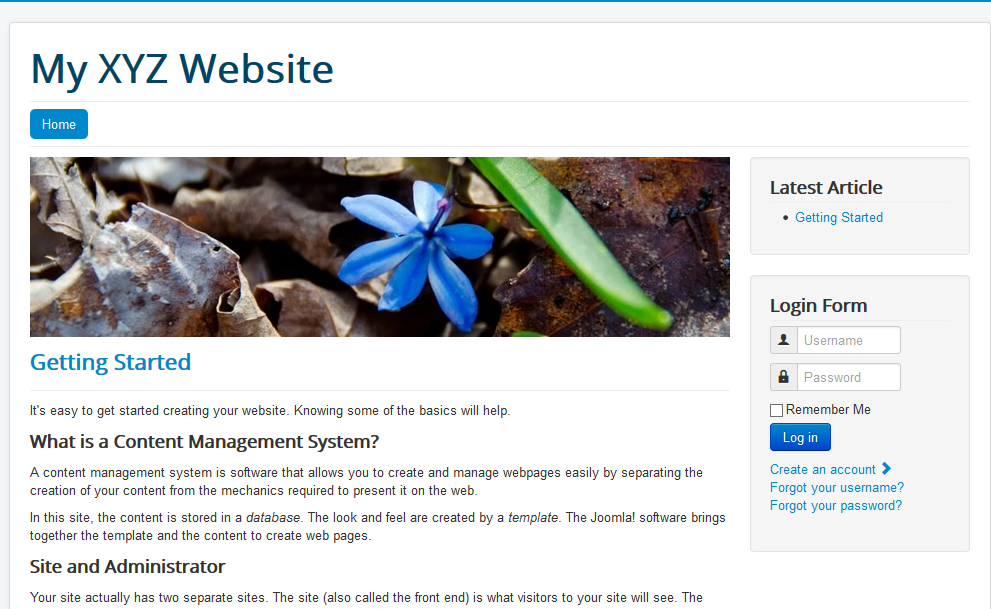
Now
You can login with your credentials and start working on your website.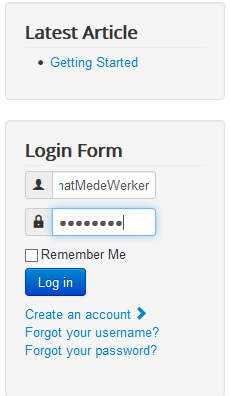
As always, if you have any wishes or comments about this article, you can report them via the chat or in a ticket to our helpdesk.