Categories
Setting up e-mail - Windows Live Mail
Email setup - Outlook Windows app
Windows Live Mail is no longer supported by Microsoft. We strongly recommend switching to another mail program. For example the new mail program of Windows 8/10. See below: Setting up e-mail - Windows 10
Would you still like to use Windows Live Mail then you can follow the following settings, however there is a big chance that this is no longer functional.
MijnHostingPartner.nl does not support Windows Live Mail anymore.
1) You open Windows Live Mail.
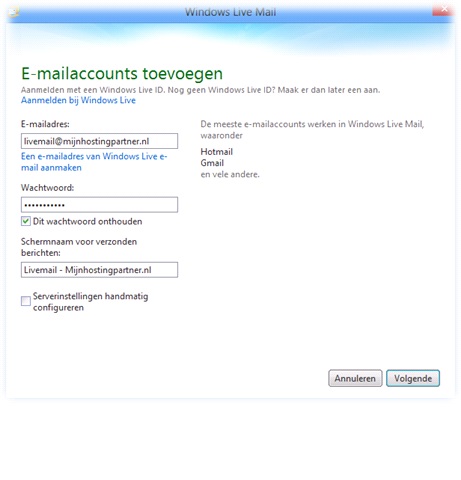
2) You click at the top on Accounts -> Mail and the following screen is displayed
Enter the email information you created in the control panel.
Email address: Here you enter your full mail address created in the control panel.
Password: In the password field you enter the password that belongs to the mail address.
mail address. You have entered this password in the control panel -> mail -> accounts.
Screen name: Your name this is visible to others when you send an email.
3) Then click on 'Next'.
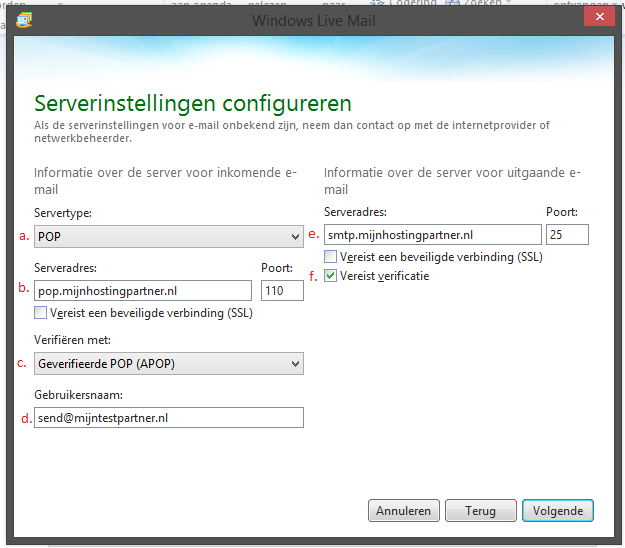
4 ) If you choose POP3 then fill in the following settings:
a. Server type POP if you want to use POP3 mail.
b. Here you enter'pop.myhostingpartner.nl'.
c. Use the pull down menu to select 'verified POP (APOP)'.
d. In this field, enter the complete mail address that you are configuring.
e. Here you fill in ALWAYS smtp.mijnhostingpartner.nl in! So not the smtp server of your internet provider!
f. Check Required authentication.
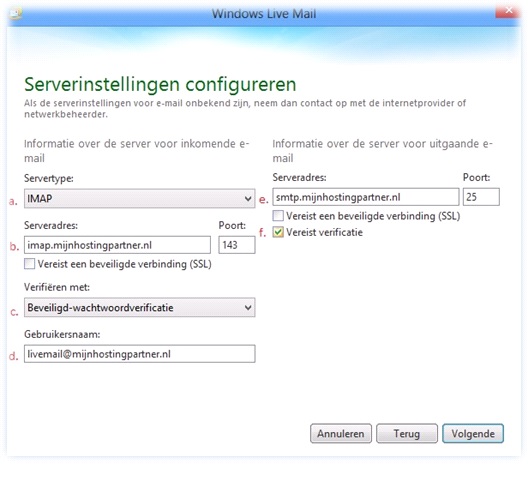
5) If you choose IMAP then fill in the following settings:
a. Server type IMAP if you want to use IMAP mail.
b. Here you enter "imap.myhostingpartner.com" .
c. Using the pull down menu select 'Secure Password Verification'.
d. In this field you enter the full mail address you are configuring.
e. Here you fill in ALWAYS smtp.mijnhostingpartner.nl ! So not the smtp server of your internet provider!
f. Check Required authentication.
6 ) Then click on 'Next' and your account is ready for use.
7) If the incoming mail is working, but the outgoing mail is not yet working then you need to change port 25 to port 26 and you can do this as follows:
Accounts -> E-mail -> click on 'Account properties' -> change the send port from 25 to 26 and save the new settings. After this the outgoing email will also work.