Categories
Making an FTP connection - Dreamweaver
Adobe Dreamweaver can also be used with MijnHostingPartner.nl, and can be set up to work with MijnHostingPartner.nl in the following way.
Step 1, collect the data
To start with this article it is advisable to have the following data ready, for example notated in notepad within Windows.
FTP account
IP address of the website
The folder structure of your website and where you want to publish it
The FTP account is created in the following way:
https://www.mijnhostingpartner.nl/client/knowledgebase/ftp/hoe-maak-ik-een-nieuw-ftp-account-aan/
The IP address is just to look up under the DNS of your domain name in the client panel the A record you should have for this, or ping it via cmd for example.
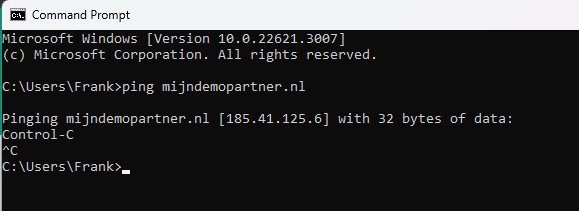
You then enter your domain name here, and note down the IP address within square brackets.
We will come back to the folder structure later in the article.
Step 2, navigate to the FTP and server settings within Dreamweaver
The nice thing about Dreamweaver is that the FTP data continues to be saved and you can easily publish to your website after each change. To set this up, go to the next option within Dreamweaver.
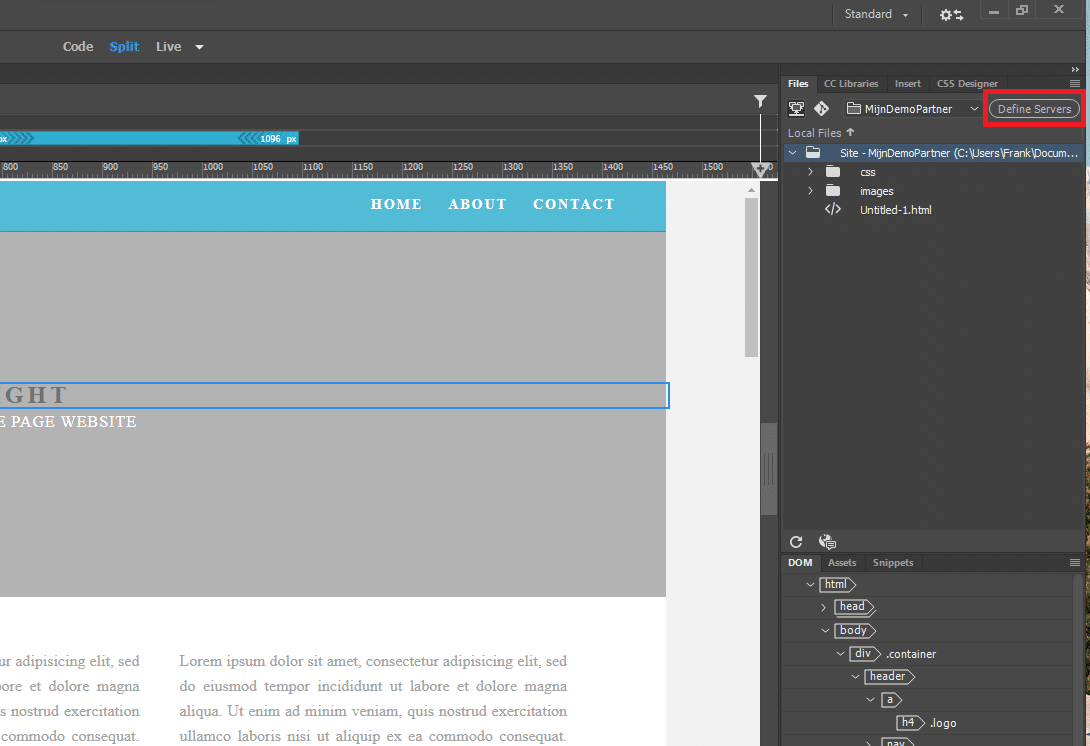
After this navigate within your server list, and select the option to add a server with the plus sign. If you want to change an existing connection you can select the existing connection here.
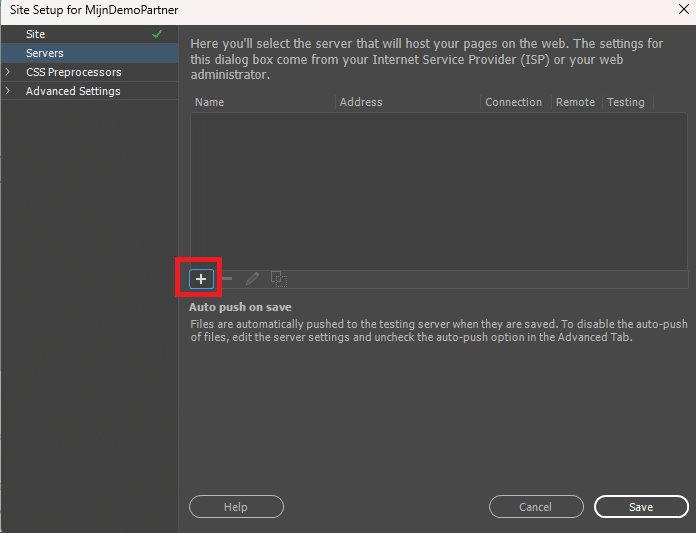
Step 3, Fill in the FTP data
The data that you have noted down can be entered here, you do this according to your domain name and your created data. Do not blindly copy our values.
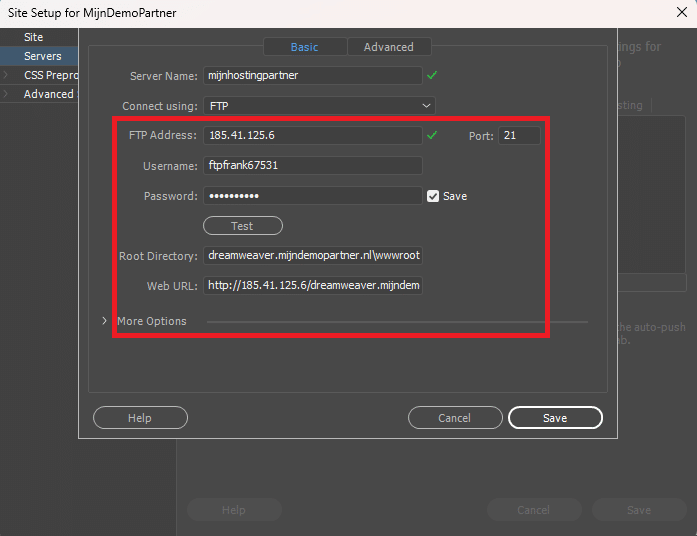
The most important values here are the FTP Address, which is the IP address of your website.
The username or Username is the FTP account you created with us in the client panel.
The Password is the password of the FTP account, as entered or generated with us.
The Save checkbox is checked by default here, we also recommend saving. Just not if your PC is shared with other users.
The root directory is the directory where the website files should reside. If you have left this default, also when creating the FTP account, then you can enter it as follows:
yourdomainnamehere.co.uk.
In our example you can see that we want to publish the website on a subdomain, and have created dreamweaver.mijndemopartner.nl on our test domain for this purpose. So take a look within the file manager in the control panel if you want the website to be in a different place or within a subdomain. And adjust the data for that where necessary.
After this you can press Test to test the connection right away. If you entered everything correctly, the connection will be successful. If you get an error message, you can use the error message to find out what is wrong.
Step 4, publish your website within MijnHostingPartner.nl
Finally it is a matter of selecting the Remote server to publish your project to MijnHostingPartner.nl, this is done with the next option:
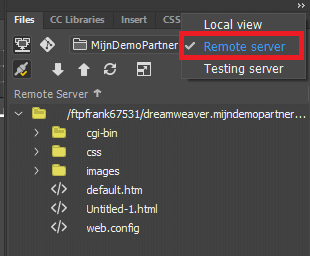
Your website will be published after this as soon as you save it, if you want to push this one more time manually you can do this by pressing Synchronize at the top:
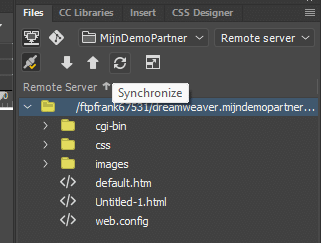
The files will then be updated.
If after publishing your website is not yet live, in most cases this is because you have not yet removed the default.htm. You can do this directly within Dreamweaver by clicking the right mouse button on our default.htm and then delete it as follows:
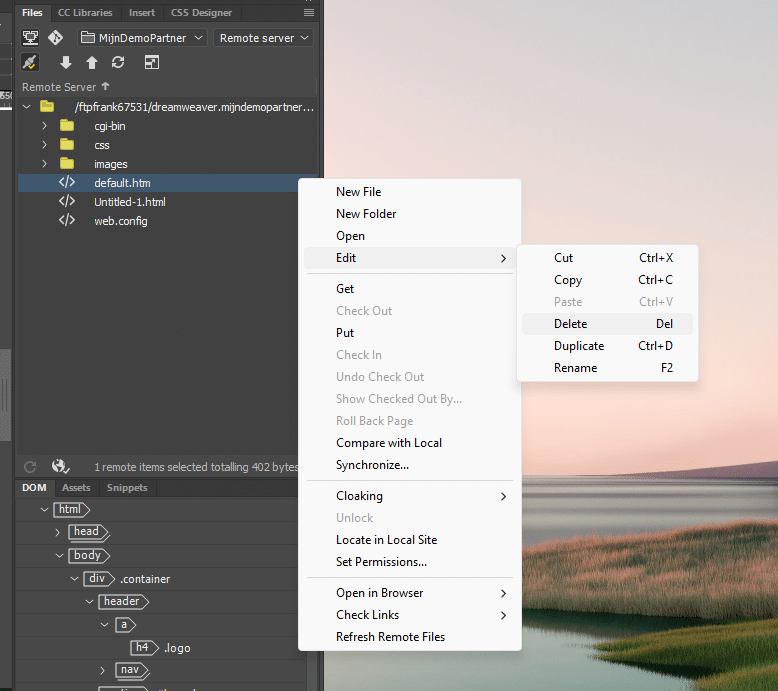
Your index.html will take precedence after this and will be opened first.
These were all the steps necessary to publish your website at MijnHostingPartner.nl using Adobe Dreamweaver. Should you still not succeed, please create a ticket with a screenshot of your entered data at FTP. We will check this for you.