Categories
How do I backup my website?
This article explains how you can back up your website, and store it in multiple places, so that even in almost every possible scenario you will still have a backup of your website files and data.
Backing up your website can be done in different ways and is not the same for every website, this is why it is first necessary to take stock of what your website uses, and how it is stored.
This depends on how your website was created, with a Content Management System such as WordPress, Joomla or Umbraco it is the case that your website consists of files in the wwwroot of the hosting space, and stores the data in a database. This database can be a MySQL 5 database, MySQL 8, MS SQL or MariaDB. For MySQL 5 and 8 and MariaDB, you can easily backup them all through PHPmyAdmin. For MS SQL, the best way to back it up is through the control panel.
If you created the website in another way, you may not be using a database. But only files in the wwwroot or outside it. So check what your situation is, and go from there further in the article to backup.
*Note, this whole article can also be automated with a two Scheduled Tasks, check the next article for this.
Control panel or FTP | backup the website files
When you want to backup the files of your website, you can do this through the Control panel or through an FTP connection. Your website will in most cases be located within the wwwroot of your hosting space. You can check this by logging into the control panel or via an FTP connection. We use the demo website mijndemopartner.nl, which is a WordPress website, for this purpose.
To go to the Filemanager from the control panel, you can log in within control.myhostingpartner.nl with your credentials, and proceed to the filemanager:
After this you can navigate to your domain name -> and then you will see the wwwroot right away:
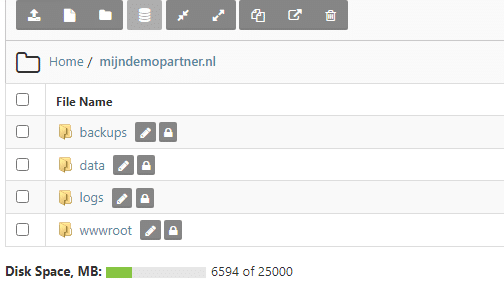
With WordPress, Joomla and many other Content Management Systems, your data will be in the wwwroot. Check this yourself for your specific situation.
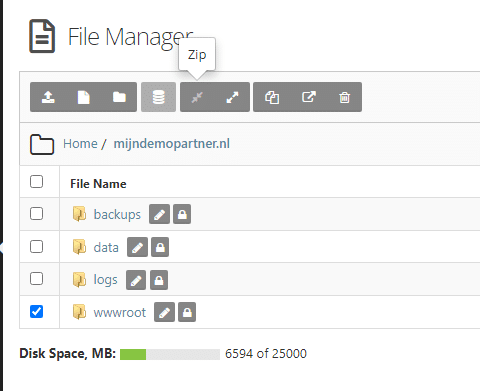
To backup your data with the control panel you can check the wwwroot checkbox, and then use the ZIP option in the menu to save it to a .zip file. Which will then include the entire wwwroot in a file.
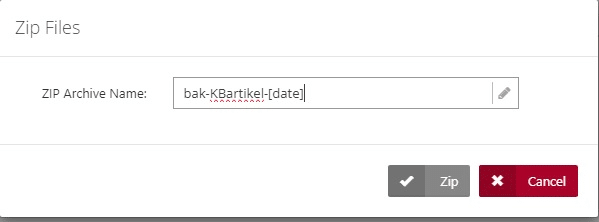
The next screen will appear after you click the ZIP option. Here you give the backup a logical name, which you can easily recognize later. The [date] function I include here automatically adds the date to the file name. Which is also useful for recognition.
Once you click on ZIP you will see that it starts zipping your files, depending on the size this can take a while. It is best to start the zipping process and check again in an hour to see if it is ready. You can also see this on the right hand side while it is still in progress:

As soon as it is finished you will see a .zip file in the same folder.
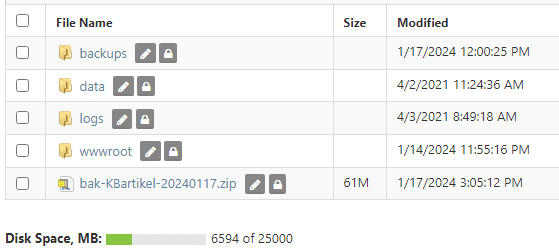
In this example you can see that our final ZIP file is only 61 MB, most WordPress websites vary greatly in size depending on how much media you have in there and what media.
You can then leave this ZIP file here, or give it another logical place to your liking. However, do not put it in a folder such as the wwwroot directly, because here it is open to the Internet. And so you may run the risk of this being captured by malicious people.
If you do not use a database within your website, then this is the backup in its entirety. And you can download it to your local PC, and you have made a backup.
MySQL 5, 8 and MariaDB
If you do use a database within your website, then you can now navigate to mysqlwebadmin.co.uk in the case of MySQL5, 8. Or mariadbwebadmin.nl in the case of MariaDB. This can be done simply in a browser, and requires no further installation. Here you log in with your database information, if you forget it, or have not saved it, you can always find it in a configuration file of your website. Configuration.php within Joomla, and wp-config.php in the case of WordPress.
Once logged in, select the database on the left side in the menu, and navigate to the next option, Export, to export the database.
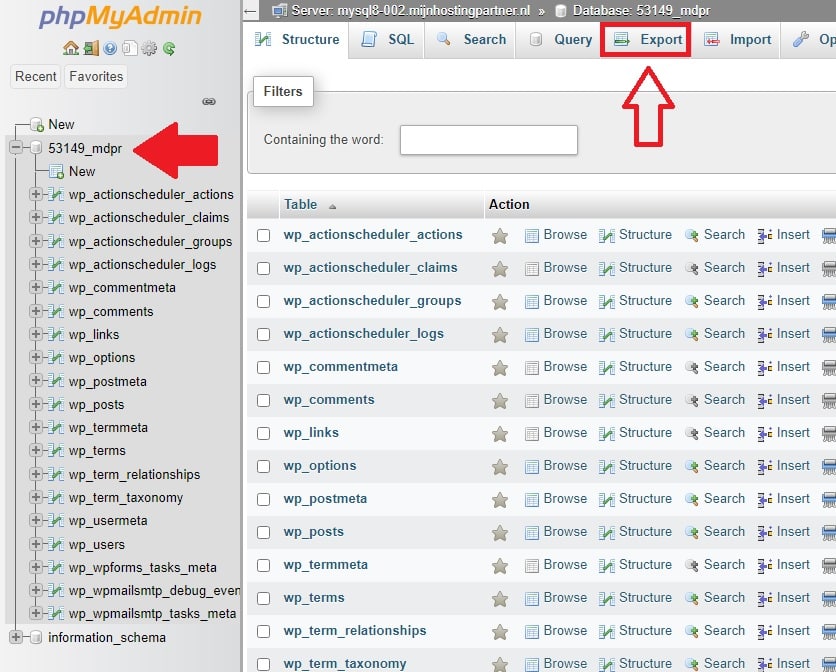
You can do this with the default settings, and once you click export it will download right away.
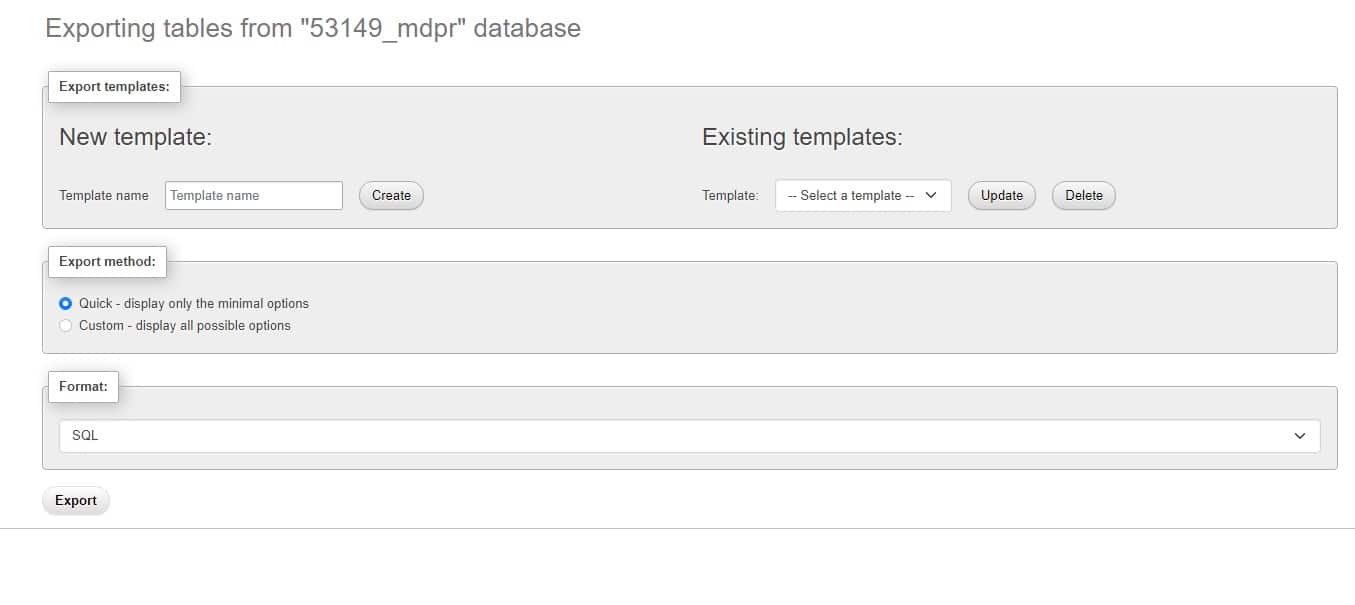
On your local computer you can then view the downloads, and you will see two files here if you did everything right:

These are your files that make a full backup of your website, and so you can restore your entire website with them in case of emergency.
To make this even neater, you can merge the .sql file into the zip. So that you have the entire backup in 1 file. This can be done simply by dragging and dropping it. Then he is added.
You can then upload this zip file to a service such as Google Drive, Microsoft OneDrive, DropBox, or your preferred file service. This way you have the backup in three places.
MS SQL backup
If you want to backup your MS SQL database, you can easily do this through the control panel. You do this by navigating to the database, and going to the Maintenance Tools option in the menu.
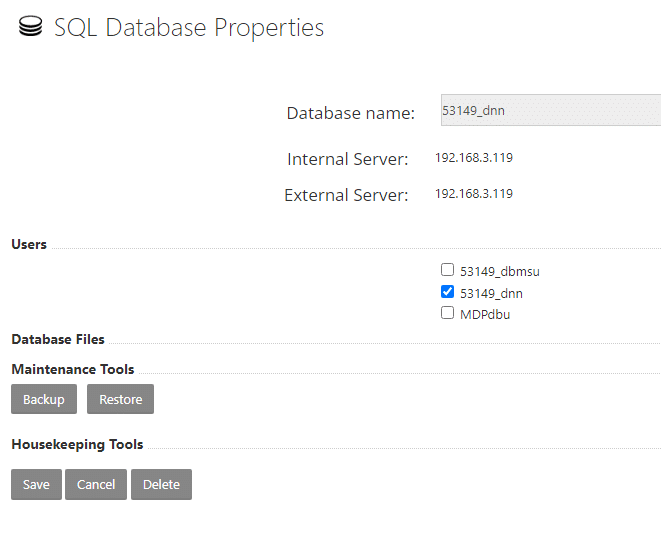
With the Backup option, you can then download it to your local computer for a while:
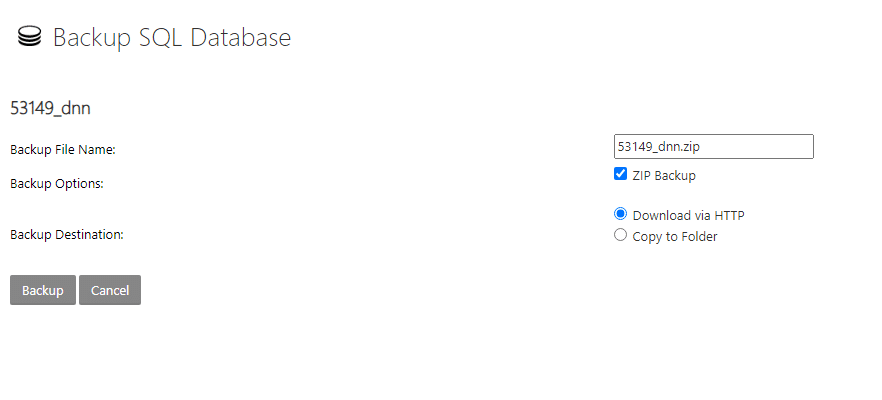
It can be zipped briefly, but this is not necessary.
These are all the steps you need to do a full website backup.